Pages

Thursday, April 30, 2015

Dressing Up! (Anne Harada, Former Guest Designer)


Dressing Up!
by Anne Harada, Former Guest Designer


I love dies that make "shaped" cards!  I try to get my hands on as many of them as I can just because they're unique and a great surprise for the recipients!

These two dress-shaped cards were made with Frantic Stamper's "Kitchen Dress A2 Card Maker” die set and Graphic 45's Home Sweet Home collection.  The 3-piece die set is extra fun to use because it comes with a die piece that makes lots of different little embellishments that you can add to your dresses!  Just choose paper patterns for your dress pieces and the embellishments and start playing!


I designed the red dress like a kitchen apron dress by adding some "ties" to each side of the apron piece and tucked in the little rolling pin and wooden spoon images into the pocket (similar to the sample on the die packaging).  I doodled in some stitch lines around some of the pieces and added a couple of tiny yellow buttons.


For the blue dress, I went with more of a child's springtime-dress design, with some lacy ruffles under the collar and on the sleeves and a couple of little country buttons as embellishments. What a fun way to use some of your favorite designer papers and small scraps!


Happy Crafting!


*** Materials for this project available at www.franticstamper.com.
 
FRA-Die-09223


Wednesday, April 29, 2015

A Cup of Thanks! (America Kuhn)


A Cup of Thanks!
by America Kuhn


Hello again FS Fans! I've got a fun Tea themed Thank You card to share that was inspired by some fun photos of Blue and Pink tea sets found on Pinterest.  I started with this pretty vintage style background paper that directed the layout for showcasing this beautiful FS Tea set. I created dimension by layering Pot and Cups with multiple cuts in blue, white and pink textured CS. Also topped the teapot cover with a half-pearl for added interest. The entire set is sitting above a quilted cut panel and frilly Fronds to make the set really stand out from busy background. Turned out quite girly. Don't you think so? Hope you will give these super adorable Tea Set dies a try! :)


*** Materials for this project available at www.franticstamper.com.
 
FRA-Die-09338


Saturday, April 25, 2015

Merry Christmas (Lynn Mangan, Guest Designer)


Another month has passed and we are again back on the 25th with a Christmas card for you. Enjoy!


Merry Christmas
by Lynn


Hi there!  I'm very happy to be stopping by with another post as a guest designer at Frantic Stamper. You'll see pretty quickly that I'm a clean and simple girl at heart keeping my designs pretty clean with not a whole lot of layers.  I have a goal to make 15 Christmas cards a month but am very far behind!  So, I thought I'd take care of one of my design team posts with a Christmas card!  I die cut the sentiment from gold paper and adhered it to the black cardstock. I was a bit off center so I added a touch of patterned paper down the edge to ground the sentiment.  I find that adding a touch of striped, polka dot or chevron paper gives a little extra to a CAS design. To finish off the card I added a few sequins. Certainly wanted this fabulous sentiment to do the talking on this card!


*** Materials for this project available at www.franticstamper.com.
 
FRA-Die-09249


Thursday, April 23, 2015

Getting the Most from One Die Cut (Jen Carter)


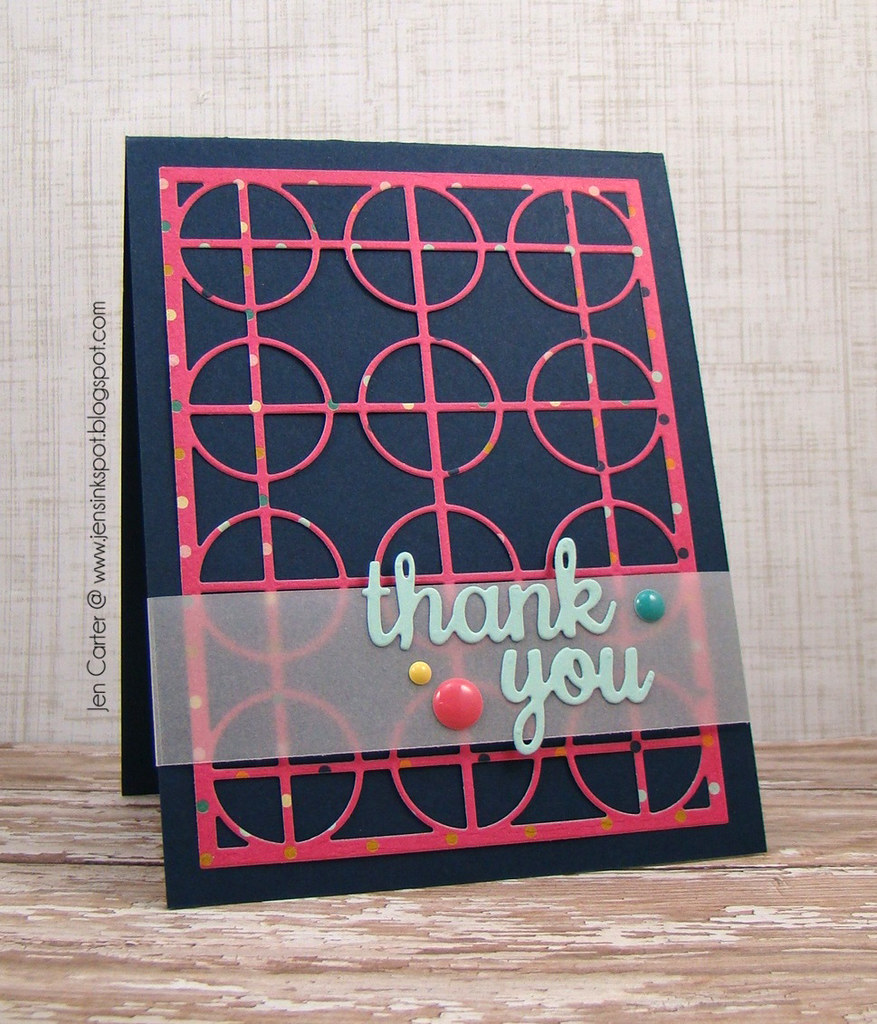
Jen Carter Frantic Stamper Circle Thank You


Getting the Most from One Die Cut
by Jen Carter


Hey everyone!  Today I wanted to share two cards that look totally different I made using the same die.  To make both cards I started by die cutting one piece of patterned paper (Flutter by Fancy Pants) with the Frantic Stamper Circle Cross Card Panel die.  I then used this one die cut to create several cards, two of which I'm sharing today and another one that I'll share at a later time.


For this first card I used the card panel that was made after die cutting.  This card is super simple and quick to put together!  All I did was add some adhesive to the back and glued it on to my card base.

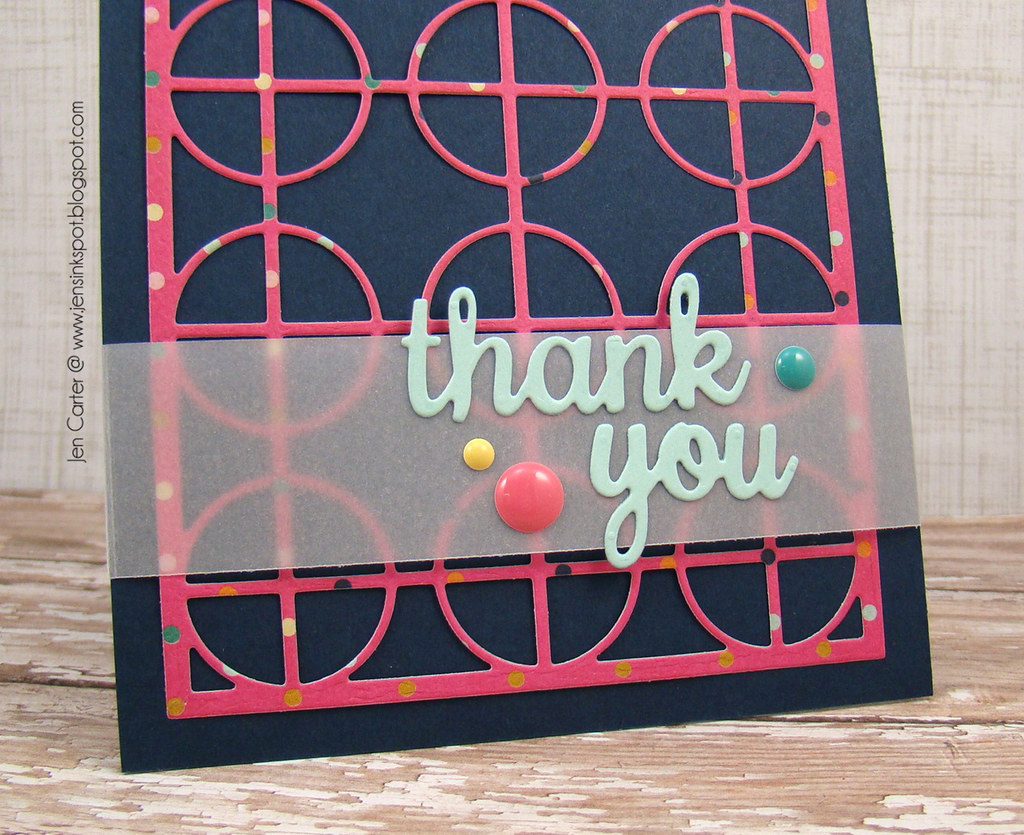
Jen Carter Frantic Stamper Circle Thank You Closeup

Next I took some vellum and wrapped it around the bottom of the card.  Here's a tip:  if you aren't sure how to adhere vellum so that the adhesive doesn't show, try wrapping it around something and then adhering it on the back side!  After the vellum was adhered I added the 'thank you" from the Accessory Words #3 die set and a few enamel dots.  Easy peasy!


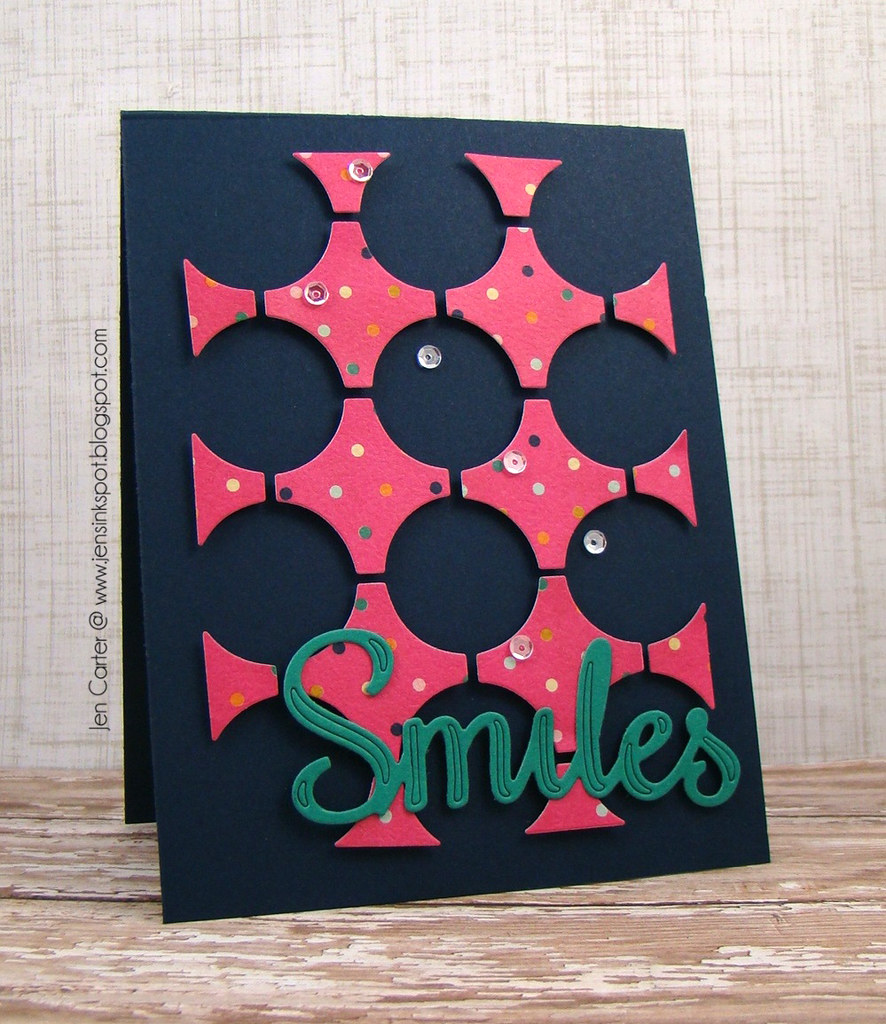
Jen Carter Frantic Stamper Circle Smiles

For this next card I used the large negative pieces that were left over after cutting the card panel.  I'm still filling up a card front using just that one die cut that I cut for the card above!  I used a cut Circle Cross Card Panel as my guide as to where to place these negative images, that I popped up with dimensionals, and then after they were where I wanted them gently lifted off the card panel piece.  

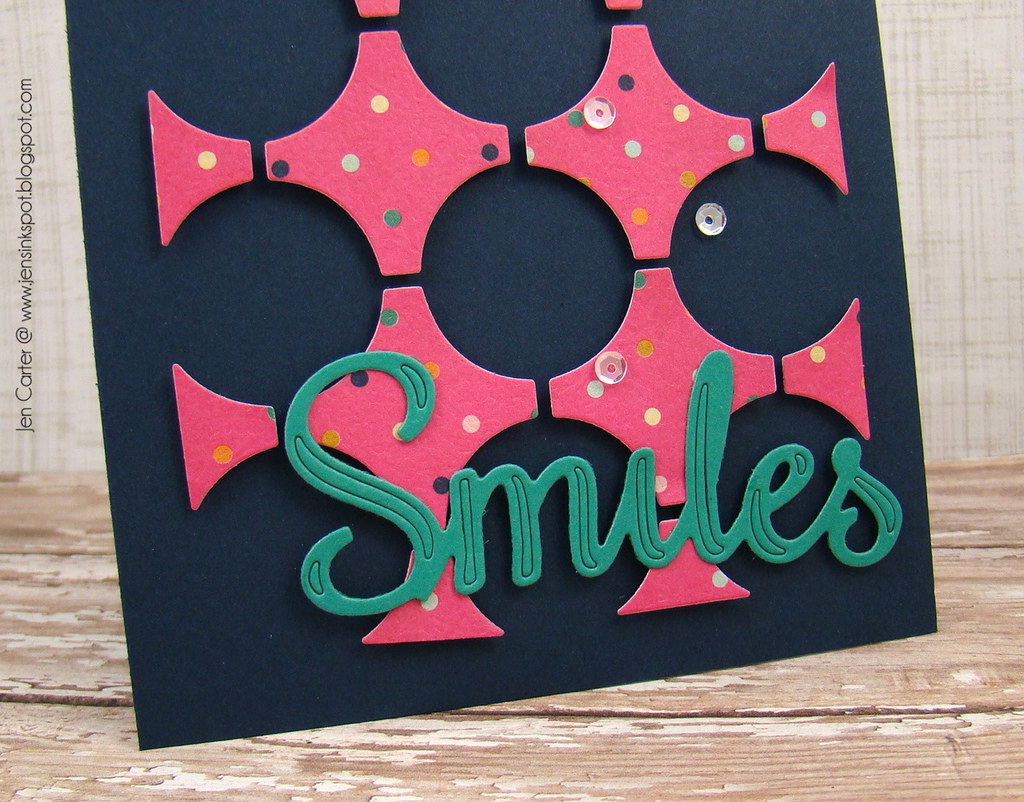
Jen Carter Frantic Stamper Circle Smiles Closeup

I added the Smiles word die cut to the top of the pieces and then added a few clear sequins to finish the card off.  Again, another easy card!

Thanks for stopping by!

*** Materials for this project available at www.franticstamper.com.
 
FRA-Die-09378
 
FRA-Die-09364
 
FRA-Die-09357


Sunday, April 19, 2015

Greetings -Groetjes (Elly DeBruin, Special Contributor)


Greetings-Groetjes
by Elly DeBruin, Special Contributor.


Today we have another lovely card from Elly DeBruin to share with you. Elly used the Spring Ivy, Elegant Vine and Small Solid Paper Bow when making this gorgeous greeting.

You can see more about this card at Elly's blog. Be sure t o leave her a comment and let her know you enjoyed her card, either here or on her blog!


*** Materials for this project available at www.franticstamper.com.
 
FRA-Die-09451
 
FRA-Die-09450
 
FRA-Die-09238

Saturday, April 18, 2015

Happy Birthday (Jeni Allen, Guest Designer)


Happy Birthday
by Jeni Allen, Guest Designer


Hey there!! I am happy to be sharing this fun birthday card with you all today!! I started out by using a scrap piece of cardstock and ran it through my Big Shot with the Triangle Card Panel die, and then used that piece of cardstock as a stencil. I got some ink and my ink blending tool and made sure to get all the triangle shaded with green ink. Then when I took the cardstock stencil off, I had this great green on green card front--love!!!

I cut out a turquoise Dragon Fly from the Dragon Fly pair die. I simply attached it to the card front.  Then I cut out my Happy Birthday Script die with white cardstock, while leaving the dies in the negative space so I could add my desired colors of ink w/o worrying about bending the die or ripping it at all. After I had used my blending tool and inks to get my desired shading, I adhered them to the card front. I put the card front onto a turquoise card, and then for the final touch added a nice thick coat of glossy accents! Once dry, the sentiment is super shiny and has some great dimension!!


*** Materials for this project available at www.franticstamper.com.
 
FRA-Die-09452
 
FRA-Die-09267
 
FRA-Die-09355

Friday, April 17, 2015

Frantic Stamper Newsletter - Friday inspiration using dies +new products!


Summer sale

Friday Inspiration
Using Frantic Stamper Precision Dies

It's Friday!!

I would like to share some beautiful cards made by our design team featuring our recent releases of Frantic Stamper Precision Dies.


We can't wait to see your creations with these new dies and stamps!
Be sure to look at our facebook page for more card samples from our Design Team.


*********NEW PRODUCT ARRIVALS*******

Speaking of dies.....  have you seen the latest additions to our store?   Our new products page always shows you all the fantastic new items in stock.  This week, we received new dies from Tattered Lace, Taylored Expressions, Memory Box and Poppystamps:
   

It's not just dies though... . we also have new solid color Pion cardstock, new collections from Echo Park and Heartfelt Creations, new Relics & Artifacts plaster casts from Prima, and more.

Coming up this weekend will be new dies from Joy Crafts and Marianne Designs, plastic stencils from a new vendor:  Stencils 1, and more!

We'd love to see your creations made with our dies too!


Hugs,
-Fran


Frantic Stamper 1-541-826-2500
644 W. Dutton Road, Eagle Point, OR. 97524


Like us on Facebook


Tuesday, April 14, 2015

Thinking of You (Rachelle Green)


Thinking of You
by Rachelle Green


I am having a ton of fun using the Frantic Stamper panel dies. If you are ever in a hurry but still want a fabulous card, start out with one of the Frantic Stamper panel dies. I started this card with a 4 1/4" x 5 1/2" card base. Next I chose the Bamboo Card Panel die. Using a 1 1/2" circle punch I used glitter paper to simulate a "sun." I stamped the sentiment onto a die from my most favorite die set ever...Elementals #1.


The digital is image colored with Copic Markers is from Saturated Canary.


*** Materials for this project available at www.franticstamper.com.
 
FRA-Die-09330
 
FRA-Die-09306


Monday, April 13, 2015

Lilac Flowers (Pam Sims, Special Contributor)


Lilac Flowers
by Pam Sims, Special Contributor

Pam has again created an amazing piece of art with Frantic Stamper dies. She used Frantic Stamper Mix 'n Match Lilac flowers and leaves, Frantic Stamper Elegant Vine , as well as Frantic Stamper Elementals #7-Coved Labels to create this stunning card.

To see another view of this lovely card, visit Pam's blog post. Be sure to leave her a comment!


*** Materials for this project available at www.franticstamper.com.
 
FRA-Die-09426
 
FRA-Die-09450
 
FRA-Die-09373

Sunday, April 05, 2015

And the winner is....


And the winner is....


Kristie Goulet

She was chosen randomly from all the entries in our contest. Using Random.org we randomly selected which pool was to be used for our selection from all the possible entries, using the numbers corresponding to the ways to enter.

1) Comment on this blog post
2) Become a follower of the Frantic Stamper Facebook page
3) Like the Giveaway announcement post
4) Share the Giveaway post on your FB page
5) Comment on the Giveaway post with your favorite die from the Frantic Stamper Precision Die line
6) tag your friends (no limit)
7) Subscribe to the Frantic Stamper Newsletter (if you already subscribe, let us know that too!)

The random number selected was 5, so we chose from the comments on the giveaway post.

The random number selected for the comments was 48. That led us to Kristie.

I have contacted Kristie to tell her of her win. Please join me in congratulating her on her victory!