Saturday, November 20, 2010

Teachers “Thank You” Treat Box

by Sharon Jeffs


Teachers “Thank You” Treat Box

Materials

  • Paper and Cardstock
    • Bazzill Card, Pomegranate     ( BAZ-2-227   $0.59)
    • My Minds Eye Patterned Paper, Candy Canes     ( MME-P-HJ1001   $0.99)
  • Inks and Embossing Powders
    • Versacolor Inkpad, Pinecone     ( TSU-VC-171   $2.09)
    • Tim Holtz Distress Ink reinker, Fired Brick     ( RAN-DR-Brick   $4.00)
  • Embellishments
    • Hambly Arts Rubons, Black Elegant Frames     ( HAM-RO-136   $5.29)
    • May Arts Grosgrain Ribbon, Red/White stripe     ( MA-336-14   $0.59/yard)
    • Petaloo Bristol Black Box, All White     ( PET-1450-000   $5.79)
    • Basic Grey Chipboard, Cappella     ( BG-CH-2422   $6.99)
    • Ranger Stickles, Crystal     ( RAN-St-cryst   $1.99)

Instructions

  • Using the red Bazzill, cut a rectangle that measures 6 inches by 12 inches and another that measures 1 ½ inches by 4 ½ inches.
    The larger piece will be your main part of the card.


  • Score the main section at 3 ½ inches from the left edge, then ½ inch from this; repeat till the end.
    You should end up with three sections that are 3 ½ inches wide and three sections that are ½ inch wide.
    Fold along each score then cut a wedge off of the far right side, cutting across the end ½ inch piece, the 3 ½ inch section and the next ½ inch section.
    See Template.


  • Score the smaller rectangle ½ inch in on all four sides then cut out the small squares at either corner to create the base.


  • Adhere this base to the base of the card, attaching the tab sides to the inside of card sides to create a box bottom.


  • Cut the following size pieces from the patterned paper (I used the green side predominantly).
    • 4 pieces measuring 5 ¾ inches by 3 ¼ inches
    • 2 pieces measuring 5 ¾ inches by 1/8 inch


  • Ink the edges of each piece with the Pinecone ink pad and adhere to the box card.

    NOTE: You will notice that one of the larger pieces needs to be cut diagonally.
    I found that by laying it over where it should go and marking to allow for the red border, I could the cut and the leftover covered the back section beautifully.

    I then added a torn strip of the opposite side to the inside for added embellishment.

  • Find the centre of the spine of the card and cut a ¼ inch slice along either side of the patterned paper.
    Thread the ribbon through both slots to hold in place for closure.


  • I chose to change the appearance of my flower so you could either skip this step if you prefer the white flower or continue on.
    Begin by spritzing the flower until it is wet.


  • Place a drop of the Fired Brick ink onto a plate and dab your brush into it slightly.
    Gently tap the brush tip onto the petal tips of the flower and allow some of the colour to soak and blend.
    I found that if you used plenty of water to wet the flower then the water actually blend the ink for you.


  • Hold the flower gently from the back and dry off with a hair dryer or heat embossing gun.
    You can leave it to dry naturally but I found that it takes forever and the petals seem to raise up and curl more when you apply the heat for a quick dry.


  • Apply the large oval frame rub-on to the front of your card, layer one of the chipboard flourishes over this and finally the flower.

  • Finish the flower off by adding a thin layer of the Stickles to the stamen and petals.


Here’s what the card looks like when open and filled with a treat for the teacher:


Thursday, November 18, 2010

We Grow by Our Dreams

by Anne Harada


We Grow by Our Dreams

Materials

  • Paper and Cardstock
    • Bazzill Places We Love Cardstock, Pennsylvania Dutch Collection     (Erie, Hershey and Battenberg BB-PWL-Penn   $11.99)
    • Webster’s Pages Garden Gala     ( WEB-6x6-WPK17   $6.99)
  • Stamps
  • Inks and Embossing Powders
  • Embellishments

Instructions

  • Fold a 4-5/8”x8-3/4” a piece of Battenberg-colored cardstock in half to create a square card base. 


  • Layer a square 4-1/8” Hershey cardstock panel onto one side of base.
    Layer a square 3-7/8” Erie cardstock panel onto the Hershey panel.

  • Cut a square 3-3/4” piece of Webster’s Pages Garden Gala designer paper with the “We Grow By our Dreams” and the “Teach Embrace” wording showing.
    Sponge the edges with Colorbox Chalk Ink in Dark Brown.

  • Tear a hole in the upper right quadrant of the designer paper.


  • Roll back the edges to enlarge the hole.
    Attach the designer paper to the card layers.


  • Stamp the Morphic Bird image using Colorbox Pigment inks.
    Cut the image out and lightly sponge the edges with Colorbox Chalk Ink in Dark Brown.
    Make sure the ink is completely dry before proceeding with the next step.


  • Color over the bird in the image using a Versamark Pen.


  • Sprinkle hologram embossing powder over the inked image.
    Use heat gun to emboss.


  • Add purple and yellow gems to the bird image.

  • Position the bird image into the torn hole of the designer paper so it looks like it’s bursting through.
    Adhere with dimensional tape.


Tuesday, November 16, 2010

New Puppy Card

by Kris Hankins


New Puppy Card

A friend recently added a new member to their family… a cute, sweet and energetic puppy. This is the congratulatory card I sent to them.

Materials

  • Paper and Cardstock
  • Stamps
    • Sentiment Stamp of Choice
  • Inks and Embossing Powders
  • Embellishments
    • 1/2" blank cotton twill ribbon     ( TWILL-1/2   $0.50/yard)
    • Thin Twine, Natural     ( CR-Twine-Nat   $0.20/yard), about 8”
    • Paw Buttons or Max & Whiskers Buttons/Brads     ( your choice ,   $3.99 - $5.99)
  • Adhesives

Instructions

  • Make a 4 1/2” x 6” card base from the Bazzill Hershey cardstock.

  • Cut a piece of Max & Whiskers Gannett paper about 1/8” smaller than the card base. Set aside.

  • Cut a favorite pet image from the Max & Whiskers Dakota paper.

  • Mat this image onto a layer of Max & Whiskers Gretchen paper (about 1/2” showing all the way around).

  • Add a narrow mat layer of Bazzill Hershey cardstock.

  • Stamp sentiment onto twill using Denim Adirondack ink.

  • Wrap the thin twine around the twill several times at side of sentiment.
    Tie off with a knot.

  • Attach the twill to the piece of Gannett paper that you cut earlier.
    Wrap ends of twill around to the back.
    Attach this piece to the front of the brown card base.

  • Add the pet image layers to front of card with 3D adhesive squares.

  • Embellish the twill with “paw” buttons or any of the coordinating Max & Whiskers Gummies or Brads.

Sunday, November 14, 2010

Sun Card

by Lis Whiting


Sun

Materials

  • Paper and Cardstock
    • Manila Cardstock – 8 ½ x 5 ½
    • Bazzill Basics Monochromatic 5-color packs
      • Browns, Walnut     ( BB-MC-BRN   $11.99), cut to 5 1/4" x 2 1/8"
      • Yellows, Lemonade     ( BB-MC-YEL   $11.99), cut to 5 1/4" x 4"
      • Greens, Aloe Vera     ( BB-MC-GRN   $11.99), cut to 5 1/4" x 2"
    • Best Creation Sunbeam Glitter Cardstock     ( BC-P-GL037   $2.59) about 2" x 3"
    • Vintage Reminisce. Stonehenge     (     ( COR-Pk-VRemin   $10.99)
      (I used Chocolate Box by Core-dinations, but it is not currently available)
  • Inks and Embossing Powders
  • Embellishments
    • Tim Holtz Tissue Tape, Symphony     ( ADV-TH-92829   $9.99)
    • Prima, Say it In Crystals, Large clear Swirls     ( PRI-CRY-522766   $7.99)
    • Prima Flowers, Essentials 8 Strawberry Kisses Patterned, Large     ( PRI-ESS-539771   $5.99)
    • American Brads, Medium, Neutral,Brown     ( AMC-BR-neutral   $3.49)
    • Basic Grey Cappella Micro Mini Alphabet     ( BG-S-CAP-2414   $1.59)
    • Wilton Cake Decoration Gold Leaves
  • Tools

Instructions


  • Fold your manila cardstock in half making a card base (5 1/2" x 4 1/4").
    Card will open on the bottom.
    Set aside.

  • Run the core-dinations through the cuttlebug using Script.
    Sand the raised parts to show the inner core of the cardstock.


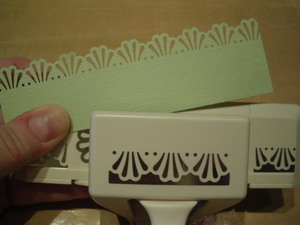
  • Punch a border on one of the long sides of the green cardstock.


  • Attach the green cardstock to the back of the embossed brown.
    You want just the punched border to show.

  • Attach brown and green to the yellow cardstock.


  • Add tissue tape from the edge of the brown.


  • Using an ink blender, blend color along all edges of the card so far with frayed burlap ink.


  • Punch out two photo corners from yellow glitter cardstock.
    Add the two photo corners to the bottom of your card.

  • Mount all of this to your card base.


  • Take out your Say it in Crystals and cut off a few curls for your card.
    Attach them.


  • Take a large green flower and a smaller light pink or lavender flower and attach them together with a brown brad.


    (flower is not attached to card yet)

  • Place a square of mounting tape on the back of your flowers.

  • Add the gold leaves to flower. Use the mounting tape to secure them.

  • Mount the flower in the middle of your crystals with mounting tape.


  • To make your tags:
    • Punch out three of the smallest tags from walnut Bazzill.

    • Add your letters, one to each tag.

    • Use your ink blending tool to add frayed burlap around the edges of each tag.


      (This pic shows two tags edged and one not edged so that you can see the difference)

    • Rub lightly your ink blending tool across each letter to add just a touch of color.

  • Mount your tags to the card with mounting tape


  • Place two small and one larger crystals on the top of the brad.
    (Makes it look a little like an antique button!)
I was serving jury duty when I took out my paper and started sketching some ideas for a book I’m doing. I thought about this card and came home and made it! Just shows that jury duty isn’t all that bad!

Saturday, November 13, 2010

Happy Birthday

by Debi Wind


Happy Birthday

Materials

Instructions

  • Cut Sea Glass cardstock to the size of 5 1/2"X8 1/2", score it and fold in half.
    Cut Grape Slush cardstock to the size of 4 1/8"X5 3/8" and Stripes pattern paper to the size of 4"X5 1/4" and adhere to card.

  • Cut one piece of Apple Crush cardstock to the size of 1 3/4"X4 1/8".
    Cut one piece of Plumes pattern paper to the size of 1 5/8"X4"; layer onto Apple Crush cardstock and adhere to card.

  • Stamp image in Warm Violet ink onto Vanilla cardstock, trim, and layer onto Apple Crush, Grape Slush, and Sea Glass cardstock.

  • Cut two pieces of Sea Glass cardstock 1 1/2"X1 1/2".
    Cut one piece Parade pattern paper and one piece Feathers pattern paper to the size of 1 3/8"X1 3/8", layer both onto Sea Glass cardstock and adhere to card.

  • Adhere main image to card.
    Finish card by adding Glossy Accents to balloon.

Friday, November 12, 2010

Simple Sunflower

by Joanne Wardle


Simple Sunflower

Materials

Jet black archival Ink RAN-ARCP-jet
$5.49 http://www.franticstamper.com/archival.htm distress ink Mustard SeedRAN-DP-Must
$5.00 http://www.franticstamper.com/distress.htm Stamps:
  • Paper and Cardstock
    • folded white card 3.5” x 5”
  • Stamps
    • Frantic Stamper Shadow Square     ( 6406-I   $3.00)
    • Frantic Stamper Sunflower     ( 148-06-I   $3.00)
  • Inks and Embossing Powders
  • Embellishments
  • Tools
  • Adhesives

Instructions

  • Stamp sunflower in black ink.

  • Overstamp with shadow square inked with mustard seed ink.

Wednesday, November 10, 2010

It's the little things

by Polinka


It's the little things

Materials

  • Paper and Cardstock
  • Stamps
    • Frantic Stamper, Med. Balloon stamp     ( 116-03-I   $3.00)
  • Inks and Embossing Powders
    • Ranger Archival Ink, Jet Black     ( RAN-ARCP-jet   $5.49)
    • Ranger Alcohol Ink, Dockside Kit     (Watermelon, Citrus, Sailboat    RAN-Alc-kit-dock   $9.99)
  • Embellishments
    • 7 gypsies 97% complete Stickers     (for example, Quotes     7G-S-17332   $1.99)
    • Little Yellow Bicycle Clothesline Stickers, Favorite Pieces     ( LYB-S-CL135   $3.49)
  • Tools

Instructions

  • Doesn't this paper fit perfectly with the picture of my nephew Noah?


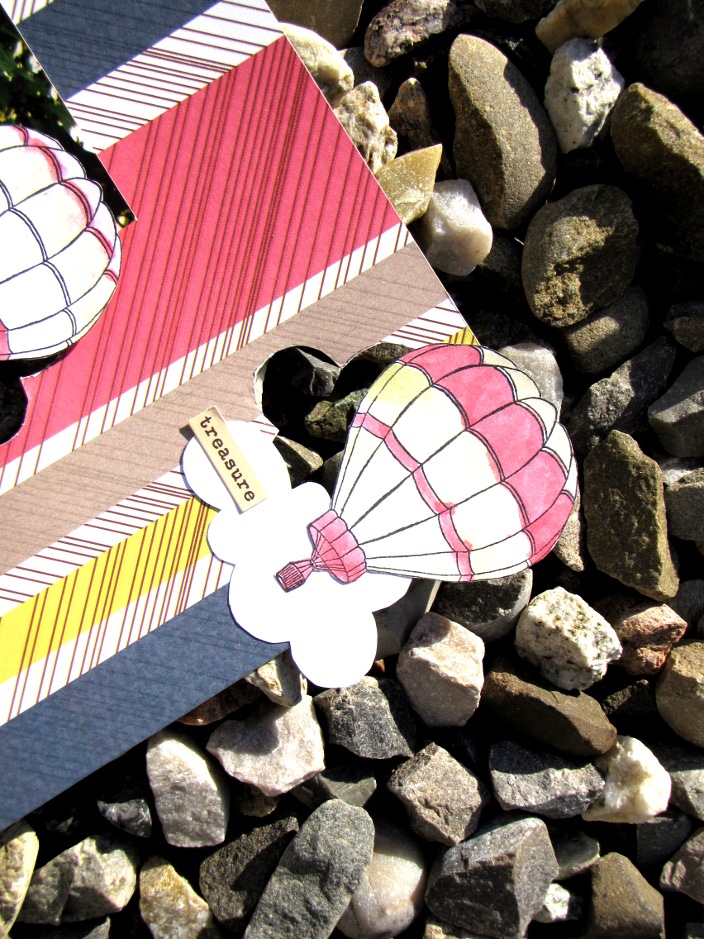
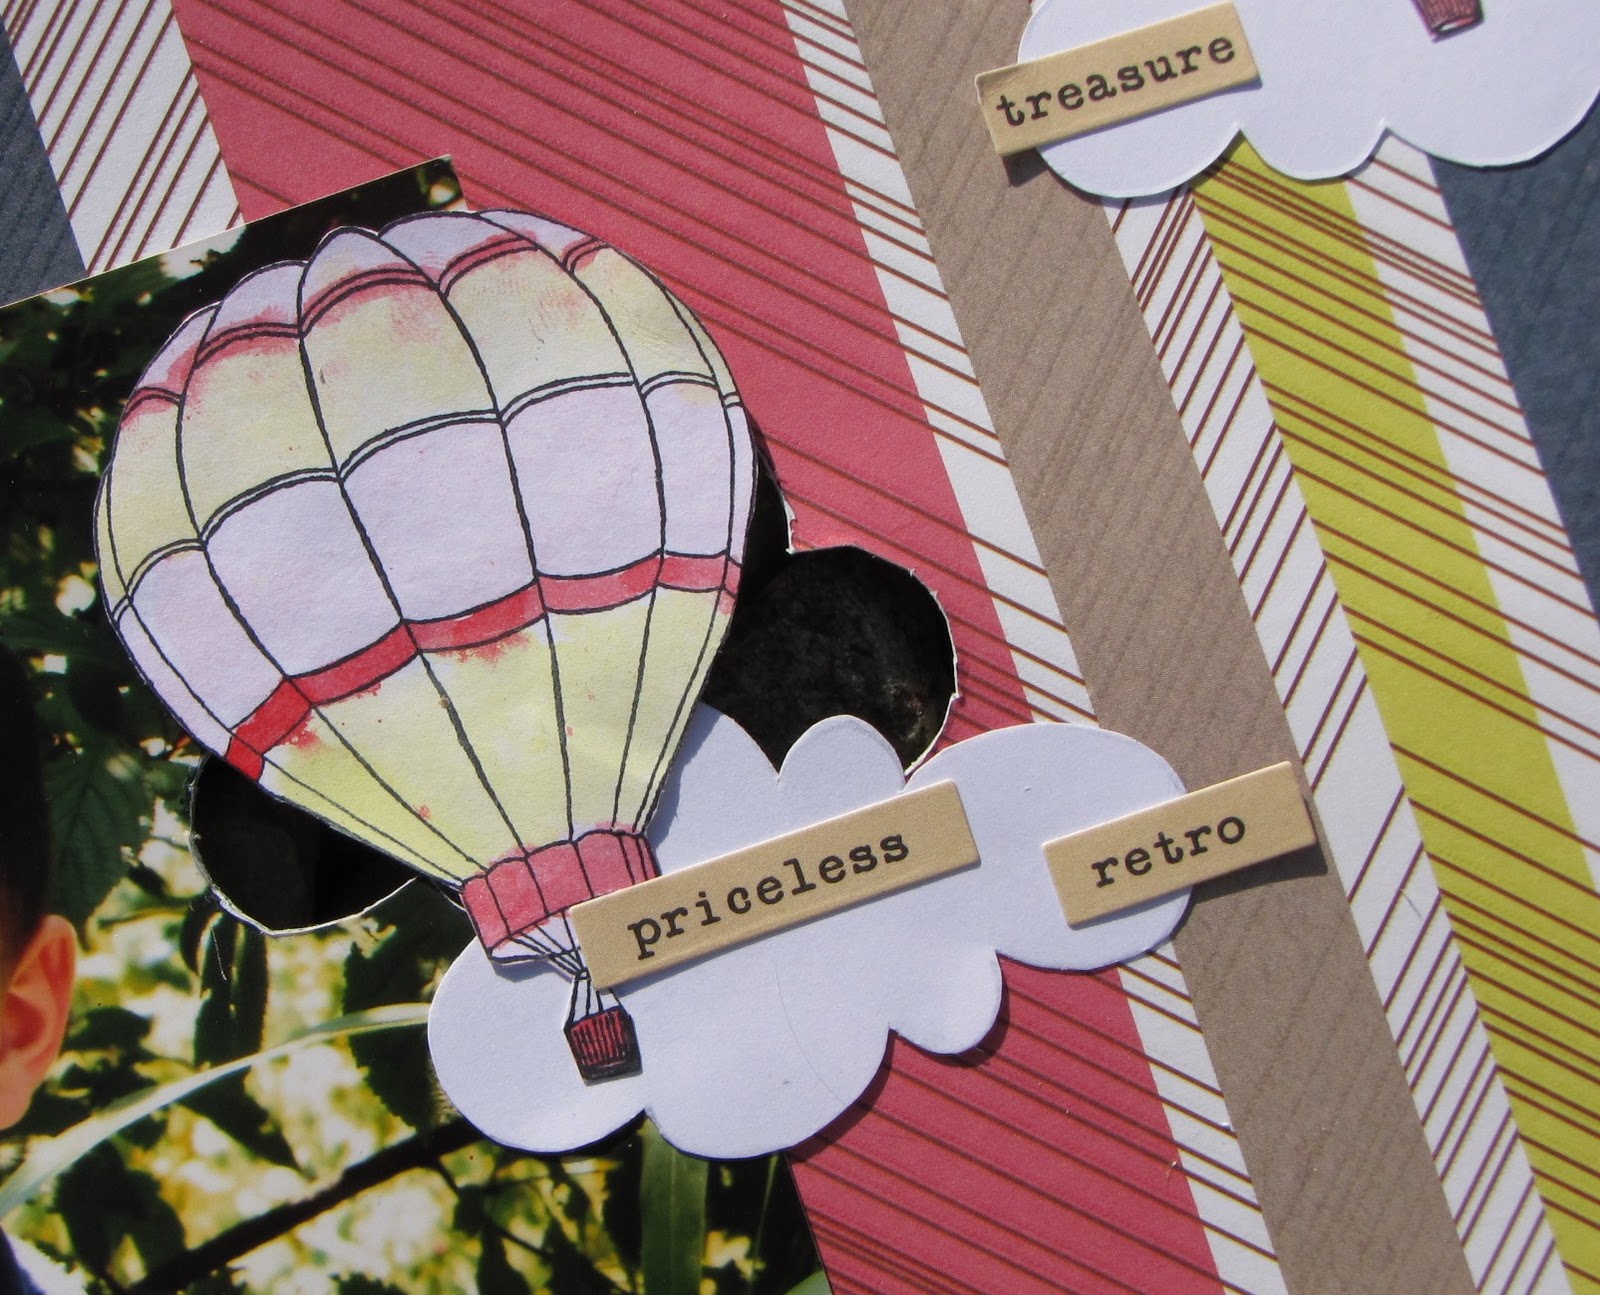
  • I adhered the picture and then drew and cut 3 clouds out of the background paper.


  • I cut 3 clouds in a white cardstock, too, and placed them near the cloud holes.

  • I stamped 3 cute hot air balloons on the white cardstock, and coloured them using alcohol ink diluated with water... I adhered these 3 balloons near the clouds, of course ;)


  • To finish I just added some journaling prompts from 7gyspies and little yellow bicycle...


Thanks for stopping by and I hope you enjoyed my project!


Have a lovely day,