Thursday, September 25, 2014

Two Design Team Announcements


I am pleased to make two Design Team announcements today. First, Jen Carter has agreed to stay on as a full-time Design Team member. Her Guest Designer stint was due to expire at the end of this month, so we are thrilled we won't be losing her!

I am also happy to announce that we have a new Guest Designer! Ann Greenspan has agreed to post with us through the first of the new year. You can see some of Ann's work at her blog, Ann Greenspan's Crafts.

Please give her a rousing welcome! But first, here is a little bit about Ann...in her own words.

Ann Marie Greenspan


I come from a very close family of 9, born in upstate New York near Lake George. My family is the driving force behind my getting into scrapbooking. I had a lot of photos that my father took of us when we were growing up, and I wanted to organize those photos into albums. But then I thought scrapbooks might be nicer so I made scrapbooks for each of my 6 brothers and sisters and all 13 of my nieces and nephews at the time.

When the scrapbooks were done, I got into making cards. I started off with just a few punches, then dies, then stamps. After my pre-school teaching days were over, I taught card making classes at various craft stores. Now I make cards that I can donate to local charities where I live in Maryland with my husband and two dogs.

My motto when making cards is to keep them simple yet elegant so others who see them will be able to recreate them easily themselves.

Saturday, September 20, 2014

Dangling Bones (Kathy Berger)


Dangling Bones
by Kathy Berger


I recently spent a couple of days with Fran at Hero Arts as guests of the wonderful owners. There we got to make cards designed and taught by some of the industry's best designers, including none other than Jennifer McGuire. One of the cards we made was a suspension card for Christmas (I will be sharing Jennifer's cards with you in a post after the first of October), and it sparked this idea for a Halloween card. Thank you Hero Arts for hosting this fabulous educational event, and Thank You, Fran, for taking me with you! I loved it and came home feeling inspired!

On to that inspiration...

First I die cut the hole in my card front and top layer (held together with a touch of washi) with a Spellbinders rectangle die. I set the card aside and worked on the front panel. I clear embossed it using the Frantic Stamper Cling Rubber Stamp, Fleur de Lys Background (FRA-CLG-4711), and then spritzed it with gold perfect pearls in water and set it aside to dry.

Next I cut two of my skeletons using the Frantic Stamper Precision Die, Dem Bones Skeleton (FRA-Die-09237) using heavy card-stock.
I glued the two sets of bones for the extremities together to give them more strength, then using a needle and thread, I pierced them and stitched them together with a single stitch per pair, and knotted the thread well. I put a small dot of glue on the knots in the thread to ensure they wouldn't come undone.

I put a piece of strong tape from top to bottom, centered on one of the torsos and placed a strong piece of thread on the tape. I then added glue to the rest of the torso and affixed the other torso to the first, sandwiching the thread between them. When finished, I stitched the arms and legs into place.

I used foam tape along the inside and outside edges of my top layer of the card and a small piece of the strong tape to attach my Dangling Bones by his central thread to the card panel, inside the diecut hole. I then attached the panel to the card front, taking care to align the holes.


A bow made with the Frantic Stamper Precision DIe, Large Swirl Paper Bow (FRA-Die-09243) and spritzed with the gold mist (Perfect Pearls in water) finished off the card front.

Next I masked off the inside of the card and HEAVILLY spritzed the right inside of the card with the gold mist. and let it dry (okay... I am impatient so I did help it along with my heat gun!)

The finishing touch on the inside of the card was a plain black saying cut with the Frantic Stamper Precision Die, Large Trick or Treat (FRA-Die-09235).


I hope you have enjoyed today's card. This one was a labor of love...and well worth the effort!


*** Materials for this project available at www.franticstamper.com.Frantic Stamper Products Used:

Thursday, September 18, 2014

Peace on Earth (Rachelle Green)


Peace on Earth
by Rachelle Green


Not only is this my version of a Clean & Simple card, it's also my first Christmas card of the year. This is a first for me because I'm always down to the wire when it comes to making Christmas cards. Maybe I'm starting a new tradition? We'll see.

As always when I receive my Frantic Stamper dies I'm like a kid on Christmas morning. I rip into the packaging and then the creative juice shift into overdrive. When I saw the Three Wise men Silhouette die I knew I wanted to try Clean & Simple. I knew I had stamps in my stash that would the die would be the perfect complement to.

Selecting the papers were now problem at all. I used a corner punch a couple of stamps and voila! It took a couple of tries to get the placement right and when doing Clean & Simple there is not much opportunity to to hide mistakes! I used the new "Peace" die cut in silver foil paper to be eye catching. As I was trying to keep embellishments of a minimum, I sprayed the entire card with a blast of glitter spritz.


I like the way it turned out so much I might use it as the cards I send out for the season. Finally, I'd like to say that as usual I am super impressed at the accuracy at when the Frantic Stamper dies cut. I have never had a bad cut as I have had with other dies. If you have not tried Frantic Stamper dies you are missing a treat. With the assortment continually growing you are sure to find something you'd like!


*** Materials for this project are available at www.franticstamper.com.Frantic Stamper Products Used:

Saturday, September 13, 2014

Ombre Glitter Card (Sharon Jeffs)


Ombre Glitter Card
by Sharon Jeffs


One of the things that I really look for when buying a die is whether or not it can be used for more than one type of project.  If I can't think of at least three ways I could use it then I won't get it.  The Fish Scales Card panel is a fantastic die with an infinite amount of different ways it can be used such as  the background for a mermaid or fish or dragon, multi-coloured inserts, layered over a print or used as a mask!

For my card I played around with different glitters to create an ombre effect that I really liked on a piece of blank card.  I used 'Glue and Seal' with distress Glitter and went layer by layer, making sure each layer was dry before adding the next one.

Once finished, I die cut the Fish Scales from a piece of black card and layered it over the ombre glitter panel.  This was super easy since this panel features a border around the die cut that is wide enough to add glue and stick the panel securely.

To finish off my card I die cut a Solid Paper bow from a scrap of metallic card stock then layered it over my panel to finish it off.

Originally I had planned to add a rhinestone to the centre of my bow but I kind of didn't think it was needed with so much glitz already on show!


*** Materials for this project are available at www.franticstamper.com.

Frantic Stamper Products Used:

Thursday, September 11, 2014

Simple Church in the Wildwood (Kathy Berger)


Simple Church in the Wildwood
by Kathy Berger


When designing this and some of the other panel dies I wanted to create something that would allow the person using it to create lovely detailed cards with very little effort...I wanted to let the dies do the work for you. That doesn't mean that you can't make a more complicated card, but I think that this card demonstrates that simple can be exquisite.

To make the card I used a Spellbinders die for the base. I had to cut it down and piece it to fit the 5"x7" card base, to which I had layered a 4 3/4"x 6 3/4" piece of amethyst cardstock. To make the focal piece I die cut the Frantic Stamper Winter Church in the Wildwood (FRA-Die-09285) twice, once out of white craft foam and again out of white card stock. I glued them together with Tombow Mono Adhesive, applied sparingly and spread out on the back of the card stock. I also use the Mono Adhesive to apply the piece to the card. All that was left to do was add the bow.

Using the craft foam makes popping this very detailed die cut off the background trivial! There is no need to struggle with piecing foam tape to try to support the die cut! No need to layer multiple die cuts to get depth. The die cuts the foam to perfectly match the card stock die cut. And the result is much more mail-friendly since there is nothing rigid! Just look at the depth the foam gives the image:


I hope you have enjoyed my card and my tip, and will give some of the detailed Frantic Stamper die panels a try!


Frantic Stamper Products Used:


Friday, August 29, 2014

"You Light Up My Life" (Rozy Smith)


"You Light Up My Life"
by Rozy


Start with 5x7 Cream Colored Card Base. Trim with Cream Colored Washi Tape.

Adhere 5x7 decorative frame cut from Daisy Paper. Cut smaller frame using Spellbinders Card Creator Reflective Moments using DCWV Pastel Green Foil. Type "You Light Up My Life" on white cardstock and cut out with smaller coordinating frame. Distress edges with color of choice.

Using Light Bulb Die with filament, cut out two from DCWV Pastel gold foil, cut out two using Light Copper metal. Layer the edge from the copper metal on the foil, adhere filament.

Decorate edge of decorative frame with Sprinkles Dots, use Sprinkles Arrows on the upper right and lower left. Adhere your sentiment, light bulbs and apply embellishments.

These light bulbs are so fun! Will be using them on more projects!


*** Materials for this project available at www.franticstamper.com.Frantic Stamper Products Used:

Thursday, August 28, 2014

Distressed Background Silhouette Card (Sharon Jeffs)


Distressed Background Silhouette Card
by Sharon Jeffs


I love, love, love art effects at the moment.  I really like that every time you use the same effect, you get a different look!  Its fantastic!
So, this time I decided to film exactly how I created my background effect for this card and then onwards to finishing the card so ... sit back and enjoy!


Distressed Background Silhouette Card from Sharon Jeffs on Vimeo.


Wednesday, August 27, 2014

Mother and Child (Kathy Berger)


Mother and Child
by Kathy Berger


When I was growing up my mom worked outside the home, putting in 40 or more hours every week doing various factory worker jobs. Mom was so incredibly busy and had little time left after the cooking and cleaning, the laundry and ironing, and all the extras she had to do to take care of me and my three brothers. But she always found time to make me and each of my siblings feel special and loved.

When I was drawing the image for this die (based on a paper-cutting pattern), and later when designing this card, I reflected on how much Mom lifted me up, emotionally and spiritually, as I was growing up. She was always there for me, and most of my success in life is due to her providing that boost whenever I needed it.

This card is dedicated to Mom, who turned 87 today.

To make the card I cut the Mother and Child panel out of red card-stock, light blue card-stock, and white craft foam. I glued the light blue panel to the craft foam panel using Tombow MonoAdhesive. I reserved ONLY the hearts cut out from the red panel, and pieced them into the heart holes in the blue panel. I then glued the whole panel to a piece of coordinating floral card stock, which, in turn, I layered onto a slightly darker blue card-stock panel. I then affixed it all to an embossed white panel (Anna Griffin), to another darker blue panel, and finally to a white 5"x7" card. I finished the card off with a bow made from 3/4" wide red grosgrain ribbon.


*** Materials for this project available at www.franticstamper.com.

Frantic Stamper Dies Used:

Tuesday, August 26, 2014

Stacking Animals (Jen Carter)


Stacking Animals
by Jen Carter


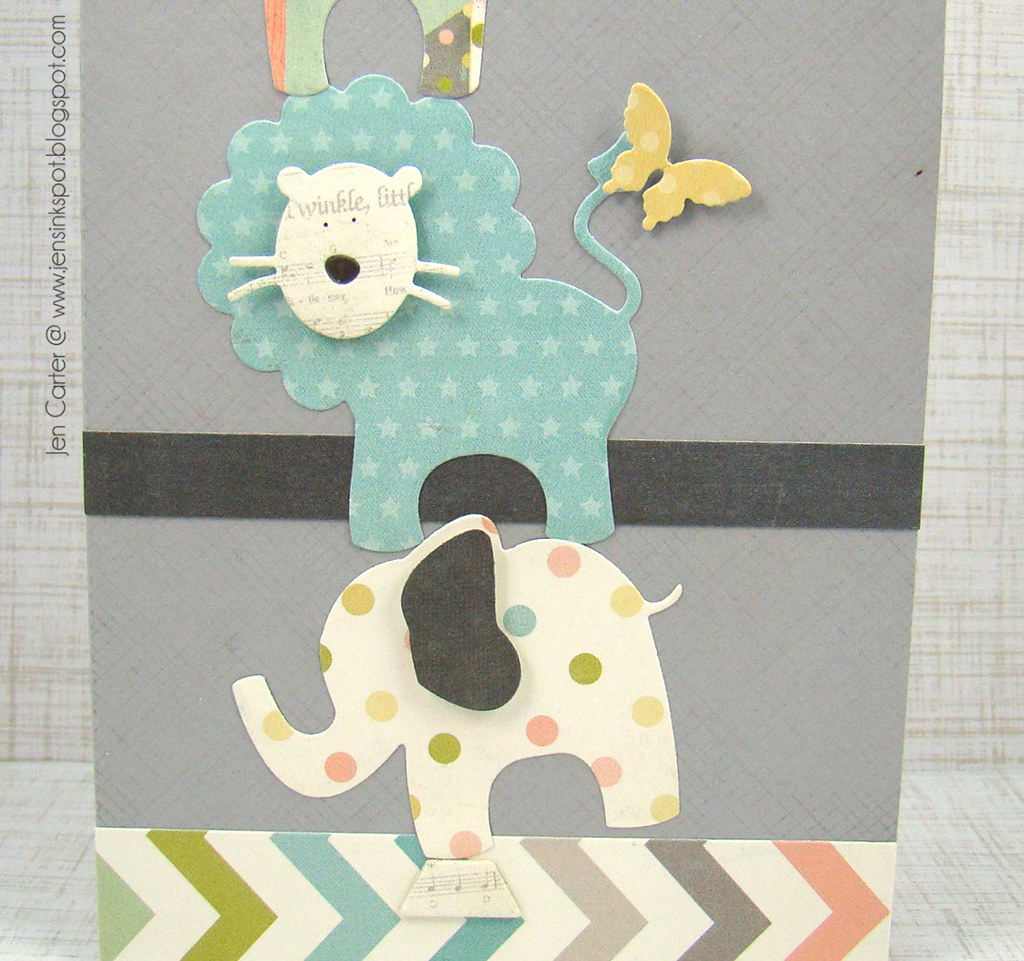
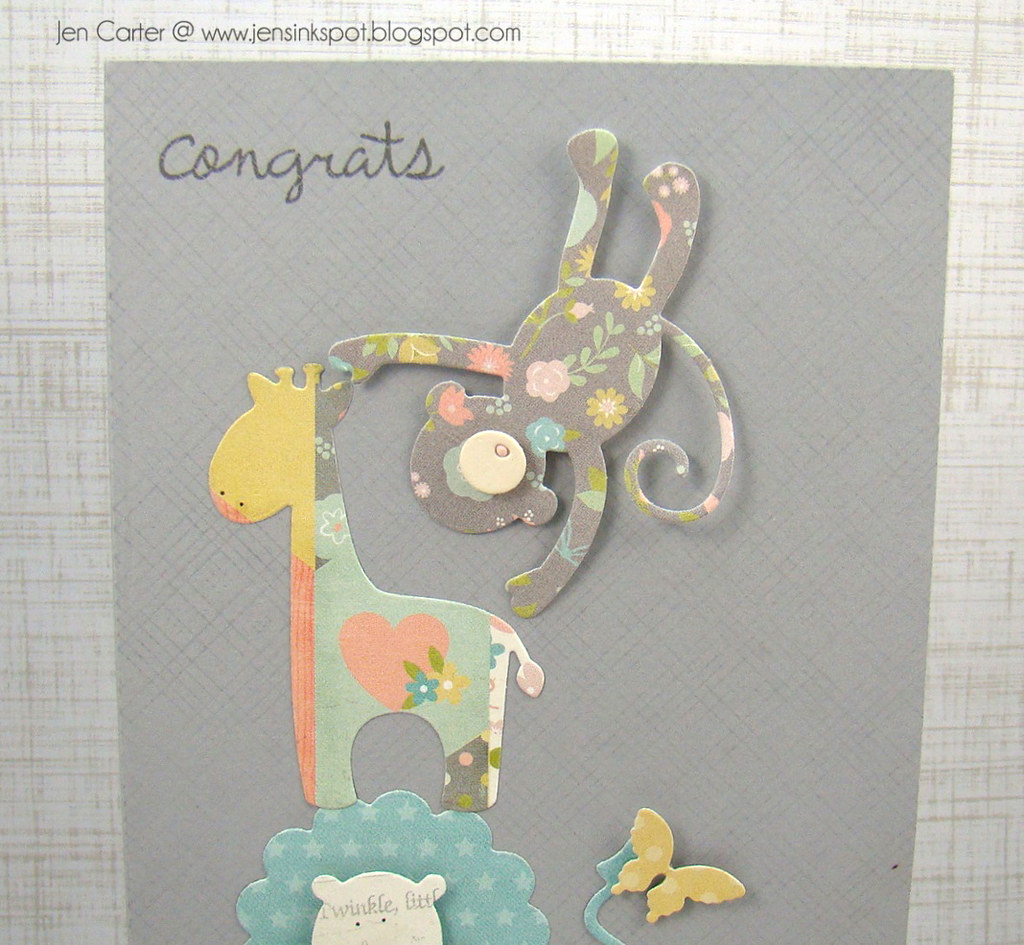
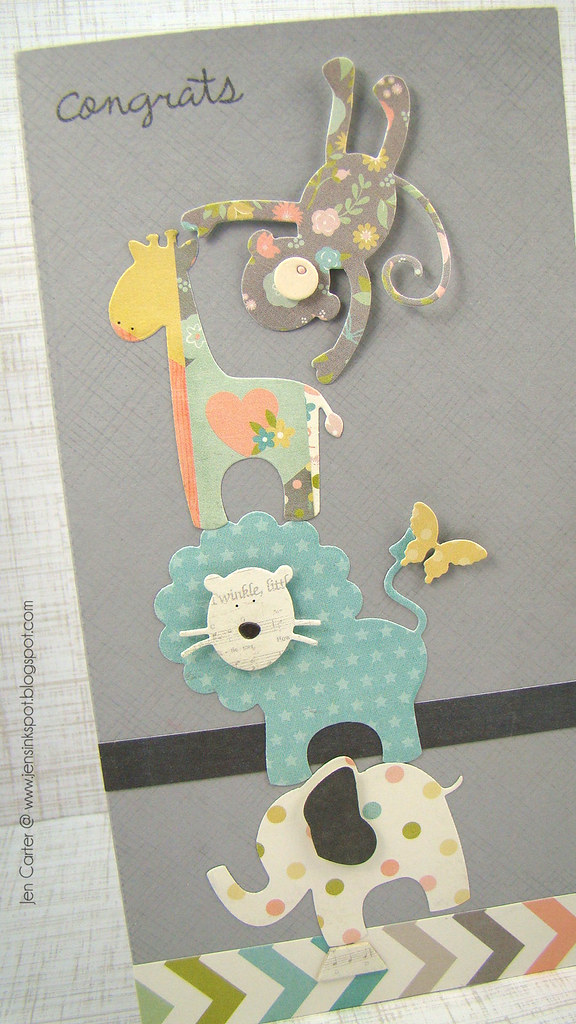
I adore (ADORE) these baby animal dies!  This is the first of several cards that I'll be sharing using these dies.  The first thing I thought of when I started playing with these were that they would be so cute stacked, which of course required a tall card.  This card measures 8 x 4, so I cut my card base 8 x 8 to accommodate the fold. I chose some cute patterned paper for my animals and went to stacking!


Baby Animals Congrats Closeup 1.3

Do you see the base that the elephant is balancing precariously on?  That is a die that is included in the die set and it worked perfectly to ground these animals.  I thought it would be cute to add a little butterfly from the Petite Butterflies die set on the lion's tail!  For the ear of the elephant and the face of the lion I used dimensionals to pop them up a little.  There are eyes for the lion that can be die cut too but this time I used a little black pen to add eyes.


Baby Animals Congrats Closeup 1.4


The monkey seemed like he needed to be clowning around so I put him upside down as if he were swinging around.  I think he is so adorable! To make him seem more 3D I adhered the top portion of him (head) directly to the card front and then I used dimensionals to pop up his bottom stomach and legs.  It added a fun dimension to the animals!


Baby Animals Congrats Closeup 1.1


This die set is so fun!! There are so many possibilities, so many themes that they can be used with!

Thanks for stopping by today!  I hope you enjoyed the card!


*** Materials for this project are available at www.franticstamper.com.
Frantic Stamper Products Used:

Wednesday, August 20, 2014

Wings of Paris Card (Sharon Jeffs)


Wings of Paris Card
by Sharon Jeffs


I absolutely adore creating distressed backgrounds and mixing different mediums together to get unique and different results.  I tend to cut a sheet of watercolour paper into smaller squares that I can experiment on and every once in awhile, I create something I adore!

This card began and an experiment.  I put a dollop of white, red and yellow acrylic paint onto a flat surface then rolled over it with a brayer.  I then brayered over a sheet of watercolour paper and spritzed it with water.  Once it was dry, I inked the edges and stamped one of my absolute favourite background stamps "Great Grandfathers Letter".

The butterfly is actually an imprint of the "Solid Butterfly" die that I carved to make my own matching stamp.  I stamped the butterfly using the same mix of paints that I'd created earlier with the brayer.

Finally I die cut an "Eiffel tower" from a scrap of card stock and covered with a layer of silver leafing and Distress ink (to tarnish and age the bright silver).


*** Materials for this project are available at www.franticstamper.com.

Frantic Stamper Products Used: