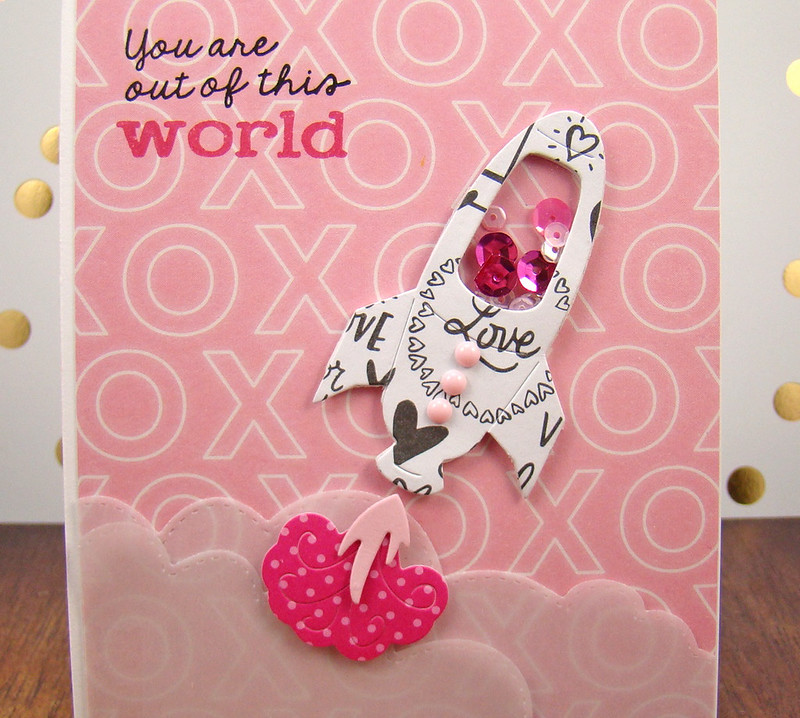
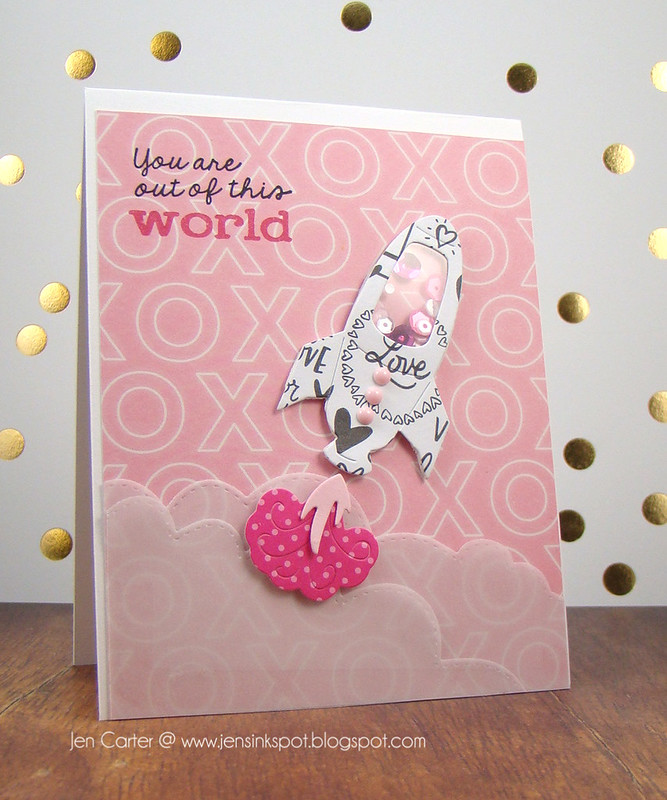
Hello! For today's card I wanted to show how you can use the new Rocket Launchdie set to make a shaker card!
I started by die cutting the rocket from the Rocket Launch die set from patterned paper. I really like how the rocket looks cut out from different patterns! This is a great die to think outside the box with!
Then, I die cut the rocket a second time using fun foam that already had adhesive on it. I added my clear acetate window and adhered the layers together, then added my sequins. For the dots on the front I used pink enamel dots.
For the clouds at the bottom, I used two of the Stitched Cloud Edgers dies and I die cut a sheet of vellum several times and layered them on top of each other. I love how this turned out and how you can still see the patterned paper in the background.
I am excited to share with you a new product assortment that is now available from Frantic Stamper. I think you'll find this set of products very versatile.
I wanted to start by sharing a video that I created showcasing the products and then I'll share two cards, one masculine & one feminine.
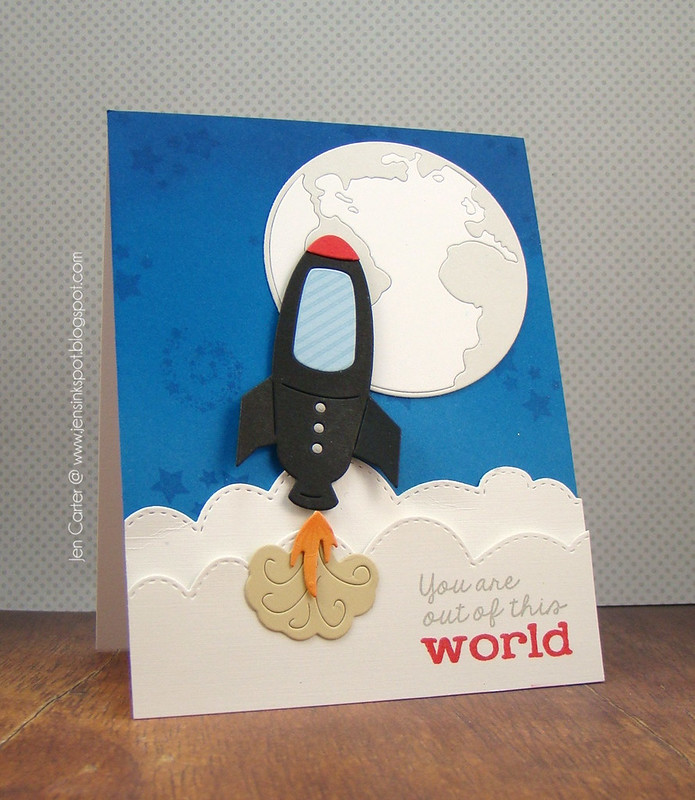
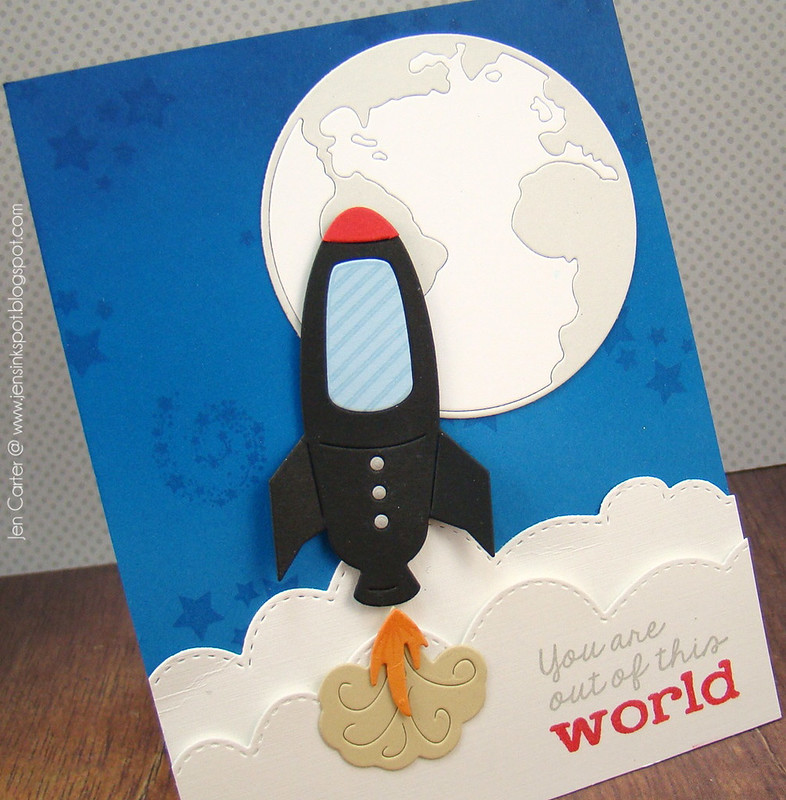
I hope that video gives you a nice showcase of these new products! Today, I wanted to show how you can create both feminine and masculine cards with these new products. Let's start first with a more traditional masculine card.
I started this card with the blue background. I sponged blue distress inks around the top of the cardstock to create the night sky. I used VersaMark ink to stamp the stars & milky way swirl from the new The Final Frontier clear polymer stamp set on the background. After that I started building the rest of the scene. I started by applying a couple cloud layers cut with the new Stitched Cloud Edgers dies (set of 3). I didn't adhere the tops of the clouds so that they could be slightly "puffy" on the card for dimension. I stamped the mix & match sentiment from the new Sentiments from Space stamp set on the clouds.
I die cut the rocket, the smoke cloud & the fire with the crazy fun and new Rocket Launch die set (set of 4). I cut the top of the cone off of the rocket with a few snips (easy to do because there is a line cut into the die there) and added a red nose cone for contrast. I also mixed & matched the window & the dots on the front. I stamped the window with one of the 6 window options in the new The Final Frontier clear polymer stamp set. The great big earth/planet is die cut from the previously released Planet Earth die that I think is super cool!
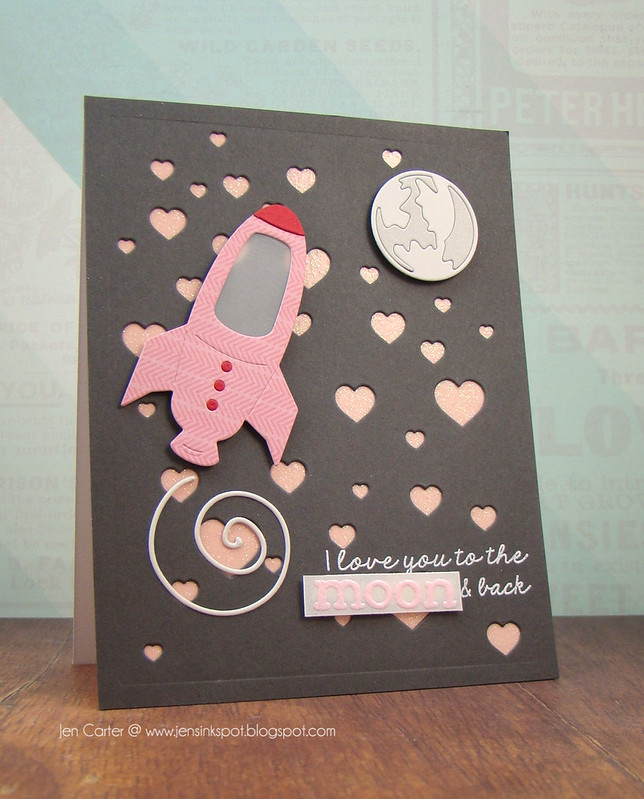
Now for a feminine, Valentiney card!
I cut this rocket from the Rocket Launch die set from patterned paper and for the window I placed vellum behind the cut out. I popped the rocket up with dimensionals. I also cut the tip off of the nose cone and used red cardstock for the tip and for the dots on front. For the background I used a previously released die called Heartfall. It made a great background for a love themed/Valentine-like card! I used pink glitter paper behind the cut out hearts.
I used the swirl die cut from the new Outer Space Die Set (set of 7 dies) to make a rocket trail and also die cut the planet included in that same die set. The sentiment I used is one of my most FAVORITE because it is one I say to my kids all the time! It is from the Sentiments from Space stamp set. I embossed the sentiment directly on the gray cardstock and then embossed the "moon" on a piece of vellum that I attached with dimensionals.
I hope you enjoyed this post. I know it was long! I look forward to sharing more projects I made using these new space themed products (including the Flying Saucer die that I haven't shared yet!).
Before I go, I want to share a close up of the new stamp sets so that you can see all of the options.