Saturday, March 18, 2017

Barn Cards with Video Tutorial (Jen Carter)

Jen Carter A2 Barn Grassy Hill 2

Barn Cards with Video Tutorial
by Jen Carter


Hello!  Today's cards again feature Frantic Stamper's Barn A2 Card Maker die.  For this first card, I used various patterned papers to make a fairly traditional looking barn with a few fun elements thrown in.  The die cuts all of the pieces that you see on this card except for the grass which was cut using the Stitched Grassy Hill Edger die.

Fran from Frantic Stamper recently had some questions about how to use the Barn A2 Card Maker die and so I've put together a video explaining the process.


Hopefully that helps some!

Below is the card that I made in the video.

Jen Carter Barn Triangle 1

Again I used mostly simple but fun patterns for my card.  I did add a fun top to the silo. I just couldn't resist throwing in some extra color!  

Thank you for joining me!


*** Materials for this project available at www.franticstamper.com.
 
FRA-Die-09972
 
FRA-Die-09986

Monday, March 13, 2017

Barn Shaped Card Tutorial (Kendra Sand)


Barn Shaped Card
by Kendra Sand


Hello CraftyFriends!

I decided to revisit the Barnyard Fun Release from Frantic Stamper to share how fun it is to create a barn shaped card with the awesome Barn Card Maker.

I grabbed a few supplies to start with:


Let's have some fun!!

I started by creating my card base (A2) from a piece of white cardstock, like I would normally. (I like to use a nice sturdy piece as my base, usually 110lb cardstock weight)


I set it aside for a moment to then die-cut the first layer of my barn from my darkest piece of gray!

Here is a picture of it once die-cut:


I'm not going to do any trimming to this piece as it is going to be my main layer for the barn.  (So I did once again use a little heavier piece of cardstock) 

I then grabbed my original white cardbase layer and added adhesive to the entire front.  I then added my die-cut barn so that the top of it slightly goes over my fold.


A view from the backside:


I now need to do a little trimming.

I cut the white strip that is extra along the bottom first:


So my card now looks like this:


The piece of white cardbase between the silo and barn needs to be fussy cut, so I did just that before moving on!

Now it's time to have some fun and begin assembling the barn!! 

I started by die-cutting the barn from a piece of red cardstock:


I marked two arrows in the photo above with a sharpie to show where I trimmed the barn.

I then added adhesive to the area where the piece was going:


I then added the die-cut to my cardstock base.


So exciting!!  

I then die-cut the barn from a piece of white cardstock and once again marked some arrows to show where I trimmed with a scissors.

I only needed the really thin piece of edging for the barn details.

I added a small amount of glue where the piece was going to go and adhered it to the base.

I then added some adhesive tape to a piece of white cardstock and ran the door dies (small and large) through twice to get two of each size as well as the trim board once.  These pieces are now stickers, which makes adding them to the barn easy!!


I then die-cut the top part of the silo with my lighter gray cardstock.


Trimmed it up and added it to my base!

How cool is that?!


Such a fun card it makes!!

Now it is ready to be personalized any way you'd like.

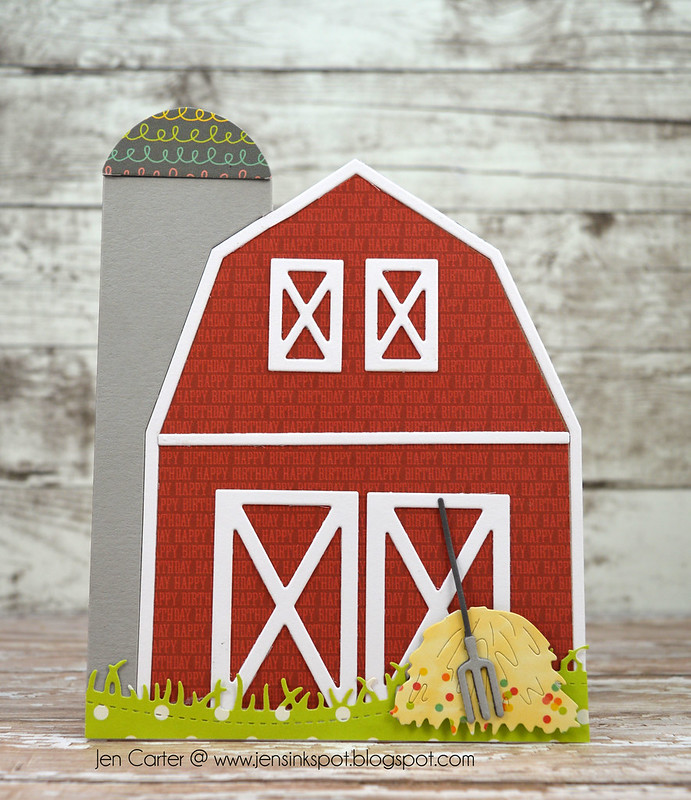
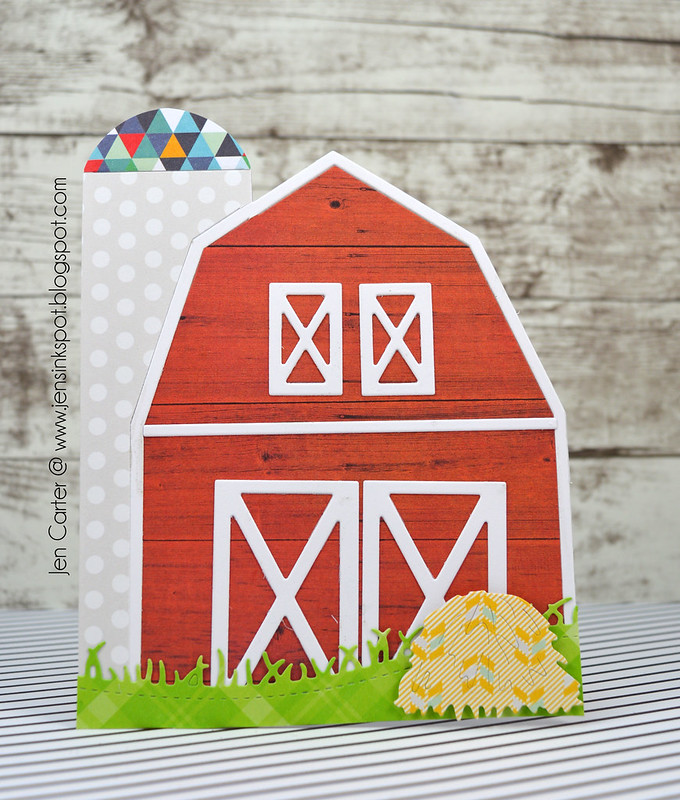
Here is my finished card:


I ended up adding hay, which is a part of the  Barn Card Die, as well as a strip of grass, which I created using the Stitched Grassy Hill Edgers!

Added some black pearls to the doors to act as handles!  And added a few gray pearls to my silo!  They add such a nice touch! 

I added the "Hey" portion of the Hey Y'All die set just above the doors, for my main sentiment, to lead into the inside, In which I stamped the "herd it's your birthday" and cow from the Party Animals clear stamp set.


What a super fun card to make!!

I hope I've inspired you to create your own barn shaped cards!

Have a lovely day!

~ Kendra ~

*** Materials for this project available at www.franticstamper.com.
 
FRA-Die-09972
 
FRA-Die-09986
 
FRA-Die-09987
 
FRA-CL-050

Friday, March 03, 2017

Hard to Say Goodbye...

This month the Frantic Stamper Design Team is going on with three fewer team members. We are always sad to see our designers move on, but it is even harder when the designer has been with us for a while. We are going to miss all three designers, but we will especially miss Michelle Leone who has been making beautiful projects for us since June of 2015, when she first joined us a guest designer. We fell in love with her clean, crisp, colorful work right away, and with Michelle pretty quickly as well! She has been a joy to work with, and both Fran and Kathy will miss her a lot. We wish her all the best in her new endeavors, and we hope that she will come back to visit us from time to time. Michelle, you are always welcome to come back!

Also leaving us is Lynn Mangan, who was with us for the past six months as a special favor to Kathy and Fran, to help us with samples for our slideshows , filling a gap between other members leaving and new members joining. We cant even begin to say how much it meant to us that she stepped in for us. This was Lynn's second guest slot with us, and we hope that at some point she will come guest for us again, or join us on a more permanent basis! We love Lynn's work, and we really enjoy working with her...she is a wonderful person, and really talented to boot! We wish Lynn well, and want her to know our team will always have a spot for her if/when she feels she can join us.

And lastly, we say goodbye to one of our most recently added team members, Mary Prasad. Mary had first thought she would join us as a full-time team member, but realized that it just wasnt going to work for her. While she wasn't with us long, Mary did make an impact! We will always enjoy the beautiful samples she made for us during the two months she was with us, and are sorry that it couldn't be for longer. We wish Mary well, and hope that our paths will cross again someday!

Please join the Design Team in wishing these three ladies all the best!

Wednesday, March 01, 2017

FranticStamper Die and Stamp Release-Sweet Baby

Frantic Stamper introduces its latest die and clear stamp release, Sweet Baby. Here is a short video slideshow with the new dies and stamps showcased in faboulous projects by the Frantic Stamper Design Team.


These dies and stamps ware availble now at the Frantic Stamper online store.