Tuesday, May 29, 2012

Lg Sitting Cat (DT Coloring Project, Linda Phinney)


Spritz cold press water color paper with water then with Adirondack Color Wash in Denim and Sailboat Blue, and Glimmer Mist in Jazz Blue and Blue Skies. Stamp the Frantic Stamper Cling-Mounted Rubber Stamp - Lg Sitting Short Hair cat on the colored-washed paper created above three times with Colorbox Pigment Ink in Black and sprinkle and emboss with Judikins Detail EP in black. Cut out one complete cat, one cat front (head and legs), and one cat head. Highlight cat's chest fur on cat front and tips of ears on cat head with Adirondack Color Wash in Wild Plum. Highlight chin, cheeks, and bridge of cat's nose on cat head with white pigment pen. Mount the pieces together with foam tape.

Sunday, May 27, 2012

On the Lake (DT Project by Jennifer Willis)

On the Lake

by Jennifer WIllis


Here is a card that could be used for any occasion. The stamp is titled On the Lake and is found in the Frantic Stamper collection. To create this water color look I used water color crayons from Lyra, coloring directly on the stamp. I then misted it with water and stamped it on cold compressed water color paper and allowed it to dry.

The paper is from the Kaisercraft These Days collection and is called History.

Friday, May 25, 2012

Announcing: New dies from Memory Box!


Brand new dies from Memory Box are here!!!

We have just received the NEWEST release of dies & stamps from Memory Box and their sister company, Poppystamps. Featuring a very summery theme, these dies are sure to make all your projects fresh and eyecatching.

The release includes:

  • 31 dies from Memory Box highlighting hawaiian hibiscus, palm trees, sandals, birds, a swaying palm and large butterflies!
  • 4 beautiful Memory Box "whisper print" floral wood mounted stamps
  • 10 dies from Poppystamps including a fun owl, cute-as-a-button vegie garden border, a mini picket fence and fun party lanterns.


We are currently well stocked on all the products in this new release.  But, they won't last long!!! 

Be sure to go to the Memory Box and Poppy Stamps at www.franticstamper.com. We're shipping orders immediately on a first come-first served basis.

Hugs,
-Fran
www.franticstamper.com
541-826-2500

Tuesday, May 22, 2012

Coloring Corner: Angel Stamped Image (DT member, Sharon Jeffs)


Angel Stamped Image

by Sharon Jeffs


From the moment I saw this image on the Frantic Stamper website, I've wanted to color it! I decided that I really wanted to play to give a whole watercolour/wall art kind of feel to it, and so I decided to color it using a dipping technique.

I began with a small piece of acetate that I stamped the image onto using a black Stazon inkpad.


I then colored in the image directly onto the back of the acetate. I used Distress ink markers. I chose to use a mix of Faded Jeans, Stormy Sky, Tumbled Glass, Weathered Wood and Picket Fence to color the background. I used Walnut Stain and Vintage Photo for the bench they are leaning on and Antique Linen and Scattered Straw for the flesh areas. Finally, I used Wild Honey for the hair and Pumice Stone for the wings.

Once it was completely colored, I spritzed the whole surface with water then pressed the whole image down onto a piece of Watercolor paper. I used a piece of heavyweight cold press paper, on the smooth side.


It doesn't look the greatest at this stage because it has no form BUT once it is completely dry, all you need to do is re-ink the stamp with the Stazon ink and stamp down with it over the top to create the defined lines and the colored image pops out as if by magic!

Sunday, May 20, 2012

Sketch Sunday: May 20, 2012


Here is today's card sketch. We hope you will enjoy it and perhaps, if you give the sketch a try, you will share with us by emailing a photo of your creation to FranticStamperSketchPhotos@yahoo.com. If you do, I will add the photo to this post!

A few of our DT members chose to create cards to share using this sketch. Enjoy!


First is a lovely card by Jane Larsson.


Here is a list of what Jane used to create the card:


Next is a fun-derful card from Sharon Jeffs.


Sharon used a Magnolia stamp that Fran is expecting to have in the store this week!

And, lastly, is a stunning card from Jennifer Willis.


Jennifer used the FranticStamper Cling mounted stamp, Peacock Postoid, colored with Spectrum Noir alcohol-ink markers to make the card.

UPDATE: We got this fabulous card from one of our readers, Valérie Goldenschue. We are thrilled to share it with you!


Until next time,

Smiles,
Kathy (DT Facilitator)

Friday, May 18, 2012

Collage of Remedies (DT Project by Jane Larsson)

Collage of Remedies

by Jane Larsson


I really love Fran´s large collection of French stamps! On this specific card I used Collage of Remedies and you will see a lot more of her French stamps on my cards, for sure!

This is a congratulations-card for a girlfriend of mine!

Other products used:
Pink Paislee patterned paper
Tim Holtz Core-Dinations Distress Cardstock Prima swirl Webster´s Pages Mini Princess Petals
Prima Alphabet-Stickers
Ribbon
Memento Rich Cocoa

- Jane

Thursday, May 17, 2012

Snapshots of Paris (DT Technique by Jennifer WIllis)


Snapshots of Paris by Jennifer Willis


Today I would like to share with you a technique to create faux snapshots for your card. Ages ago there were cameras that instantly took a picture and magically spit it out within seconds. These little gems were so much fun remember the moment with. To create your own snapshots like mine, you will need the Eiffel Tower and Absinthe images from the Frantic Stamper collection, white card stock, your preferred coloring tools and background paper (paper featured today is from Kaisercraft's These Days collection titled Ancestry).

I have created two different size snapshots for my card. This is to give you an idea of how versatile this technique can be. The Absinthe image will fit in the smaller size snapshot while the Eiffel tower is a bit taller image. To begin I like to stamp my image before trimming it out, I often miss the mark when trying to hit the center of my stamping surface. Stamp the Absinthe image and trim to 3" x 3".  Cut the mat from white card stock to 3.25" x 4.25". Adhere the stamped image to the mat, centering between the left and right sides and about 1/8" from the top of the mat. I colored my image with copics. Don't forget the background color - I could image this couple sitting on a sidewalk somewhere in Paris having an afternoon drink, so I went with a blue sky.

Stamp the Eiffel Tower image and cut the image to 4" x 4". Cut a mat to 5" x 5.25". Again you will want to center the image between the left and right sides about 1/8" from the top leaving about 1 1/8" of the lower area of the mat exposed. Now you have your snapshots!

When coloring this image I wanted to make sure it looked like a photograph by adding some clouds to a blue sky and extending the bushes to the edges of the paper. A personal touch can be added to the card by handwriting a sentiment on the lower edge of the snapshot, which also adds a bit of authenticity.

To create the card, I used a brown card stock for the base, cutting it to 6" x 6", matted the green side of the Kaiser paper (cut to 5.75" x 5.75"). Adhere the Eiffel Tower snapshot at an angle and the add the strip from the bottom of the printed paper. Adhere the second snapshot at an angle and add some brads in the corners of the card to finish it off.

Thanks for stopping by today, I hope you have enjoyed your visit!

Johnny Jump Ups Card (DT Project by Sharon Jeffs)


Johnny Jump Up Card

by Sharon Jeffs


I loved how my Johnny Jump Ups image turned out with the glitter coloring and so I really wanted to use it straight away to create a card.

I began by cutting a square based card in a light green tone.  I then also cut a darker green mat to go over this and inked the edges of it with a white pigment inkpad.

Finally, I cut a piece of white card that was the exact same size and my piece of acetate and inked the edges of the white piece with a pale pink inkpad.


To attach the acetate to my card without showing any glue, I punched small holes into 3 of the 4 corners of the acetate AND the white card  then  attached the acetate to the white card using 3 brads.

In the final corner I simply used a dot of glue because I wanted to add an embellishment that would hide the glue spot. To create my embellishment attached a green ribbon bow then I threaded a few beads onto a pin and pinned it through the centre of the bow.

Sunday, May 13, 2012

Happy Mother's Day!

We hope that all of the world's mothers will be shown all the love they deserve today, and every day!

Happy Mother's Day to you all.

Saturday, May 12, 2012

Canvas Sampler (DT project by Sharon Jeffs)

Canvas Sampler

by Sharon Jeffs


I love playing around with different mediums and exploring new techniques.  I think it's a general love of learning new things that has always kept me so keen in craft.   That's kind of why I decided to create a sampler of some of the newer effects I have been playing with to keep as a reminder of what I have done rather than always creating a card to give to someone else.

Originally I bought a set of five canvas coasters to play with (my daughter took a keen liking to the second one I created and its disappeared into the depths of her bedroom). Here is a bit of a rundown on what I did one each:


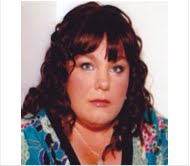
I love this face stamp and have used it a few times! I began this one by wetting the surface of the canvas then blending Distress inks over the surface. (I used Faded Jeans, Dusty Concord and Mustard Seed) I then stamped my face stamp on the bottom left corner and added the swirl over the top using an Archival Ink, to act like abstract hair. To finish off, I added a layer of embossing ink over the entire surface and heat set a layer of clear UTEE. As a final touch I then went over the surface roughly with the embossing pad and applied a layer of gold embossing powder over this. I also used my finger to rub parts off so that it was very much a worn away effect.


My next sampler, I used Distress inkpad directly onto my canvas. (I used Mustard Seed, Peeled Paint and Rusty Hinge)  Once dry, I stamped the Chicken wire background over the surface with an Archival ink (I used Coffee) and also inked the edges with this same ink pad.

Next I stamped the pears into the centre of the sampler in black Archival ink then coloured each using a waterbrush and Distress ink. Once again everything was coated with embossing ink and UTEE before being heat set.


I love this one! Everything about it screams fun to me and it was!

I began with five different bottles of Distress stains (I used Faded Jeans, Dusty Concord, Fired Brick, Rusty Hinge and Peeled Paint) and literally just splatted them onto the surface of the sampler. I did two separate layers, drying each layer. I then stamped the Chat Noir image on the centre and sealed the whole thing with UTEE. b


Remember how I said I loved the stain splat effect? Well I used the same technique for this sampler BUT I then went in and blotted away any and all excess stain so that the effect was muted. (I used Peeled Paint, Faded Jeans and Dusty Concord)

Once dry I stamped the Newsprint background stamp over the surface in Archival ink (I used coffee) then the pen nibs and the Swirls around the edges.

To then complete my Sampler and bring them permanently together (especially so that my daughter can't walk away with another one) I attached a strand of wide ribbon down through the back so they can be hung together and some swivel clasps to connect them all as well!

Thursday, May 10, 2012

Technique Thursday: Hero Arts Hidden Message


Today we have a really fun card from Hero Arts. We think that the cupcake card itself is super cute, but the hidden message slider is even better! The technique for making it could be used in all sorts of ways and has us looking at our stamps in a new way, looking for a way to sneak in that hidden message! We hope it will inspire you, too!


Wednesday, May 09, 2012

Warehouse Wednesday: Stamp on in...

Stamp on in……


Lots and lots of new stamps are in store at Franticstamper.com!

We've just added a wide variety of stamps from whimsical Flower Fairies to classic Beatrix Potter , cute as a button Strawberry Kisses, English countryside landscapes from Art-Kure as well as collage images from Australian company Stamp-it.

Today, we'll be adding new Magenta stamps as well.


There's something for every style of stamping! Be sure to also check out our new products page for even more new arrivals!!

Happy Stamping!
-Fran

Tuesday, May 08, 2012

Coloring Corner: Coloring on Acetate


Coloring on Acetate

by Sharon Jeffs


I haven't played with this technique in a long time but I do love coloring onto acetate!

I began to create this pretty image by stamping the "Johnny Jump-ups" from the Frantic Stamper stamp line with a black Stazon ink onto a piece of acetate. Once the image was dry, I turned the whole piece of acetate upside down; it's best to work on the back, you'll see why at the end!


I then began to color in all the stems and leaves using a pair of Copic markers. I began first with G94 (Grayish Green) then went over the top with G99 (Olive).


I then used Glossy accents (any other clear adhesive will also work) and colored the centres of each of the flowers before sprinkling a pale pink over the top. I then waited until this was touch dry before coloring in each of the flowers with another layer of Glossy accents and sprinkling white glitter over this.


I left everything to thoroughly dry then I used a soft brush over the surface to brush away any excess glitter that has not adhered.  Once that was done, I turned it over and ta-da!! The image was perfectly colored with glitter with all the stamped lines intact!

Sunday, May 06, 2012

Sketch Sunday: May 6, 2012


Here is the card sketch for today, May 6, 2012. I didn't notice it when I drew it, but it kind of makes me think of the old west with its color scheme! What do YOU think of when you look at it? What does it inspire YOU to create? Please feel free to share what you create by emailing a photo of it to FranticStamperSketchPhotos@yahoo.com and I will add it to this post!


First up we have a beautiful card by Jane Larsson. Jane used the "West Train" stamp by Frantic Stamper and Aladine's Doily Eiffel Tower Stamp, along with some Little Yellow Bicycle paper and Anna Griffin die-cut flowers to create this gorgeous work.


Next we would like to share Jennifer Larsson's lovely card. She, too, used an Eiffel tower, but hers is by Frantic Stamper, Lg Eiffel Tower! She also used the following Frantic Stamper cling mounted stamps:Hand/Clock, Enough of Paris, Rue de Chaillot Postmark, and Visa Stamp.


And then we have a fabulous card from Linda Phinney! Linda used the Frantic Stamper Cling-Mounted Rubber Stamp French Newspaper Background on blue paper and then die-cut her stars (and hand cut a strip) to create this wonderful take on the sketch. Notice that she moved a few elements, but that they are all still there. That is the beauty of a sketch; it is a starting point but not necessarily the whole story!


Thanks for coming by. We look forward to hearing from you!

Smiles,
Kathy, DT facilitator for
www.franticstamper.com