

Fancy Deer
by Jen CarterHello everyone! Today I have a holiday card to share. For this one I used the negative part of the die cut as my main image.
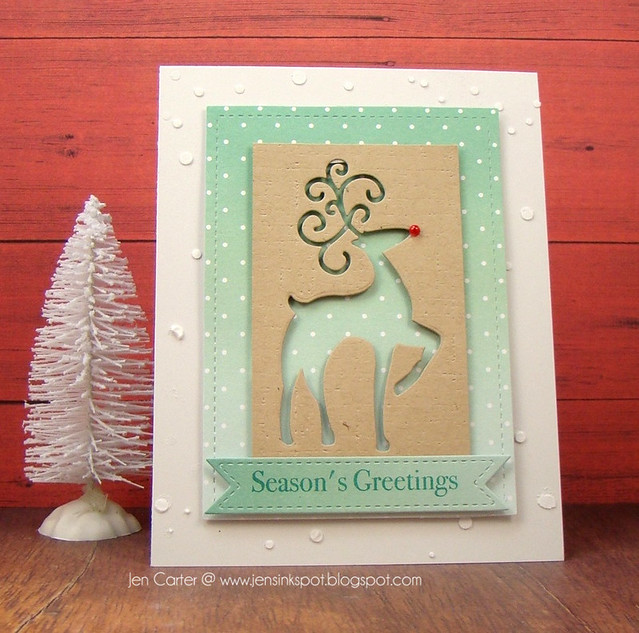
I just love mint, white & kraft paired together! To create this card I used the Large Fancy Deer die from Frantic Stamper and cut it out of a piece of textured kraft cardstock. I added a red enamel dot to the nose for a pop of color. I die cut the frame from the Elementals #1 set of dies to create the mint polka dotted mat which I then popped the negative deer panel up from. I die cut the sentiment banner from the Diagonal Card Sketcher die set and stamped "Season's Greetings" with the clear Round Christmas Vignettes stamp set.
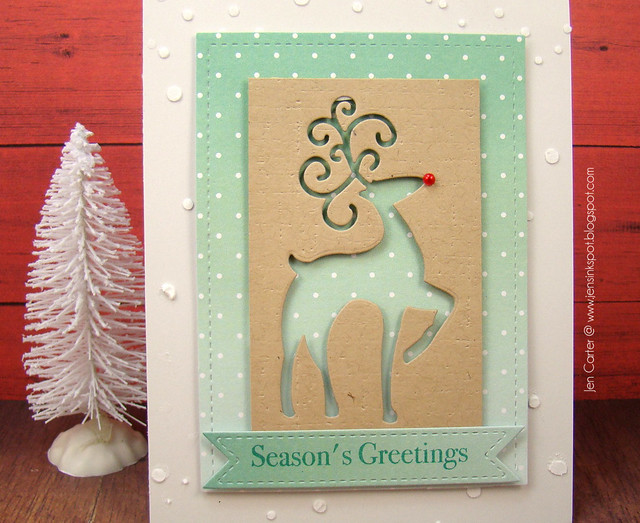
Can you see the white lumpy snowflakes on the background of the light gray cardstock? To create this I used the Snowflake Reverse Cut die and cut a piece of white cardstock with it to use as a stencil. I then took some texture paste (like this) and used an old gift card to spread it around on my stencil being sure to hold the paper still. Once I carefully removed the stencil, I let my snowflakes dry and then adhered the rest of the card-front on top of it. It takes a little time, but I sure like the look of those snowflakes!
Thanks for visiting!
*** Materials for this project available at www.franticstamper.com.
 FRA-Die-09675 FRA-Die-09675 |  FRA-Die-09613 FRA-Die-09613 |  FRA-Die-09375 FRA-Die-09375 |  FRA-CL-022 |

I love how you used the negative and that mint colour is so pretty. I sure like the look of the snowflakes too.
ReplyDelete