Sunday, November 14, 2010

Sun Card

by Lis Whiting


Sun

Materials

  • Paper and Cardstock
    • Manila Cardstock – 8 ½ x 5 ½
    • Bazzill Basics Monochromatic 5-color packs
      • Browns, Walnut     ( BB-MC-BRN   $11.99), cut to 5 1/4" x 2 1/8"
      • Yellows, Lemonade     ( BB-MC-YEL   $11.99), cut to 5 1/4" x 4"
      • Greens, Aloe Vera     ( BB-MC-GRN   $11.99), cut to 5 1/4" x 2"
    • Best Creation Sunbeam Glitter Cardstock     ( BC-P-GL037   $2.59) about 2" x 3"
    • Vintage Reminisce. Stonehenge     (     ( COR-Pk-VRemin   $10.99)
      (I used Chocolate Box by Core-dinations, but it is not currently available)
  • Inks and Embossing Powders
  • Embellishments
    • Tim Holtz Tissue Tape, Symphony     ( ADV-TH-92829   $9.99)
    • Prima, Say it In Crystals, Large clear Swirls     ( PRI-CRY-522766   $7.99)
    • Prima Flowers, Essentials 8 Strawberry Kisses Patterned, Large     ( PRI-ESS-539771   $5.99)
    • American Brads, Medium, Neutral,Brown     ( AMC-BR-neutral   $3.49)
    • Basic Grey Cappella Micro Mini Alphabet     ( BG-S-CAP-2414   $1.59)
    • Wilton Cake Decoration Gold Leaves
  • Tools

Instructions


  • Fold your manila cardstock in half making a card base (5 1/2" x 4 1/4").
    Card will open on the bottom.
    Set aside.

  • Run the core-dinations through the cuttlebug using Script.
    Sand the raised parts to show the inner core of the cardstock.


  • Punch a border on one of the long sides of the green cardstock.


  • Attach the green cardstock to the back of the embossed brown.
    You want just the punched border to show.

  • Attach brown and green to the yellow cardstock.


  • Add tissue tape from the edge of the brown.


  • Using an ink blender, blend color along all edges of the card so far with frayed burlap ink.


  • Punch out two photo corners from yellow glitter cardstock.
    Add the two photo corners to the bottom of your card.

  • Mount all of this to your card base.


  • Take out your Say it in Crystals and cut off a few curls for your card.
    Attach them.


  • Take a large green flower and a smaller light pink or lavender flower and attach them together with a brown brad.


    (flower is not attached to card yet)

  • Place a square of mounting tape on the back of your flowers.

  • Add the gold leaves to flower. Use the mounting tape to secure them.

  • Mount the flower in the middle of your crystals with mounting tape.


  • To make your tags:
    • Punch out three of the smallest tags from walnut Bazzill.

    • Add your letters, one to each tag.

    • Use your ink blending tool to add frayed burlap around the edges of each tag.


      (This pic shows two tags edged and one not edged so that you can see the difference)

    • Rub lightly your ink blending tool across each letter to add just a touch of color.

  • Mount your tags to the card with mounting tape


  • Place two small and one larger crystals on the top of the brad.
    (Makes it look a little like an antique button!)
I was serving jury duty when I took out my paper and started sketching some ideas for a book I’m doing. I thought about this card and came home and made it! Just shows that jury duty isn’t all that bad!

Saturday, November 13, 2010

Happy Birthday

by Debi Wind


Happy Birthday

Materials

Instructions

  • Cut Sea Glass cardstock to the size of 5 1/2"X8 1/2", score it and fold in half.
    Cut Grape Slush cardstock to the size of 4 1/8"X5 3/8" and Stripes pattern paper to the size of 4"X5 1/4" and adhere to card.

  • Cut one piece of Apple Crush cardstock to the size of 1 3/4"X4 1/8".
    Cut one piece of Plumes pattern paper to the size of 1 5/8"X4"; layer onto Apple Crush cardstock and adhere to card.

  • Stamp image in Warm Violet ink onto Vanilla cardstock, trim, and layer onto Apple Crush, Grape Slush, and Sea Glass cardstock.

  • Cut two pieces of Sea Glass cardstock 1 1/2"X1 1/2".
    Cut one piece Parade pattern paper and one piece Feathers pattern paper to the size of 1 3/8"X1 3/8", layer both onto Sea Glass cardstock and adhere to card.

  • Adhere main image to card.
    Finish card by adding Glossy Accents to balloon.

Friday, November 12, 2010

Simple Sunflower

by Joanne Wardle


Simple Sunflower

Materials

Jet black archival Ink RAN-ARCP-jet
$5.49 http://www.franticstamper.com/archival.htm distress ink Mustard SeedRAN-DP-Must
$5.00 http://www.franticstamper.com/distress.htm Stamps:
  • Paper and Cardstock
    • folded white card 3.5” x 5”
  • Stamps
    • Frantic Stamper Shadow Square     ( 6406-I   $3.00)
    • Frantic Stamper Sunflower     ( 148-06-I   $3.00)
  • Inks and Embossing Powders
  • Embellishments
  • Tools
  • Adhesives

Instructions

  • Stamp sunflower in black ink.

  • Overstamp with shadow square inked with mustard seed ink.

Wednesday, November 10, 2010

It's the little things

by Polinka


It's the little things

Materials

  • Paper and Cardstock
  • Stamps
    • Frantic Stamper, Med. Balloon stamp     ( 116-03-I   $3.00)
  • Inks and Embossing Powders
    • Ranger Archival Ink, Jet Black     ( RAN-ARCP-jet   $5.49)
    • Ranger Alcohol Ink, Dockside Kit     (Watermelon, Citrus, Sailboat    RAN-Alc-kit-dock   $9.99)
  • Embellishments
    • 7 gypsies 97% complete Stickers     (for example, Quotes     7G-S-17332   $1.99)
    • Little Yellow Bicycle Clothesline Stickers, Favorite Pieces     ( LYB-S-CL135   $3.49)
  • Tools

Instructions

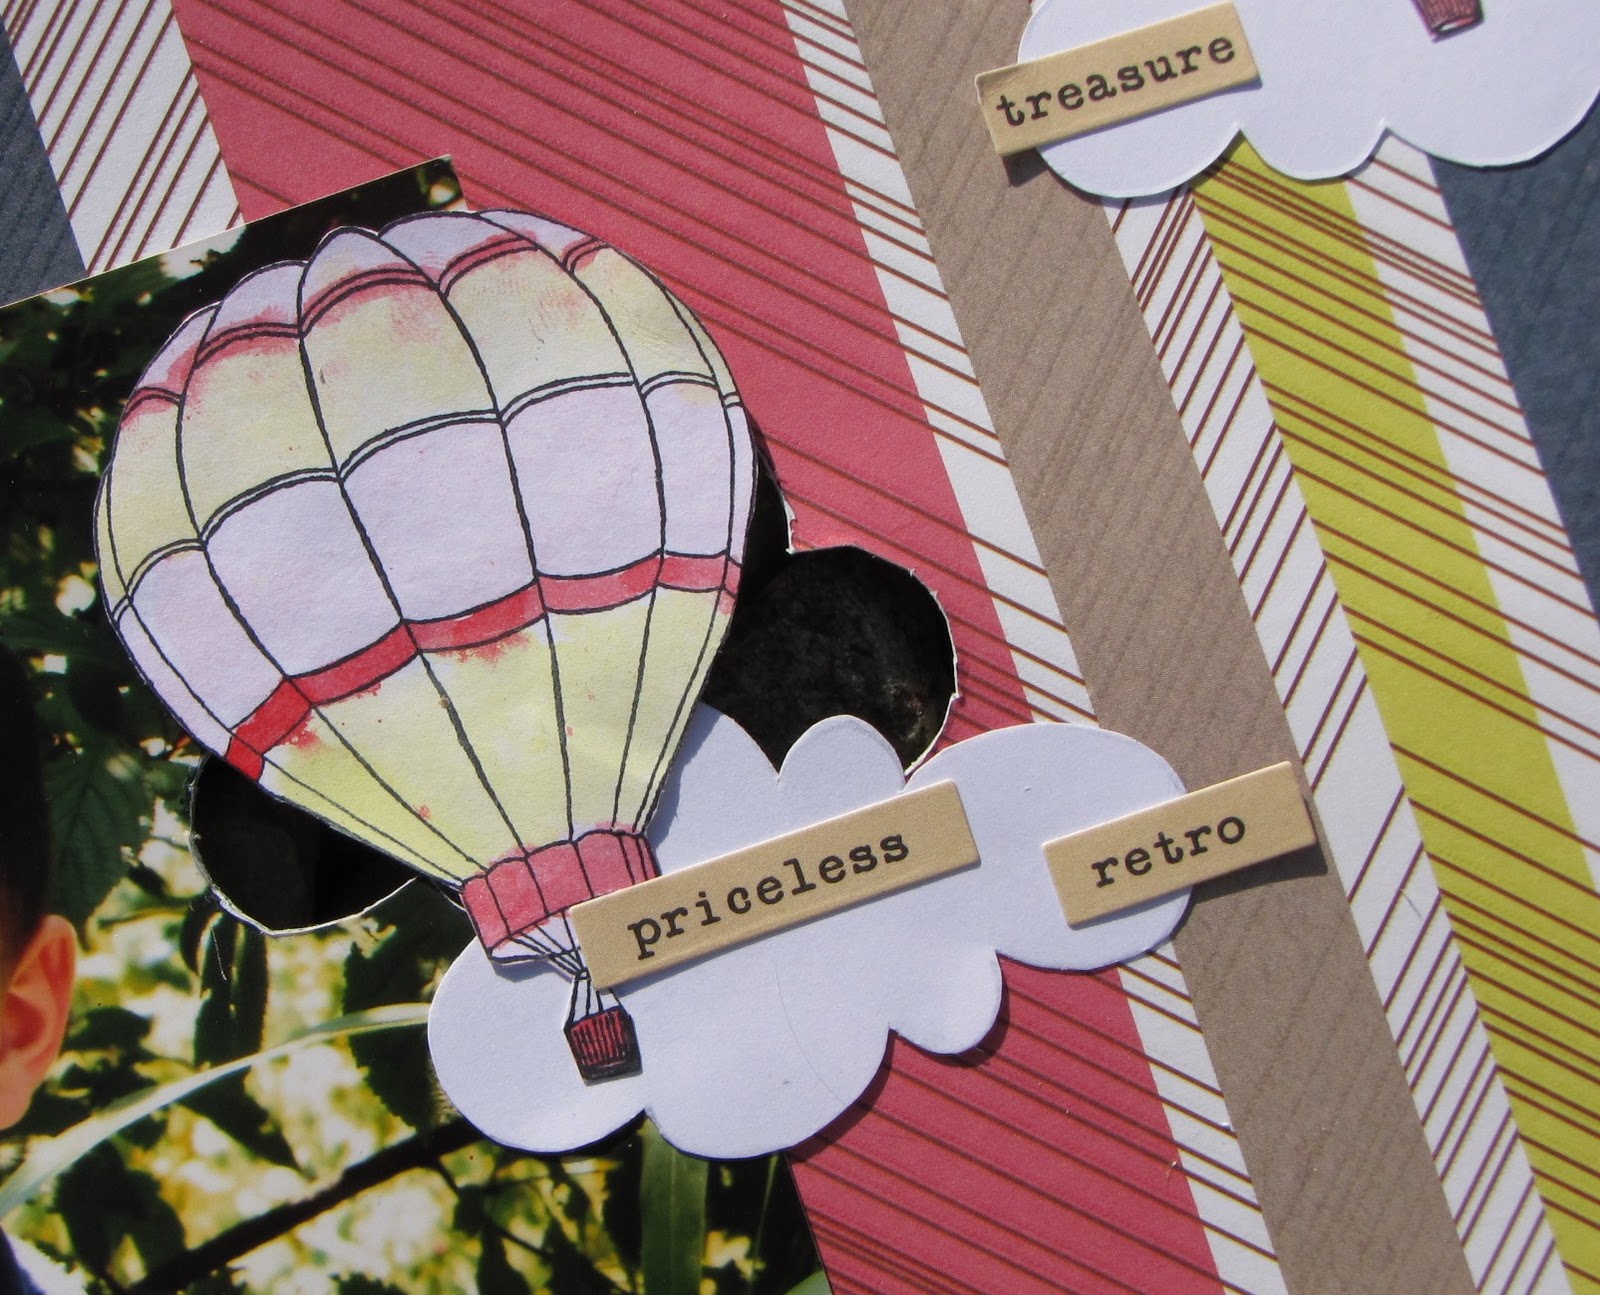
  • Doesn't this paper fit perfectly with the picture of my nephew Noah?


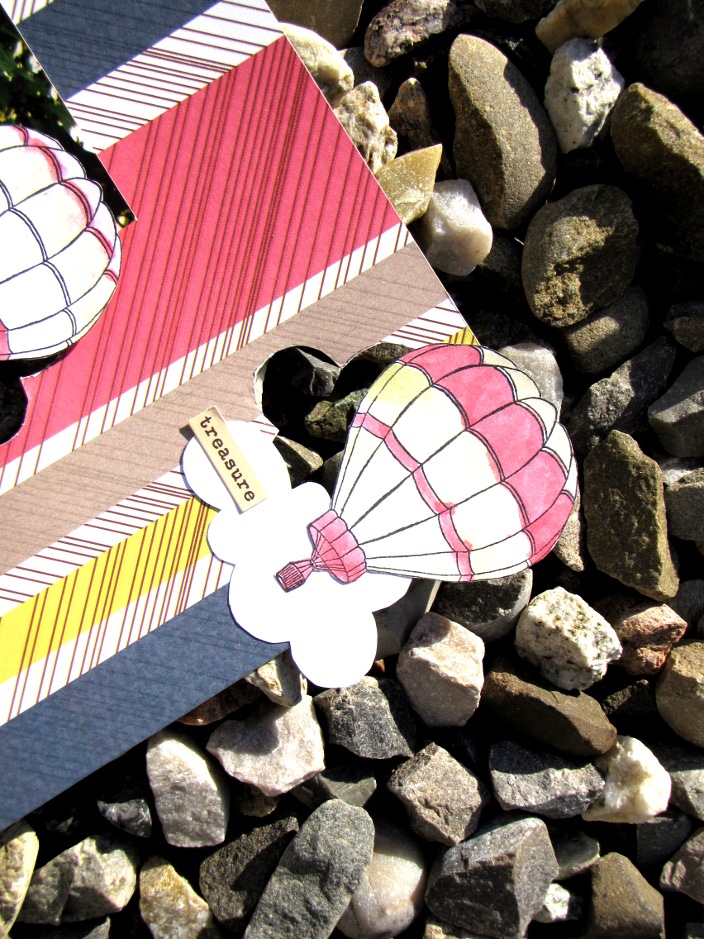
  • I adhered the picture and then drew and cut 3 clouds out of the background paper.


  • I cut 3 clouds in a white cardstock, too, and placed them near the cloud holes.

  • I stamped 3 cute hot air balloons on the white cardstock, and coloured them using alcohol ink diluated with water... I adhered these 3 balloons near the clouds, of course ;)


  • To finish I just added some journaling prompts from 7gyspies and little yellow bicycle...


Thanks for stopping by and I hope you enjoyed my project!


Have a lovely day,

Monday, November 08, 2010

Pals

by Erika Taylor


Pals

I love seasonal papers that you can use for other occasions. Rich patterns and color combinations that take a seasonal line into another occasion with the right embellishments. The My Mind’s Eye Haunted collection is one of those versatile collections indeed.

Materials

  • Cardstock
    • Bazzill, Black, Classic texture     ( BAZ-10-1075   $0.59)
    • Core’dinations, Black Magic Spell Caster, teal     ( COR-Pk-BMSpell   $10.99)
  • Patterned Paper
  • Embellishments
  • Sprays
    • Tattered Angels Glimmer Mist, Dragonfly TAT-dragon   $6.95)
  • Tools
    • The Scor-Pal     ( Scor-pal   $39.99)
    • Tim Holtz Non-Stick Micro Serrated scissors     ( TON-sci-serrated   $11.95)
    • Tim Holtz Idea-Ology Sanding Block     ( ADV-TH-92482   $5.99)
    • Making Memories Slice Starter™ Kit. Pink     ( MM-SLICE-KitPink   $179.99)
    • Making Memories Think Pink cartridge     (included with Pink Slice     MM-SLICE-KitPink   $49.99 -- SALE: $39.99)
    • Making Memories Noteworthy cartridge     (included with Pink Slice     MM-SLICE-note   $39.99 -- SALE: $29.99)
  • Adhesives

Instructions

  • Cut black cardstock 5 ½” x 8 ½”.
    Score with Scor-Pal at 4 ¼”. Set aside

  • Cut 4 1/8” x 5 3/8” scroll patterned paper.
    Cut 4” x 5 ¼” black cardstock and 3 7/8” x 5 1/8” Chandellier patterned paper.
    Layer with adhesive

  • Cut 6 1/2” piece of black twill ribbon and wrap around card front.
    Tie in knot on right side of card front.

  • Spray damask die cut with Dragonfly glimmer mist.
    Adhere to card front using dimensional dots.

  • Cut out leaves and rose bud from Core’dinations paper using Think Pink cartridge.
    Lightly sand edges with sanding block.
    Adhere onto top of damask die cut.

  • Cut out four varying sizes of 5 petal flowers using scissors.
    Curl petals around pencil for dimension.
    Layer from smallest to largest and attach with brad.
    Adhere to top of damask die cut.

  • Cut out small tag from patterned paper using Slice Noteworthy cartridge.
    Apply rub-on sentiment. Put small hole in top of tag and string with twine.
    Knot around twill ribbon.

  • Finish card with pearls.


Taking a seasonal collection and seeing the possibilities for expansion is a great way to get more use out of those favorite lines. Thanks for sharing a My Mind’s Eye moment with me today.

Toodles
Erika

Saturday, November 06, 2010

PopOut Card

by Sharon Jeffs


PopOut Card

Materials

  • Paper and Cardstock
    • Bazzill Singles, Lemonade     ( BAZ-4-413   $0.59)
    • Bazzill Singles, Pinecone, 2 sheets     ( BAZ-9-975   $0.59 ea.)
    • Prima Patterned Paper, Smoking Jacket     ( PRI-P-810368   $0.79)
    • Prima Patterned Paper, Inamorato     ( PRI-P-810337   $0.79)
  • Inks and Embossing Powders
  • Embellishments

Instructions

  • Begin with the Lemonade card and score in half.
    Open up and score a line 3 inches from the side.
    Repeat with other side.
    Cut away the two smaller sections on the bottom half of the card as indicated in the template.


  • From the cut away sections, cut out two tags that measure 1 ½ inches by 5 inches.

  • Ink all of the edges of the tags and the main card section with the Pinecone ink pad.


  • Using the Brown Bazzill, cut out the following pieces:

    • 1 piece measuring 5 ¾ inches by 5 ¾ inches

    • 2 pieces measuring 3 ¾ inches by 5 ¾ inches

    • 4 pieces measuring 2 ¾ inches by 5 ¾ inches

    • 2 pieces measuring 2 inches by 2 ½ inches

  • The patterned paper for the mats are to be cut as follows:

    • Inamorato Paper
      • 1 piece measuring 5 ½ inches by 5 ½ inches

      • 2 pieces measuring 2 ½ inches by 5 ½ inches

      • 1 piece measuring 5 ½ inches by 3 ½ inches

      • 2 pieces measuring 1 ¾ inches by 2 ¼ inches

    • Smoking Jacket Paper
      • 2 pieces measuring 2 ½ inches by 5 ½ inches

      • 1 piece measuring 5 ½ inches by 3 ½ inches

  • Ink the edges of each of the Patterned paper pieces with the Pinecone inkpad.


  • Adhere each of the panels to their corresponding places with the smaller matted pieces being placed on the inside of the flaps.


  • Adhere the tags to the lower flap ready for your message.


  • Cut a 4 ½ inch by 4 ½ inch square from the brown card and a 4 ¼ inch by 4 ¼ inch square from the Smoking Jacket paper.
    Ink the edges of the patterned paper and adhere to the brown card.
    Adhere both to the inside centre panel.

  • Cut a 4 ½ inch by 4 inch piece from the brown card and a 4 ¼ inch by 3 ¾ inch piece from the Smoking Jacket paper.
    Ink the edges of the patterned paper and adhere to the brown card.
    Apply glue to only half of the back of this and adhere to only one side of the flaps so that it is centred when closed.


  • Decorate the small square sections on the inside flaps by applying one of the Prima pearl swirls, one for each side.
    Cut the Prima clay roses off before applying and put aside for the next step.


  • Adhere 3 of the clay roses to the bottom left corner and three in the top right corner of the front panel.
    Adhere the Prima vine to the centre of this panel.


  • Finally add a photo to the centre main panel of your card to add that extra special touch to your gift.
    Here’s what mine looks like inside – without the photo.


Thursday, November 04, 2010

Suede Card

by Anne Harada


Suede Card

Suede paper works beautifully with pigment inks, embossing, die cutting, just about everything that you can do with regular paper. This is a quick sample with some simple stamping.


Materials

  • Paper and Cardstock
    • White card stock
    • SEI Suede Paper Sampler Pack, Autumn     ( SUED-ASST-Autumn   $4.99)
  • Stamps
    • Sentiment stamp of your choice
  • Inks and Embossing Powders
  • Embellishments

Instructions

  • Create a card base from white cardstock 6-3/4” x 6-1/4”.
    Fold the 6-3/4” side in half.

  • Cut a 3”x6” rectangle of dark brown suede paper.
    Adhere to your card base.

  • Attach chipboard leafy flourish to suede paper.


  • Attach Wooley flowers as shown in sample along the flourish chipboard.

  • In the bottom right corner, stamp a sentiment with white pigment ink.


Tuesday, November 02, 2010

Giggle

by Kris Hankins


Giggle

I love this sweet card. It is the perfect card to send a girlfriend “just because” or to someone expected a little baby girl. She just makes me smile.

Materials

  • Paper and Cardstock
    • Prima Jack n' Jill Cardstock, Day Dreamer     ( PRI-P-841652   $0.79)
    • Bazzill Pinecone Cardstock     ( BAZ-9-975   $0.59)
    • Cream cardstock of choice
  • Embellishments
  • Tools
  • Adhesives

Instructions

  • I started by making a 5.25” square card base with my favorite cream colored cardstock. Next, I added a layer of brown bazzill cardstock to the front of the card.

  • From my Prima Jack n Jill cardstock, I cut a 5” square from the corner with the little girl printed on it.

    Note – this leaves a little boy in another corner so you can make a similar card for a boy.

  • Attach this to the brown layer on the front of the card.

  • Each daisy was colored in with a Stardust pen to make it iridescent.
    I put light olive pearls (varying sizes) in the centers of each flower.


  • A taupe colored silk bow was attached to the little girl’s hair.
    Also, a green Prima tiny-tot flower was added to her hands.


  • I stamped a scrap of the cream colored cardstock with the word “giggle”.
    I punch it out with a 1” circle punch.

  • On a scrap of the Jack n Jill cardstock, I punched a 1.25” circle from the REVERSE side of the paper.

  • Lastly, a 1.5” scalloped circle was punched from a scrap of the brown cardstock.

  • I glued the brown and flowered layers together.
    Giggle was added using a 3D foam square.
    The completed sentiment circle was attached to the card with 2 3D foam squares.


    TIP - Also, as I usually try to do… I added a scrap border piece of cardstock to the lower inside edge of card. This just adds that little extra something that really finishes off a card.

Enjoy this sweet card… and giggle a little.