
front side

back side

matching card

Handwritten Love You Baskets and Card
by Ann Greenspan
Every year I make a bunch of these heart shaped baskets to give to the children at a local hospital on Valentine's Day. This year I am using the new die "
Handwritten Love You" by Frantic Stamper. It has the look that someone actually wrote the words with a pen and not the look you would typically get by using a die. I guess you could say our designer, Kathy Berger, is responsible for this. Maybe it is her handwriting? I have to rely on the die, myself, because my handwriting is not that good at all. I made both a card and basket with this die.
To start off, I use the largest die in the
Sizzix Scalloped Hearts set and cut two out using a medium to heavy weight cardstock. You could also use the
Spellbinder Heart Nestabilities but the largest die in this set is not quite as large as the largest Sizzix die, and I like my baskets to be as big as possible to hold more.

To embellish the front of the basket, I cut out the next smallest die in the set with red cardstock. Next I placed the
Frantic Stamper Handwritten Love You die right inside the red scalloped heart and ran it through my
Sizzix Vagabond machine. To get the white scalloped heart, I traced around the die that I used to cut the red heart with and then manually cut it out. It is just slightly bigger than the red heart and gives a nice layered effect. It also makes the area that was cut out using the word die show through.
To make the basket itself, I dry embossed both of the large pink scalloped hearts using a Cuttlebug mini hearts embossing folder. Next I adhered the "loops" of the Handwritten Love You back into the negative space of the cut out inside the red heart. I also used the red words that were cut out from this heart and put them on the back side of the basket.


At this point you want to cut off the bottom scallop on the two big hearts so they will allow the box to stand up.
Before assembling the basket, I like to embellish the front completely so when pushing down to adhere any embellishments, I won't squish the basket. Once the front and back are embellished you are ready to work on the part that holds the basket together.
Cut a strip of cardstock 8' x 3"; I cut mine in pink to match the pink hearts. Place the strip of paper landscape (horizontally) on a scoring board and score at 3 1/2" and 4 1/2". Turn the strip vertically now and score at 1/2" and 2 1/2". Cut tiny triangles out of the strip as seen below. The cuts are right at the 3 1/2 and 4 1/2 score lines, but only cut up to the 1/2" score line on each side.

Place some double sided tape or glue along the edges of the strip as shown below. If you are using designer paper you will want the tape to go on the good side of the paper.

Now you are ready to adhere the front and back hearts to the strip. Place the strip in front of you horizontally with the tape facing up. Line up one heart to the very middle, small section of the strip with the two triangles on each side. Do not let the bottom of the heart fall below the 1/2" horizontal score line. Adhere the heart just above that score line and centered between the 3 1/2 and 4 1/2 score lines. Do the same for the other heart.
Turn the basket over and remove the backing from two of the tape strips that are along the same 1/2" horizontal score line. One heart will be flat on the table. Bring one side of the basket strip to the heart on the table and line up the edge of that strip so that you can't see any of it along the scalloped edge of the heart. If it's too close to the scalloped edge, you will see the strip once it's assembled. Do the same for the other side, pressing down on the adhesive to make sure it sticks.

Here is another picture of a different basket that better shows the sides of the scalloped heart and how you want a little of the scalloped edge to show:

When the basket stands up, it should be able to balance itself. We are now ready to put on a handle.

You can use either a stiff piece of wide ribbon, at least 1 1/2" wide and 12" long or make your own. Below is how you can make an easy handle for the basket using an edge punch.
I am using the
Martha Stewart Lace Heart edge punch. Using a strip of cardstock that is 12" long x 2" wide, we are going to symmetrically punch both sides of this strip, one side at a time. Turn the punch over on it's back side and place the paper in the edge punch so that one end of the strip lines up right at the very left side of the punch when looking down through the punch. This is the most important part of punching symmetrically -- to have the proper starting point when punching both sides.

Hold the paper in place and make your first punch. Turn the punch over so you are looking at the top side of it and slide the paper to the left so the 3 punched out hearts line up exactly inside the hearts drawn on the punch itself. Continue punching and sliding the paper so that it lines up perfectly with those hearts printed on the punch. If you are ever in doubt whether you are sliding the paper far enough, you can always turn the punch back over, look through the back side, and make sure that you don't see any already punched out hearts within the punch. If you do, you need to slide the paper further over.


There are no punched hearts showing "inside" the punch area, so you are good to go.
When you reach the end of the strip, it should look like this on one side:

Notice you have a full heart on one end and just half a heart on the other end. This is important to note in order to be able to line the paper back into the punch to punch the other side.
Using the end of the paper that has the "full" heart on the end, place the strip back into your punch with the straight side of the paper toward the bottom of the punch and the already punched hearts at the top of the punch as in the photo below. Make sure the left end of the paper is lined up inside the punch so that the very end of it is at the left edge just like when you first started punching the other side.
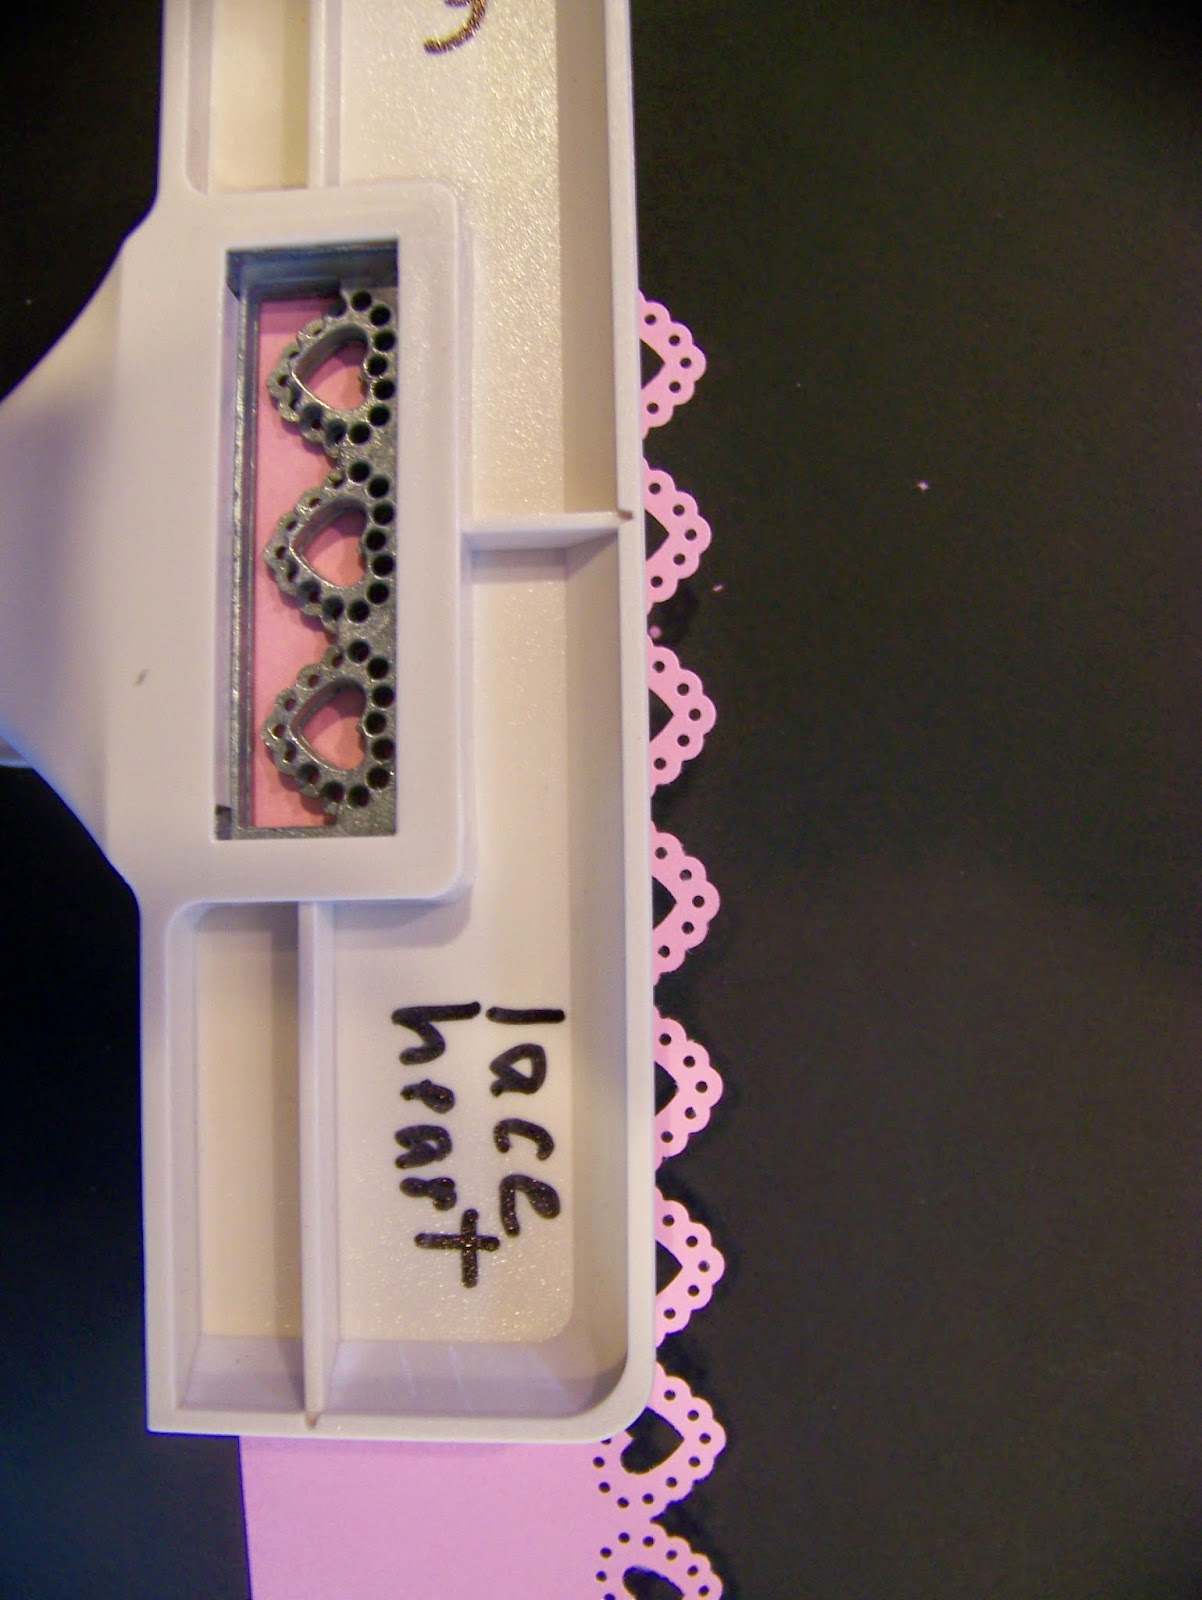
Continue punching and looking at the back side if needed until the entire edge is punched and looks like this:

When adhering the handle to the basket, you want to place the adhesive on the good side of the handle at both ends. If using designer paper, make sure the adhesive goes on the side with the design on it.

Place the adhesive end of the strip into the inside of the basket and push down.

Bring the other end of the strip to the other side of the basket and adhere it the same way. Your basket is now ready to fill. By using the biggest Sizzix scalloped heart die to make these baskets, I am able to fit about 30 Andes Candies in it. That's one whole bag!
To make the card that matches your basket, just cut out the Love You die and adhere it to the front of a card.
Add this basket to the others and they will be off to the children soon:




