Happy World Card Making Day! I hope you are having a chance to be creative today!
Some would probably disagree but coming from somewhere where it doesn't snow in winter, a trip to the snow certainly means lots of fun.
I created a little snowy scene using several Frantic Stamper dies. The first one is a new in October called Snow Capped Mountains. I cut two sets and placed then to make a snowy range. Of course if you didn't want snow on your mountains you can leave the little caps off as they cut separately.
The foreground is created using a favourite set called Stitched Scene Builder edgers, again cut twice. Next layer is the little trees Snow Globe Triangle trees cut and placed behind Oliver snowman. I cut him in white then again in the various colours that enable me to dress him up.
I am so excited to share the second half of our Christmas and Winter release! I hope you will enjoy this slideshow video featuring fabulous cards by our super-talented design team!
I am also excited to share a quick and easy Christmas card using one of the newest background stamps, Sparkles and Dots. I hope you will enjoy it!
Quick and Easy Christmas Card
by Kathy Berger
I have a really quick and easy Christmas card to share with you today. I used my Memory MISTI and my original MISTI to stamp a whole stack of these cards in just a few minutes!
I started by placing the Small Grid and the new Sparkles and Dots rubber background stamps side by side on the Memory MISTI. Since they are 6 inches square, they fit perfectly on the MISTI! I inked the Small Grid with Versamark ink and stamped it onto a piece of kraft cardstock, cut to 4”x5.25”. Next I inked the Small Grid again, and inked the Sparkles and Dots with white pigment ink. I moved the panel that I had stamped with the Small Grid over to line up with the Sparkles and Dots, and put a second kraft panel in place to stamp with the Small Grid. Closing the lid of the MISTI stamped both panels. I repeated the inking, moving, and stamping of two panels at a time until I had my stack of panels stamped.
Next I arranged my Round Christmas Vignettes clear stamps and saying on my regular MISTI. I inked them in red ink and stamped one of my kraft panels. I reinked and stamped, swapping in each kraft panel in turn, until all the panels were stamped. I then quickly colored the open areas of the red circles with a white gel pen.
I added a little strip of red dotted washi tape to each panel, and then mounted each panel to a white folded standard-sized card.
It took about an hour and a half to make the stack of 50 hand-made cards, including cutting the 50 kraft panels and cards!
I hope that if you have a Memory MISTI you will try my double background-stamping trick the next time you have a lot of cards to make! The Frantic Stamper background stamps are perfect for this technique!
Here are a couple closer looks at the cards.
For this card I used a variety of items from the August Release. It's a spooky release (and more) with a lot of possibilities for all of your Halloween and/or Autumn creations. I decided to cook up a Witch's Brew.
The Mix and Match Witches Legs are just way too fun. The die set actually comes with three options of legs and three options of shoes.
I also loved the sentiment from the clear stamp set - The Witch Is In. Yes, definitely. The witch is in... the brew!
The Big Cauldron also comes with a die to represent steam coming off of the brew. I decided to try something a little different with that particular die. I used the relief part of it (the part you'd normally toss) as a template of sorts and put some glitter plaste in it.I kind of like the way that looked.
And as is my practice, I had to decorate the inside of my card, too. I just think a card feels bare unless I do that.
I think the Witch's Brew is about ready now... but the question I have is this: What does one do with Witch's Brew?
Whilst the Northern Hemisphere welcomes Fall we in the Southern Hemisphere are saying goodby to winter. Although with the weather we are having spring may be struggling to appear.
The card I am sharing today features dies from the August Release: Reverse Cut Leaves, a set of 2 leaves and Fall words, a set of 4 word dies.
My card design is fairly simple but it shows the dies off to their potential using bright Autumn colours on a brown background. Whilst the dies are designed as leaves the first leaf die could also be used as a feather and the second die I think could take on a tropical look. Adds to the versatility and usability of the set.
Stamping with Backgrounds, Distress Oxide Inks & Water
by Jen Carter
For the card above, I used Frantic Stamper's Sun Rays 6x6 Background Rubber Stamp to create the yellow sunny background. It is easy to do (video tutorial below) and fun to see the results! The ink I used for this card was Catherine Pooler's Tiara (dye ink) in the middle and Distress Oxide Ink Spiced Marmalade. I blended those colors onto the background and then "inked" my rubber stamp up with water. Yes...water! Then I stamped and this is the result that I got!
I used the Ferris Wheel die for the main image. I love that the little chairs are a separate die so that it is easy to mix & match! I die cut the tickets with the new Tickets die. A fun feature to this die is that it perforates in between each ticket so you can tear the tickets off to make an even more realistic looking ticket. I stamped the sentiment with the clear Life is a Carnival Stamp Set.
To see how easy it is to make a background like this, please view my video below.
I hope that the video helps to show how easy it is to create your own unique backgrounds.
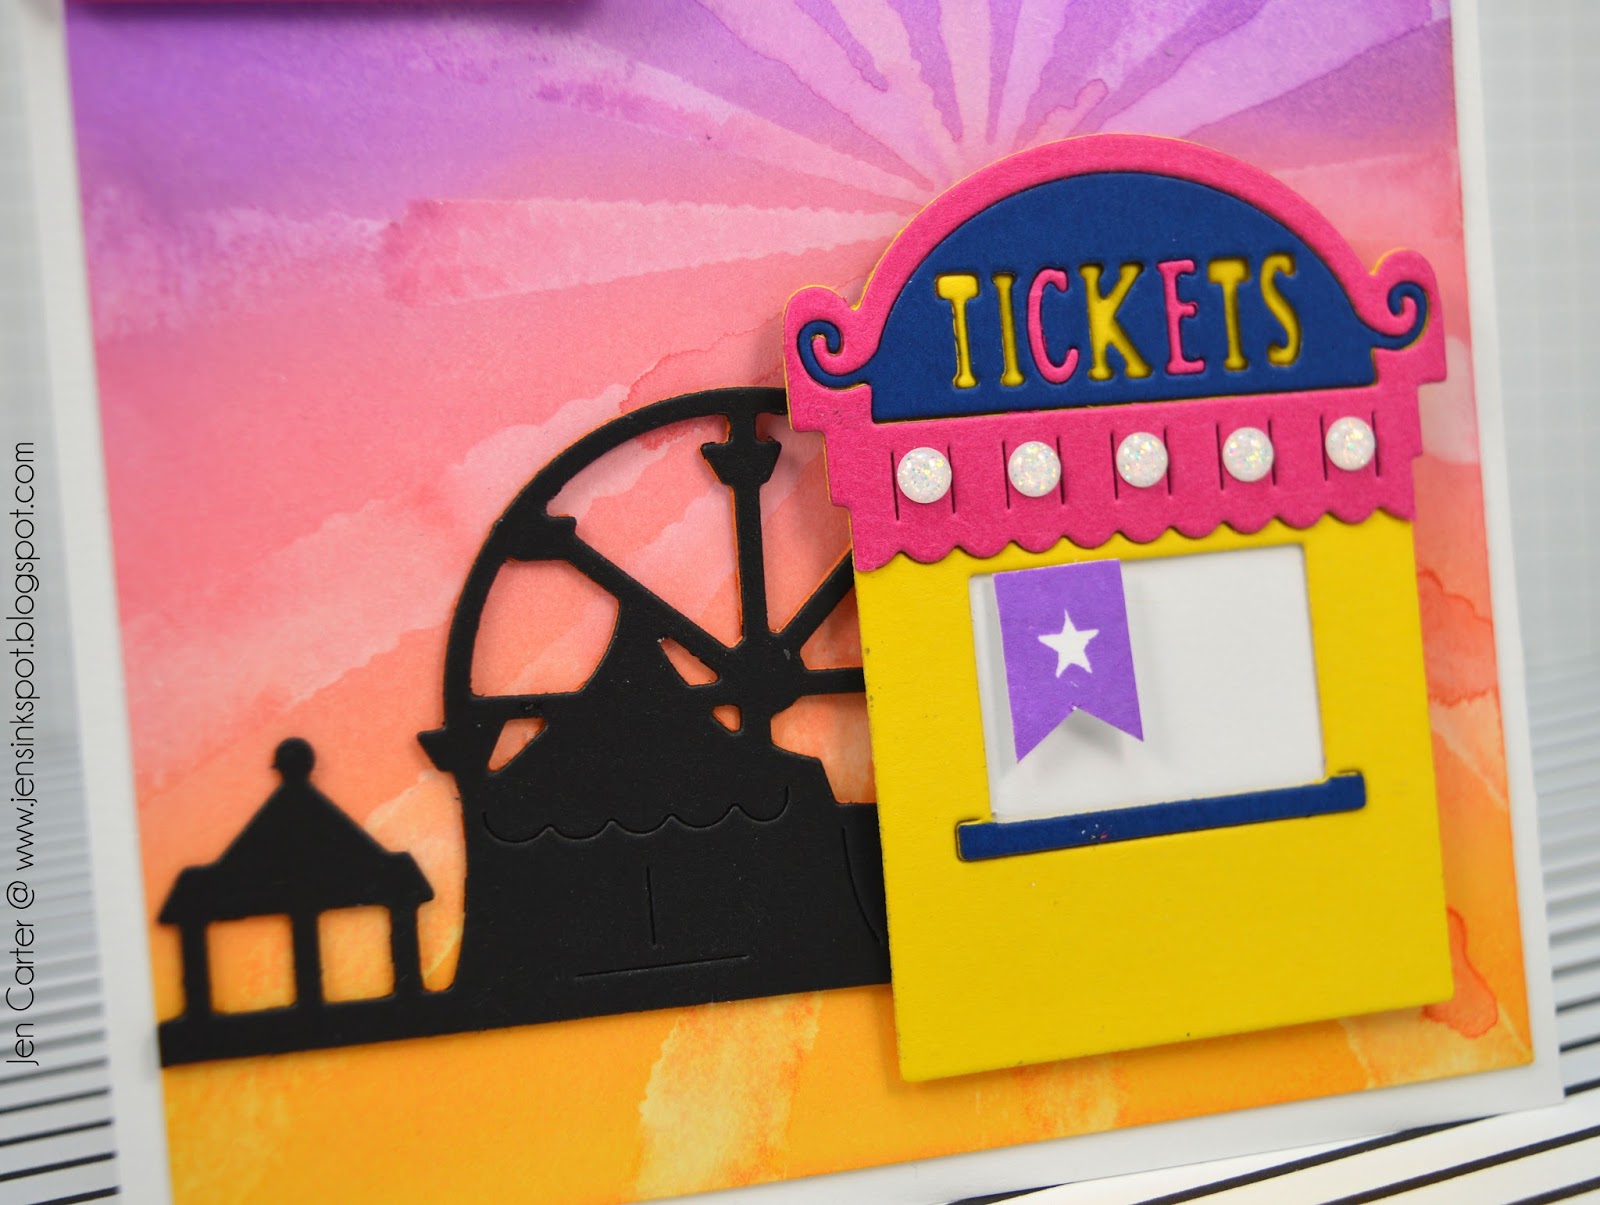
Here is a card I made using one of the backgrounds you saw in the video. For this one I used Spiced Marmalade, Worn Lipstick, Wilted Violet & Cracked Pistachio Distress Oxide Inks and water. I again die cut the Tickets die in three different colors and stamped the sentiment and outline with the Life is a Carnival clear stamp set.
When the background was dry, I added part of the Carnival Skyline as a silhouette in black. The Ticket Booth was fun to put together mixing and matching different bright carnival like colors. The little purple star banner was stamped with the Circus clear stamp set I added glitter enamel dots on the ticket canopy to look like lights.
Be sure to check out the entire new line of Frantic Stamper's 6x6 red rubber background stamps! You can see them all HERE. And, if you'd like to check out the Distress Oxide Inks you can find those in the Frantic Stamper store, too!
Isn't this such a gorgeous little die. It's from the June release called Summer Carnival Fun. I just had to add sparkle using silver glitter paper. I cut the die from the four different papers and then cut and layered them to get the effect I wanted. I thought it should be a girly card so I added some lace and ribbon with soft feminine papers to create a soft pretty card perfect for any little girl.
We do not celebrate any Thanksgiving day in the Czech Republic but still I like to make cards with Thankful sayings. For this card I used the FRA-DIE-10278 Stacking Maple Leaves dies. I chose one sheet from Paintables by Prima. I painted it with watercolours (Gansai Tambi) and then I die cut the leaves. The background is very easy - it is watercolour paper dry embossed with a WeR Memory Keepers embossing folder.
The sentiment is from the Frantic Stamper clear stamp set CL-076. I stamped it with Versa Fine onyx black ink. I was not sure if a normal frame would be too boring for such a card so I took the biggest die from the FRA-DIE-10261 Grateful Florals Outlines die set and I used it as the frame. That can be for you great tip how to use your dies another way; make a frame with them even when they supposed to be just outlines for some stamps.
I added NUVO Crystal Drops black drops on the witches shoes and eyes of the bat. I cut out all of the dies with black card stock and added purple, orange and green card stock on the back of the legs and on the witches' dresses. I used a old Martha Stewart crack paper punch around the edge of the paper to give it an old appearance and other punches for the bottom edges of the dresses.