Sunday, May 30, 2010

Z-fold Thinking of You

by Kathy Berger

This card is very quick to make but looks special because of its fold-back panel. I hope you'll give it a try.


Z-fold Thinking of You

Materials

  • Paper
    • Bazzill Basics "Places We Love" 5-color packs, Martha's Vineyard, Apple Sauce     ( BB-PWL-Martha   $11.99)
    • White card stock
  • Inks
  • Stamps
  • Embellishments
    • White Organza Ribbon, 1/4" width, 12 inches     ( CR-ORG4-Wht   $0.30/yard)
    • Adhesive mesh joint tape from the hardware store (used for sheetrock seams)
  • Adhesives
    • ATG-714 Double Sided Adhesive Tape Gun for 1/4" tape     ( ATG-714   $59.99)
    • Double Sided Refill for ATG-714     ( 1/4" x 36 yd   $5.95)
    • Glue Dots Mini Size, 300 dots, 3/16" dia     ( GLUE-Mini   $3.99)
  • Tools
  • Miscellaneous
    • About a dozen 2" rubber bands
    • Coloring tools of choice (I used colored pencils and GooGone™)

Instructions

  • Cut the cardstock.
    • Applesauce cardstock:
            one piece 5 1/2" x 8 1/2"
            two pieces each 3 1/2" x 2 3/4".
    • White cardstock:
            two pieces each 3" x 2 1/4"
  • Corner chomp the small rectangles of the applesauce and the white cardstock using the STUB side of the chomper.
  • Using the Versafine pad, stamp the bird on one of the white rectangles, and the "Thinking of you" on the other. Color as desired.
  • Mount the white panels onto the applesauce panels. Set aside.


  • Using the Scor-pal score the applesauce card in the landscape orientation at 2 1/8" and at 4 1/4".
  • Mountain fold the card at the 2 1/8" score line, and Valley fold at the 4 1/4" score.
  • Use one of the rubber bands to bind the other bands into a clump. Use scissors to trim the loops off one end of the bands.
    (My daughter named the resulting tool a "Splongee" when she was 3 and it stuck.)


  • Tap the ends of the "Splongee" onto the Versamark pad and stamp onto the front folded-back part of the card only. Repeat to randomly cover that part of the card.
    This will add a subtle "texture" to the folded panel.
  • Cut a strip of the seam tape to about 1" wide, 5 1/2" long. Apply to the the part of the inside of the card that is visible from the front.


  • Affix the panel that has the saying stamped on it to the inside of the card.
  • Apply glue tape to the back of the left half of the panel with the bird stamped on it (WARNING: this will be the RIGHT side of the panel when it is face down!)
  • Affix the bird panel to the front folded-back part of the card, taking care to align the panel so it completely covers the saying panel on the inside of the card.


  • Add a bow tied out of the organdy ribbon to the lower right of the card.

Thanks for coming by. See you next time!

Kathy

Saturday, May 29, 2010

Just Buzzing By...

by Erika Taylor

I love plaid and bright colors. Always warms my heart when I see them together. One of the best combinations of this is the June Bug collection from Basic Grey. So cheery, full of life and a big spoonful of happiness added to finish this collection off. Today I’m sharing with you a very quick and easy card using the fabulous June Bug line. I call it Just Buzzing by to say Hi!

Just Buzzing by to say Hi!

Materials

Instructions

  • Cut Oslo cardstock at 5 ½” x 8 ½” score at 4 ¼””.

  • Cut Vintage Plaid patterned paper 4 1/8” x 5 3/8” . Add 3 green brads to bottom of paper. Adhere to card front

  • Cut out 2 3/8” x 3 7/8” Oslo cardstock. Adhere 2 ¼” x 3 ¾” Park Bench patterned paper on top. Adhere to card front.

  • Cut 1 ½” x 3 1/8” RicRac pattern paper. Punch Lace border on one side of paper.

  • Cut 3 1/8” x 3 ½” Oslo cardstock. Cut 3” x 3 3/8” Vintage Plaid yellow pattern paper. Layer then adhere punched border piece to back side. Wrap edge with ribbon. Tie bow. Adhere entire piece to card front.

  • Cut out flower using precision scissors, from Broken China patterned paper. Adhere to card front with foam dots.

  • Finish card with felt bee, alpha letter stickers and felt button piece.
Thanks so much for stopping by today and sharing a fabulous Frantic Stamper June Bug collection Moment!

Toodles!
Erika

Thursday, May 27, 2010

Kioshi Thinking of You Card

by Anne Harada

Kioshi Thinking of You Card

Materials:

Instructions

  • Create a base card 4-3/4” square using black cardstock.

  • Create a 4-1/2” layer in white card stock, and another 4-1/4” layer in black cardstock.

  • Stack and adhere the layers together.

  • Cut a 4-1/4”x1-3/4” strip of Basic Grey Kioshi – Camelia DP and adhere on the left side of the the top layer of black cardstock as shown in the photo.

  • Cut a 4-1/4” x 2” strip of Basic Grey Kioshi – Kiku lavender DP to the side of the Camelia DP, leaving about a 1/8” gap between the two papers.

  • Stamp Inkadinkado’s Flower Sentiments image on Basic Grey “Kioshi – Mokuren” green paper using Versafine Onyx Black ink.

  • Die cut the image out in a circle shape using Nestibilities Large 3-1/4” Circle.

  • Position the circle over the Basic Grey Kioshi DP layers as shown in photo.

  • Select chipboard embellishments from the coordinating Basic Grey Kioshi Chip Board Sticker Shapes and adhere to the card.

Tuesday, May 25, 2010

Agnès - 1951

by Pauline Dirrig


Agnès - 1951

Materials

  • Paper
  • Stickers
    • Basic Grey Green At Heart – Elements Stickers ( BG-GAH-2145   $2.99)
    • Basic Grey Max & Whiskers – Mini Mono Stickers ( BG-S-GAH-2148   $1.59)
  • Pen
    • American Crafts - Galaxy Marker – White - Medium Point ( AMC-GAL-Mwhite   $2.29)
  • Adhesive
  • Sewing machine and orange thread

Instructions

  • I wanted a bright color combination for this photo and the new Green At Heart line from Basic Grey was just fine for this purpose. I loved this orange paper, and thought it would be great as a background for this baby girl picture of my mother, who is turning 60 this year!

  • I cut it at the album size (6 x 5 inches) and then cut a piece of the violet paper at the same height as the photo and a little bit larger in width.

  • Once the paper and photo were adhered next to each other at the bottom of the layout, I could start to decorate with the coordinated stickers.

  • The 3 little flowers needed some help, so I stitched 3 stems for them with an orange thread.

  • Finally I highlighted some embellies with a white gel pen (for example, the butterfly).


Thanks for stopping by!

Have a lovely day,

Sunday, May 23, 2010

I Love Paris

by Debi Wind


I Love Paris

Materials

Instructions

  • Cut black cardstock to the size of 6"X8 1/2", score it and fold in half.

    Cut 2 pieces of Paris Post pattern paper (pattern on reverse side of one piece used on card), one piece the size of 5 7/8"X4 1/8" and one piece to the size of 2 7/8"X3 5/8".

    Adhere large Paris Post piece to the card and adhere reverse side of Paris Post to black card and adhere to middle of card.

  • Stamp Paris Montage and I Love Paris in black ink onto ivory cardstock.

    Trim, and using the sponge distress the edges with brush corduroy and spice marigold ink.

    Layer onto cashmere and black cardstock.

  • Adhere Paris Montage and I Love Paris to card.

Thanks for allowing me to share with you today. See you next time!
Debi

Saturday, May 22, 2010

Butterfly for You

by Erika Taylor

Glitter, sparkle and butterflies. What better combination is there? SEI has some amazing papers and today I’m sharing with you a card made with the Jolie Chocolat line. This line is full of beautiful pinks, corals and browns. I’ve also used some amazing May Arts ribbon that really adds depth and character to the card.

Butterfly for You

Materials

Instructions

  • Cut String of Pearls cardstock at 5 1/2” x11” score at 5 1/2”. Set aside

  • Cut flamingo cardstock 5 3/8 x 5 3/8 ”. Adhere 5 ¼” x 5 ¼” patterned paper to card front.

  • Cut out 4 ¾” x 4 ¾” patterned paper. Adhere to card front.

  • Cut 2 ½” x 4” cardstock. Distress edges. Adhere to card front. Cut 2 ¼” x 3 ½” Flamingo cardstock, distress edges and adhere to card front.

  • Cut 5 ¾” piece Webbed weave ribbon and attach to back side of card front using double sided tape.

  • Cut 1” x 4” Framboise embossed paper. Distress edges. Adhere to card front using foam dots

  • Cut out flower image and butterfly image from patterned paper. Add glitter to edges using glue pen. Spray flowers with Glimmer Mist. Adhere to card front.

  • Apply Liquid Pearls and Shimmerz accents to butterfly. Bend wings when wet, then adhere to card front using foam dots.

  • Finish card with Dew Drops and Alpha Sticker sentiment.
Thanks so much for stopping by today and sharing a fabulous Frantic Stamper SEI papers Moment!

Toodles!
Erika

Friday, May 21, 2010

Embossed Acetate Card

by Sharon Jeffs


Embossed Acetate Card

Materials

Instructions

  • Trim A4 paper to 6 inches by 11 7/8 inches.

  • Place your card in a landscape orientation and score at the 4 inch and 8 inch mark. Fold in so that the smaller width section sits inside the card.


  • Mark out window on the centre panel that measures ½ an inch in from the top, bottom and both scored folds. Use a sharp blade, cut this section out.


  • Fold card in so that the smaller section is butted up against the window piece and trace the window. Cut out this section as well and set aside.


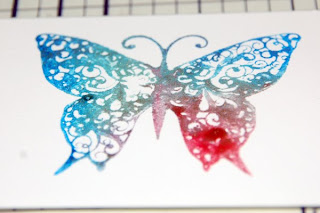
  • Using the butterfly stamp and the stazon pad, stamp the butterfly onto a scrap of acetate.


  • Shake each of the Smooch spritz’s well and spray a glass surface randomly.


  • Stamp the butterfly stamp into the spray and stamp down onto a piece of white card. Cut both butterfly images out.


  • Fold up the acetate butterflies wings slightly and then adhere to the card butterfly using a small amount of glossy accents along only the body section. Add dabs of Ice Stickles across the acetate wings and set aside to dry thoroughly.


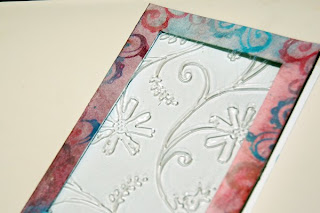
  • Spritz a small amount of water across the remaining smooch ink still on the glass and stamp down into it with one of the flourish stamps. Stamp randomly around the edges of the centre section of the card. Using the blending tool, add in extra colour by dabbing and blending any remaining ink onto the surface of the card. Finally, add a layer of the Distress Rock Candy over the surface of the centre section and put aside to dry thoroughly.


  • Cut out a piece of acetate that measures 2 ½ inches by 5 ½ inches. Place it centrally within the cuttlebug embossing folder and run it through the cuttlebug or alternate embossing machine.


  • Once dry adhere embossed acetate panel between two window sections and glue together to form a single layer front of your card.


  • Attach butterfly to the front corner of your card.


  • Using the blending tool, blend Distress ink across the inside of the card. Stamp sentiment inside the card so that is peers through the acetate window.


Thanks for stopping by. I hope you've enjoyed today's project!

Wednesday, May 19, 2010

Canvas Tile Tag Card

by Kris Hankins


Canvas Tiles – Tag Card

I was in a card making mood today, but wanted to do something a bit “different”. I decided to make a “tag card”. It is simply a card cut in the shape of a tag with ribbons/fibers attached only to the front of the card. The look of a tag with the versatility of a card.
Make sure you check out the embellishments I made with wood tiles and sticky canvas.

Materials

Instructions

  • Let’s start by making the Canvas Tiles used to embellish this card. These tiles can be made to embellish all sorts of art projects.

    • Take 3 wood/game tiles and ink up the sides and front edges of the tiles with Fluid Chalk ink (Chestnut Roan). Set aside to dry.


    • Cut (3) 2” squares of Ranger’s Sticky Back Canvas. Ink the canvas pieces with Fluid Chalk ink (Lime Pastel). Heat set with a heat gun.

    • Using small images from Tim Holtz stamp sets, stamp the canvas pieces using Memories black ink. Heat set with a heat gun.


    • Determine what part of the stamped images you want to the focal point of your canvas tiles. Trace around your tile with a pencil directly to the face of the inked canvas. Trim inside the trace lines.


    • Once you know that the canvas will fit the tile properly (a little small is best) adhere the sticky canvas pieces to the tiles. Cover with a piece of paper and burnish well.

    • Using a blending tool, lightly ink the edges of the small canvas pieces using the Chestnut Roan Fluid Chalk ink. Heat set with a heat gun.


  • Now let's construct the tag card.

    • For this card cut a 6” x 7” piece of Kraft cardstock. Fold in half to make a finished card (3.5” x 6”). At the top corners of card, angle cut the corners at ¾” from corner point.


    • Take the vintage style printed papers you have chosen and cut a 1” x 6” strip and a 2.5” x 6”strip. Glue them to the card front. Trim any excess overhang.

    • Distress the edges of the card using your Distress Tool and/or sandpaper.


    • Attach your gathered ribbon piece vertically where the two printed papers match up. I used mini glue dots to attach this fluffy ribbon.

    • Glue the three finished canvas tiles to the tag. Snug them up next to the ribbons edge.

    • Add your favorite vintage style prima flowers at the base of the card.

    • Embellish the ribbon/flowers with a trinket pin. Add a couple of glass beads to the pin and stick the pin into the ribbon so that the metal stem is hidden (and point ends up in a glue dot).


    • Add the stamped word “family” to the card front.

    • At the top front of card, punch a hole and add a matching eyelet. Thread the olive colored ribbon through it. Tie a bow around the ribbons using a scrap of fabric/muslin.


Your “canvas tile” tag card is now done. Enjoy!
Kris