Wednesday, November 25, 2015

Merry Christmas (Rachelle Green)


Today marks one month until the big day. We hope our monthly cards have inspired you to get your cards made in time to have a relaxed holiday season. Today we share a lovely yet simple card from DT member Rachelle Green.


Merry Christmas
by Rachelle Green


I kid you not, I put this card together in less than 10 minutes. Sometimes the stars align and everything goes as planned. I've really been having an issue with sleeping and wake up at all times of the night. This was one of those nights only this night I awakened with an idea for a card.

I started by using Frantic Stamper Precision Die Snowfall Reverse Cut. I placed it atop white cardstock and fill in the cut outs with iridescent glitter glue. Next I used white iridescent glitter paper and a stitched circle die for my "moon" cut. Using Santa's Sleigh Die and black cardstock I cut the silhouette, added a tiny bit of red glitter glue onto the lead reindeer's nose and glue it as if Santa and his reindeer are riding across the sky in front of the moon. To finish the card off, I used red foil paper and the Merry Christmas Die. I love the finished product and taking less than 10 minutes was the icing on the cake!


*** Materials for this project available at www.franticstamper.com.
 
FRA-Die-09613
 
FRA-Die-09622
 
FRA-Die-09619


Tuesday, November 24, 2015

"The Way It Is" Altered Book (Rozy Smith)


"The Way It Is" Altered Book
by Rozy


Spray paint cardboard book with Krylon Leather Brown. Let dry for a couple of days.

Using Heartfelt Creations Floral Key Collection, line the inside of the box with paper of choice, on the inside flap use an old music sheet to line the flap. Cut out word sentiments that fit the theme, adhere to the right side of music sheet.

Fold a doily in half continuing until there are several folds to pleat the doily, then distress and adhere to right side of box. Adhere a flat doily to the left side.

Create tag out of the paper collection; the tag also has a pleated, distressed doily attached to the left side.

Use a Tim Holtz clear bottle, fill with decorations of your choice (I use inserts from intricate dies that I have saved in a bottle for future use). Tie it with a ribbon, insert flowers, leaves to create a bouquet then adhere to base of box. Proceed to decorate to your hearts desire.

On the front, look for Vintage items galore!

Using Heartfelt Creations Floral Key Collection pick a frame, cut out the center, apply a vintage picture behind the frame.

Using Vintage tickets, tags with the framed picture, adhere to background paper that is cut to the size of the front of the box. Wrap with ribbon before attaching. Proceed to embellish in the style of choice. As always, don't hesitate to decorate and have fun.

When finished wrap jute around the front flap and attach metal charms. Using a hot glue gun center items and anchor. Make a large bow, in the center place a Frantic Stamper Cameo. Apply white lace adhesive strips around outside of book and sprinkle music notes.

Attach white lace adhesive strips with Doodlebug Sprinkles in the center, sprinkle musical notes across the page.

Voila! One of a kind gift!


*** Materials for this project available at www.franticstamper.com.
 
FRA-Die-09044
 
FRA-CAM-F1

Saturday, November 21, 2015

Merry Ornaments (Michelle Leone)


Merry Ornaments
by Michelle Leone


Yay...... I'm starting with a few holiday card projects and wanted to include some pretty metallics! The silvers and golds are oh so lovely (if a bit of a challenge to photograph!) and add that extra bit of pizzaz.

I've used the Large Solid Ornament Duo dies and the Fancy Scroll die to fashion these merry ornaments in a classic holiday red/gold, a pretty aqua/silver combo and a trio in white, gray and silver. The clean and simple sentiments and May Arts silver/gold fine metallic cording are the perfect added touches. 

Hopefully, LOTS more holiday cards/tags to come!


*** Materials for this project available at www.franticstamper.com.
 
FRA-Die-09428
 
FRA-Die-09657
 
FRA-Die-09640

Thursday, November 19, 2015

Fancy Deer, Take Two (Jen Carter)


Fancy Deer, Take Two

by Jen Carter

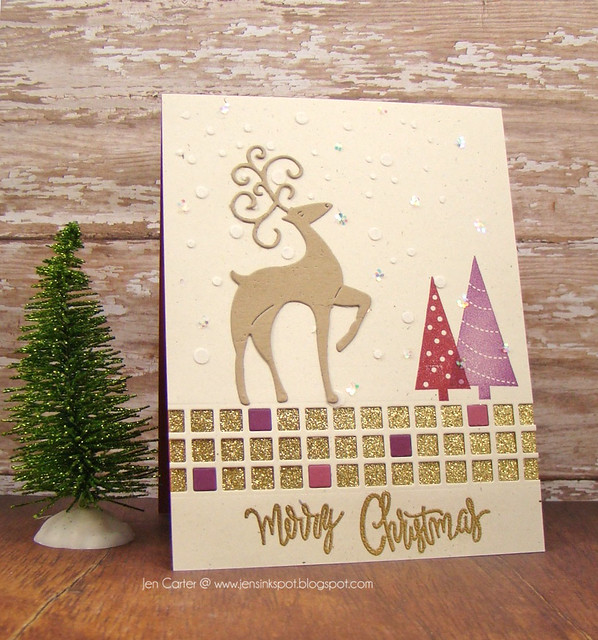
For this card I started by cutting the border with the Lattice Card Band die from Frantic Stamper. I backed it with gold glitter paper and then added in a few pieces of cardstock in random places to create interest.  I next stamped two trees from the Triangle Trees clear stamp set in colors to match the cardstock squares.

Next, I created a stencil using the Snowfall Reverse Cut Die.  After creating my stencil with white cardstock I used white texture paste to create the snowflake dimension.  I added in some random glitter snowflakes as well.

Jen Carter Merry Christmas Deer Side

 I used the deer that I cut out from the panel I used on this card, cut from the Large Fancy Deer die.  The sentiment was heat embossed with gold powder and is also from the Triangle Trees clear stamp set.

Thank you for visiting today!  I hope you have a wonderful day!


*** Materials for this project available at www.franticstamper.com.
 
FRA-Die-09665
 
FRA-Die-09613
 
FRA-Die-09675
 
FRA-CL-027

Sunday, November 15, 2015

Fancy Deer (Jen Carter)


Fancy Deer
by Jen Carter


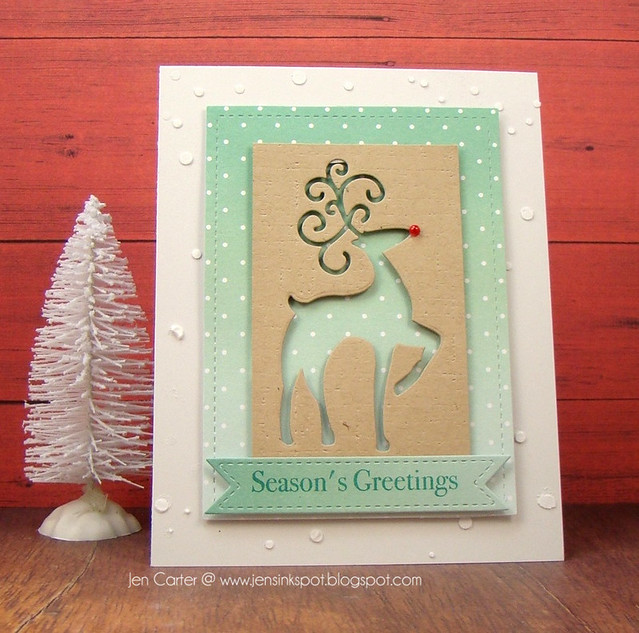
Hello everyone!  Today I have a holiday card to share.  For this one I used the negative part of the die cut as my main image.

Jen Carter Fancy Deer Seasons Greetings Front

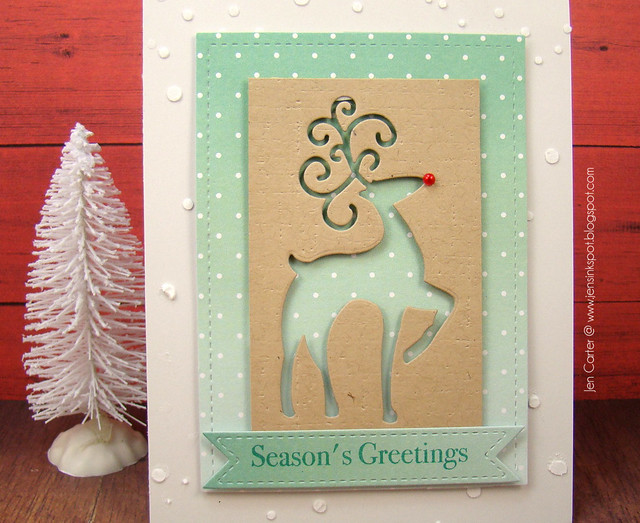
I just love mint, white & kraft paired together!  To create this card I used the Large Fancy Deer die from Frantic Stamper and cut it out of a piece of textured kraft cardstock. I added a red enamel dot to the nose for a pop of color.  I die cut the frame from the Elementals #1 set of dies to create the mint polka dotted mat which I then popped the negative deer panel up from.  I die cut the sentiment banner from the Diagonal Card Sketcher die set and stamped "Season's Greetings" with the clear Round Christmas Vignettes stamp set.

Jen Carter Fancy Deer Seasons Greetings Closeup

Can you see the white lumpy snowflakes on the background of the light gray cardstock?  To create this I used the Snowflake Reverse Cut die and cut a piece of white cardstock with it to use as a stencil.  I then took some texture paste (like this) and used an old gift card to spread it around on my stencil being sure to hold the paper still.  Once I carefully removed the stencil, I let my snowflakes dry and then adhered the rest of the card-front on top of it.  It takes a little time, but I sure like the look of those snowflakes!

Thanks for visiting!


*** Materials for this project available at www.franticstamper.com.
FRA-Die-09675
FRA-Die-09613
FRA-Die-09375

FRA-CL-022

Friday, November 13, 2015

Love the Moment (Karen Letchworth, Guest Designer)


Love the Moment
by Karen Letchworth


Having been around for 50 years, I've learned that it's important to "love the moment".  So many times, we get so caught up in the chaos of life that we forget to slow down and enjoy the small things along the way.  Learning to love the moment brings us joy in the details of life, and I encourage you all to do the same.  Life really is about all the little things.


I made this card using a mish-mash of old patterned papers.  Then, I added some tags, some ribbons and laces, and then.....the star of the card - THE FLOWERS.  They were die-cut from wool felt and vintage lace using one of Frantic Stamper's Precision Dies called Large Layering Posies.  These awesome die-cuts went through the wool felt (and even the vintage lace) like a knife through warm butter!  They cut out so easily, and I simply layered them into the beautiful flowers you see on my card.  Down at the bottom right of the vellum tag, I added two more small flowers.  Those are the centers of this die-cut.  You get two sizes (two dies) in this one lovely set, and that gives you options.  I added some sweet little pearl gem stickers to the centers of my die-cut flowers.

Isn't it amazing how much dimension you can get from just this one small die cut?  It really is fun to use Frantic Stampers Precision Dies to cut more than just paper.  The options are truly endless.  They will cut through burlap, canvas, material, ......and even wool felt and lace.  It sure made making this card fun and easy.  I encourage you to check out all of Frantic Stamper's AMAZING Precision Dies.  You will quickly be as in love with them as I am, and you'll really find yourself "loving the moment" when you craft with them!


*** Materials for this project available at www.franticstamper.com.
 
FRA-Die-09557

Wednesday, November 11, 2015

"Autumn In The Wildwood" (Rozy Smith)


"Autumn In The Wildwood"
by Rozy Smith


Start with a black card base. Cut your card panel out using a white shade (there is another project using this die that will be placed on the Face Book page and this white portion is the throw away backing from the original). No need to waste anything!

Adhere the panel to the black cardstock. Using the Petite Maple Leaves die cut out several leaf sets from patterned papers. The paper, for the leaves on this card, were made using the Shaving Cream method. If you would like something really original, try making your own paper. They come out beautiful.

Adhere a cream colored bow to the top right of the card and position one bird from the Small Birds Die Set. That simple!

Have fun with all the new & old creative dies in the Frantic Stamper Die collection. The dies are wonderful and cut like cutting butter! Hope you are all enjoying Fall!

Rozy


*** Materials for this project available at www.franticstamper.com.
 
FRA-Die-09663
 
FRA-Die-09599
 
FRA-Die-09084


Sunday, November 01, 2015

Design Team News


Today we thank our former Guest Designer, Marilyn Scheller for sharing her wonderful artwork with us. We wish her all the best as she leaves our team. We hope to some day have her join us again!

Today we also welcome our newest Guest Designer, Lori McAree. Lori will be with us for the next three months, sharing her work with us both here and on our FaceBook page. Please join us in making her welcome.


Here is a little about Lori, in her own words:


Hi! I'm Lori McAree and I am so excited to be guest designing for Frantic Stamper! I've been crafty all of my life but after the first time holding a stamp I was hooked!! It's been about 10+ years and still going strong! I am primarily a CAS stamper but like to dabble in different mediums and add a few layers from time to time. When I'm not stamping I do enjoy cross stitch, going to classic car shows or outdoor activities with my husband and spending time with family.