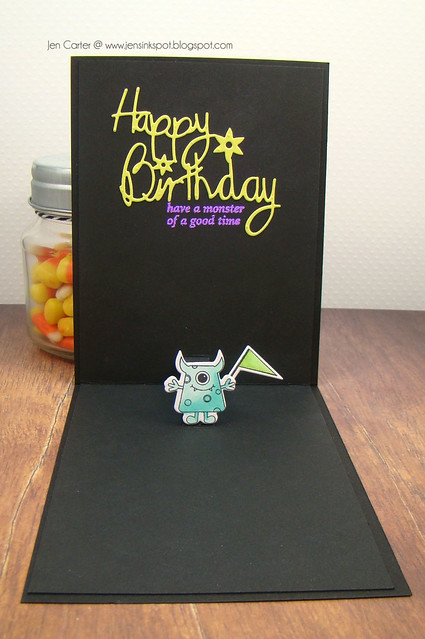
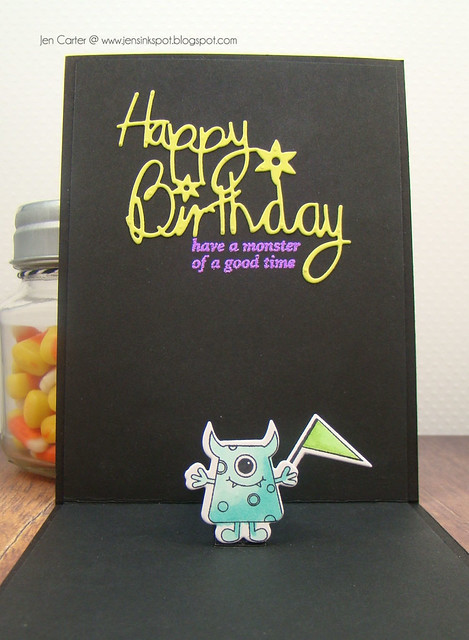
For today's card I thought a little outside the box. I love the new Frantic Stamper Snowflake Reverse Cut die! As soon as I saw it I knew that this is one I'd go back to time & time again. But, since I'm looking forward to FALL and not winter, I thought that I could put this die to another use as well! Yep! I turned those little snowflakes into eyeballs! :) After I cut out the die from black paper, I backed it with a bright yellow cardstock. I used a black marker to make a little dot for eyeballs on some of the yellow circles. I think it looks like monster eye balls. Then, I heat embossed the sentiment from the cute Monster Mash Up stamp set in Neon Purple embossing powder. I could see using this die and doing something similar with the eyes with the Birch Trees & other tree dies (like this one)!
When you open up the card you have a very simple message and a little guy greeting you! :) I thought about adding a lot of monsters to the inside, but thought that this way was so much cuter.
A couple of days ago Fran got a request from a customer asking for a card and instructions using the Flip Card #1 die.
The Flip Card die is a very versatile die. In the next few days I will show you three different ways I have used the die, with detailed instructions of how I used it.
For this first card in the series, which is a standard 4 1/4"x5 1/2" card, I wanted to center the cutout on the card front. To make it really simple for me to make this kind of card (with the cutout centered on the front of a standard card) I created a guide out of scrap card stock. I made the guide the same height as my card (5 1/2") but only half as wide (2 1/8"). I then marked one edge of the card 7/8" from each end. You can get a copy of my guide here.
(To come up with the 7/8" I subtracted the length of the die from the height of the card (5 1/2" - 3 3/4" =1 3/4"). That gives me how much space is left over once the die is placed on the card. Since I want to center my die I would need to divide that left-over space in two equal pieces and put the die between them. 1 3/4" divided by two is 7/8".)
My card blank is 8 1/2" x 5 1/2", scored at 4 1/4", but left flat.
I line-up my guide with the top and left edge of the card, and then place the die at its edge, in between the two marks, and tape it into place.
I then ran the card through my die cutting machine. When done cutting, I used my Scor-pal to finish scoring my card along the line scored by the die, at the 2 1/8" mark, being careful not to score across the cut-out portion.
Now, for this particular card I wanted to create a field of stars, so I used my starfall die on the right side of the card. I glued a piece of yellow card behind the right side of the card, and then another piece of black behind that.
It was finally time to fold my card. First I valley folded the card on the center score line, and then mountain folded the score around my cutout.
I reinforced the folds with my bone folder, making the card lie flat.
All that was left to do was decorate the card. I cut extra yellow stars for my project with the Starfall die.
I cut my "aliens" using the Monsters die and white card stock. I stamped their corresponding image onto them, and colored them. I set them aside.
Using an old Stampendous clear stamp set called "Hot Rocketz", I stamped rockets and flying saucers onto white card stock. I colored the images, fussy cut them, and set them aside.
Using my largest plain circle die I cut a circle. I colored it gray with my Copics and added a small crater to it. I glued the circle in place on the inside of my card and trimmed the circle so it was flush with my card's bottom edge.
I glued my rockets into place. I cut a small slit in the saucer and inserted one of my monsters into the slit. I glued the saucer into place. I glued two more of my monsters in place. (It turned out I only had room for three of the four monsters, but that is okay, I'll use the other on a different project sometime.) I added google eyes to each of the monsters' eye(s), and a banner to the hand of one of the monsters.
I stamped my sentiment (from the same Stampendous set).
I glued on a few of my extra yellow stars on the front and inside of the card.
Ta Da! I hope you agree that this card is just "Out of this World"!
If you would like a little more help on using the die in this manner, I have a little video for you. Please don't mind my voice. We have a lot of smoke in our little valley because of all the wildfires, and the smoke has really irritated my throat.
Oh my goodness, this card was so much fun to make!
Started with a Happy Birthday base, covered it with multi shades of Polka Dot Paper (America Kuhn had shipped me the paper, thanks America!)
The monsters and sayings were created using the Monsters Outlines Die and the Monster Mash Up Stamp Set. How sweet is that having both the stamp set and the matching die to cut your work out!
The fun part is making each little monster an individual. A little kid would love this card and it would be awesome mounted in a shadow box with pictures of the party!