Showing posts with label Pop-Up Card Bases. Show all posts

Sunday, August 30, 2015

Warning! Monster Inside! (Jen Carter)


WARNING! Monster Inside!
by Jen Carter


For today's card I thought a little outside the box.  I love the new Frantic Stamper Snowflake Reverse Cut die!  As soon as I saw it I knew that this is one I'd go back to time & time again.  But, since I'm looking forward to FALL and not winter, I thought that I could put this die to another use as well! Yep!  I turned those little snowflakes into eyeballs! :)  After I cut out the die from black paper, I backed it with a bright yellow cardstock.  I used a black marker to make a little dot for eyeballs on some of the yellow circles.  I think it looks like monster eye balls.  Then, I heat embossed the sentiment from the cute Monster Mash Up stamp set in Neon Purple embossing powder.  I could see using this die and doing something similar with the eyes with the Birch Trees & other tree dies (like this one)!

Jen Carter Monster Inside Inside

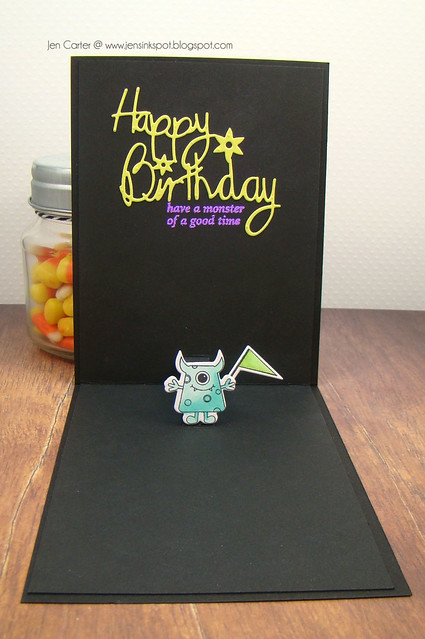
When you open up the card you have a very simple message and a little guy greeting you! :)  I thought about adding a lot of monsters to the inside, but thought that this way was so much cuter.

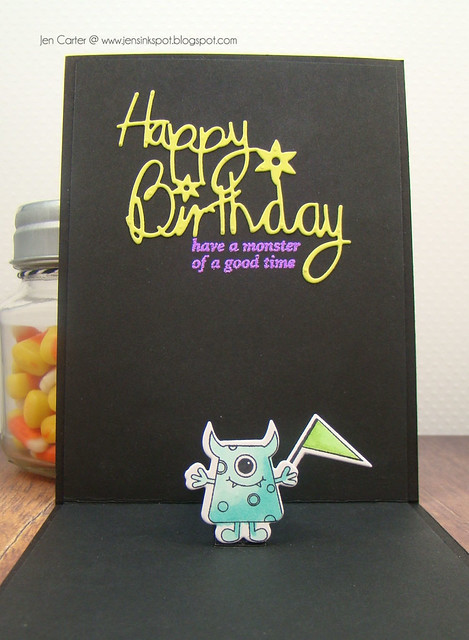
Jen Carter Monster Inside Closeup

The Floral Happy Birthday die cut seemed perfect for this card because it was fun & playful, much like the card. I used Stick It! to adhere my sentiment die cut.  It's SO much easier this way! I embossed the sentiment in neon purple again and it is also from the Monster Mash Up stamp set.  I used the Pop-Up Bases die to make the little monster (from the Monster Mash Up stamp set & Monster Mash Outline Dies) stick out from the front of the card when it is opened.  Such a fun surprise! 


*** Materials for this project available at www.franticstamper.com.
 
FRA-Die-09613
 
FRA-Die-09272
 
FRA-Die-09585
 
FRA-Die-09414
 
FRA-CL-018


Saturday, April 04, 2015

Easter Pop-Up Card (Ann Greenspan)


Easter Pop-Up Card
by Ann Greenspan


Frantic Stamper has a set of 7 dies called Pop-Up Card Bases that allow you to make a pop-up card without having to manually cut the pop-up supports.

When I make a pop-up card, I like to work on the inside layer first then once that is done, adhere the inside to the actual card base.  The first thing I did was to adhere a blue and green panel for the inside of the card so it had a nice background.  Then I put the largest of the pop-up dies on the center where the normal fold line would be but didn't fold the card until after cutting this first die.


Use your fingers to reinforce the score lines that the die made for you.


I always try to remember to hold the object that will be attached to the pop-up area onto the card to be sure that when the card closes it won't stick outside the card.  You also want to be sure that the size of the pop-up die is the correct one for the embellishment that will be popped up.  I accidentally forgot to do this and when I placed a cloud  on the pop-up, you could see the white card base that would go behind the panel, so I ended up not using that pop-up space for that cloud.


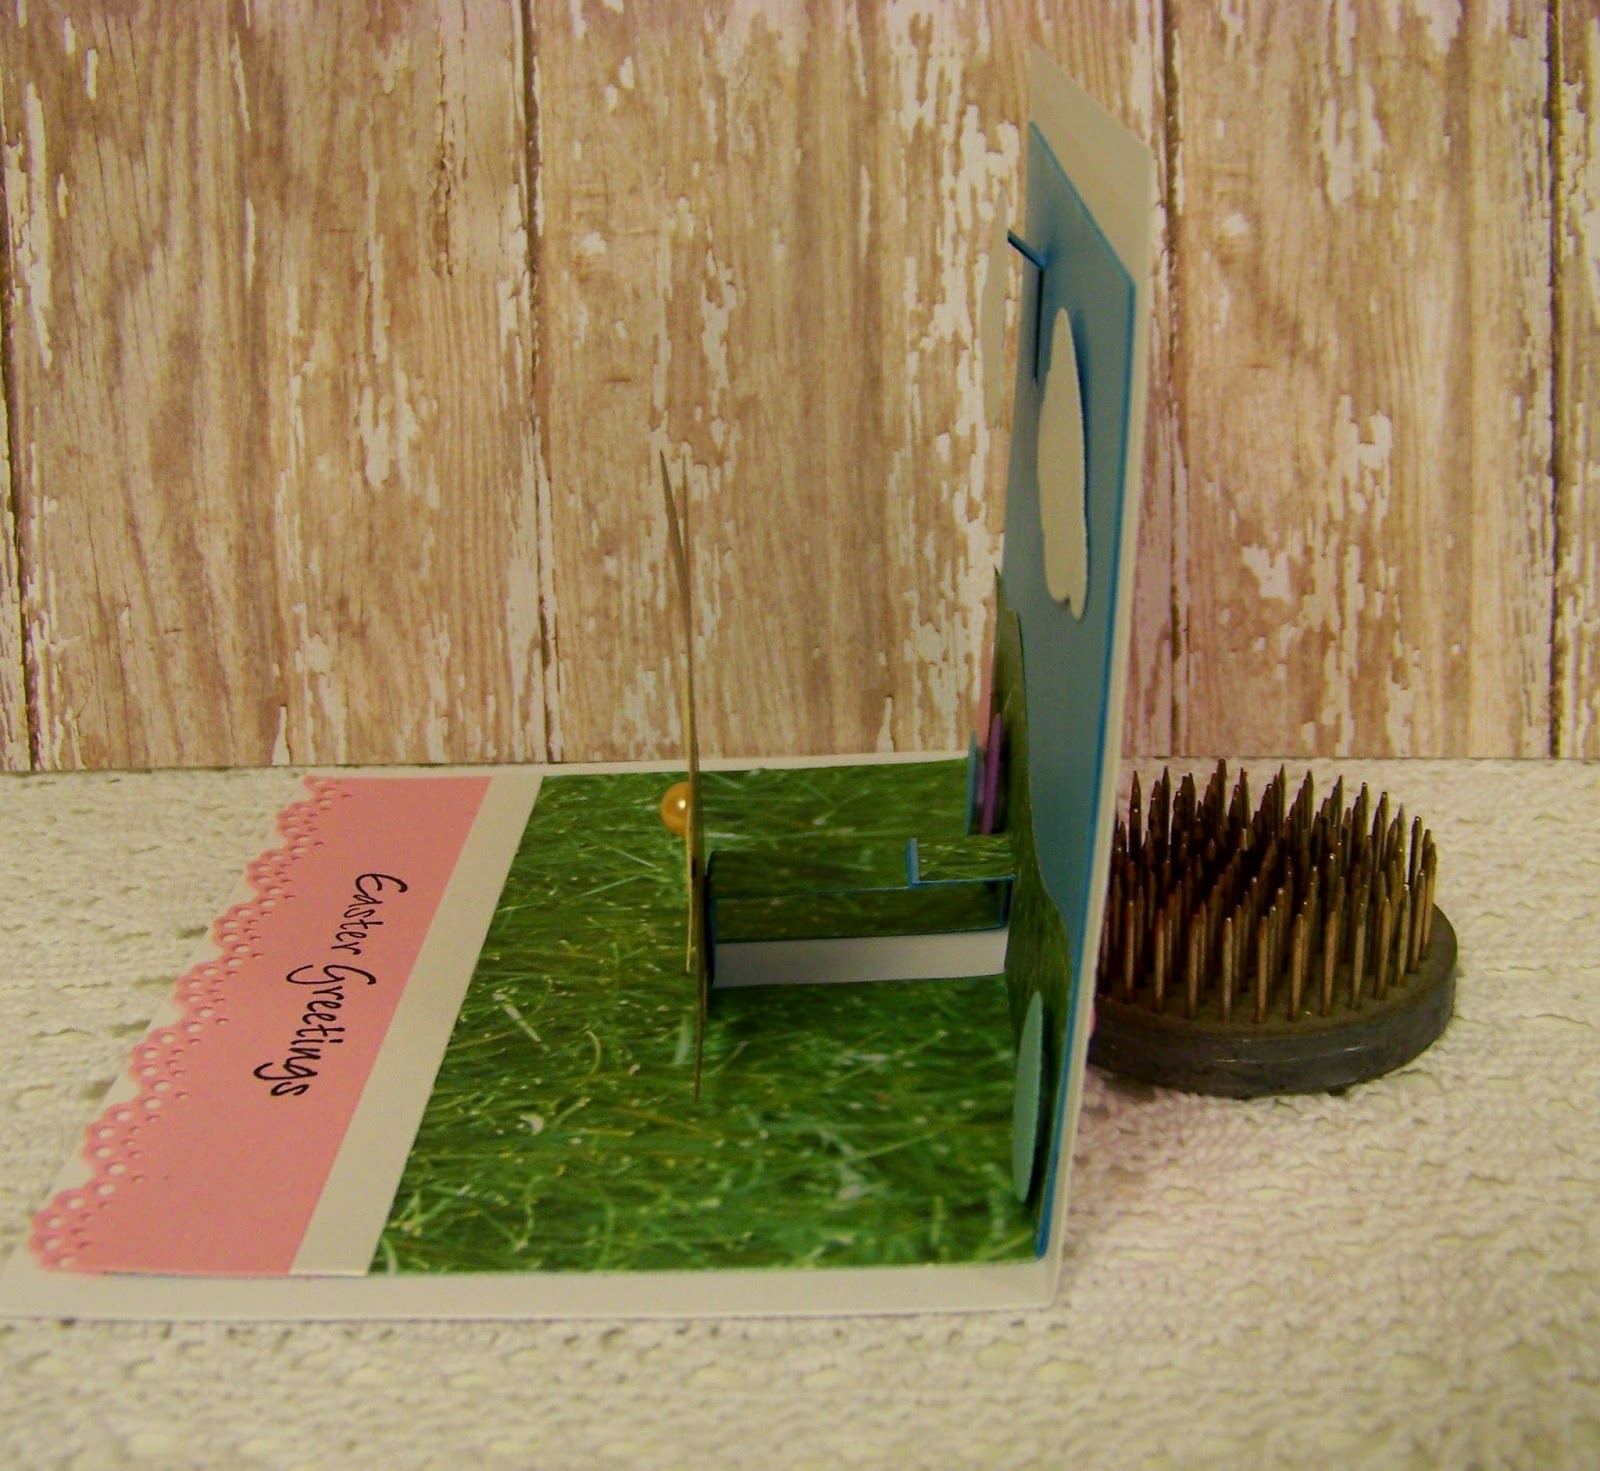
Once the pop-ups are adhered to the card, you can decorate the inside and front.  Below is a side view of what the card looks like with the two pop-ups.


Now you can decorate the front of the card however you wish.  I chose to put a bunny and butterflies on mine:


*** Materials for this project available at www.franticstamper.com.
 
FRA-Die-09414
 
FRA-Die-09129
 
FRA-Die-09390
 
FRA-Die-09388

Thursday, April 02, 2015

Pop-Up Bases Video #2 (Jen Carter)


Jen Carter Cupcake Pop Up 1
Pop-Up Bases Video #2
by Jen Carter


Hello everyone!

I have another card & video to share today.  I told you a few weeks ago when I shared a video on how to use the Frantic Stamper Pop Up Bases dies that I would make another one to show how to use a few more dies in the die set.

So, first here is my card and then the video will follow.

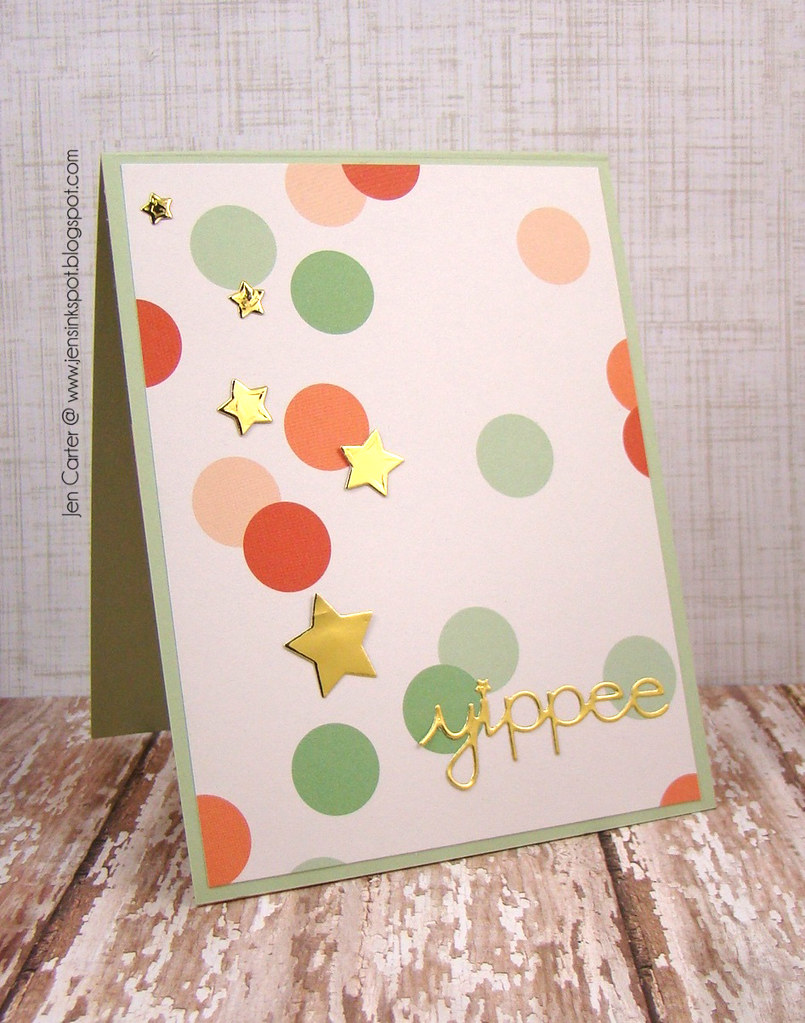
Jen Carter Cupcake Pop Up 1

Here's the front of my card.  I kept it pretty simple because I want the impact to be on the inside. I used a dotted patterned paper and then added in gold stars & a gold die cut sentiment from Frantic Stamper.

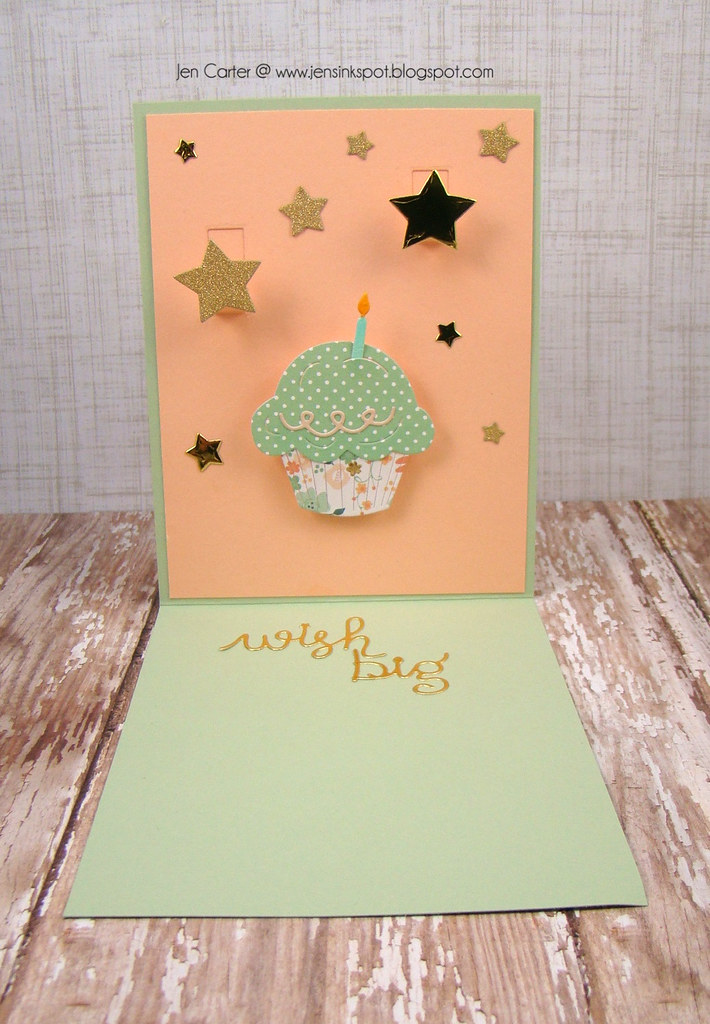
Jen Carter Cupcake Pop Up Inside 1

This is the inside. I used the 3 little rectangle dies from the Pop-Up Bases die set to pop up the cupcake and the two largest stars.  The cupcake dies are a new die set from Frantic Stamper called Delicious Cupcake.

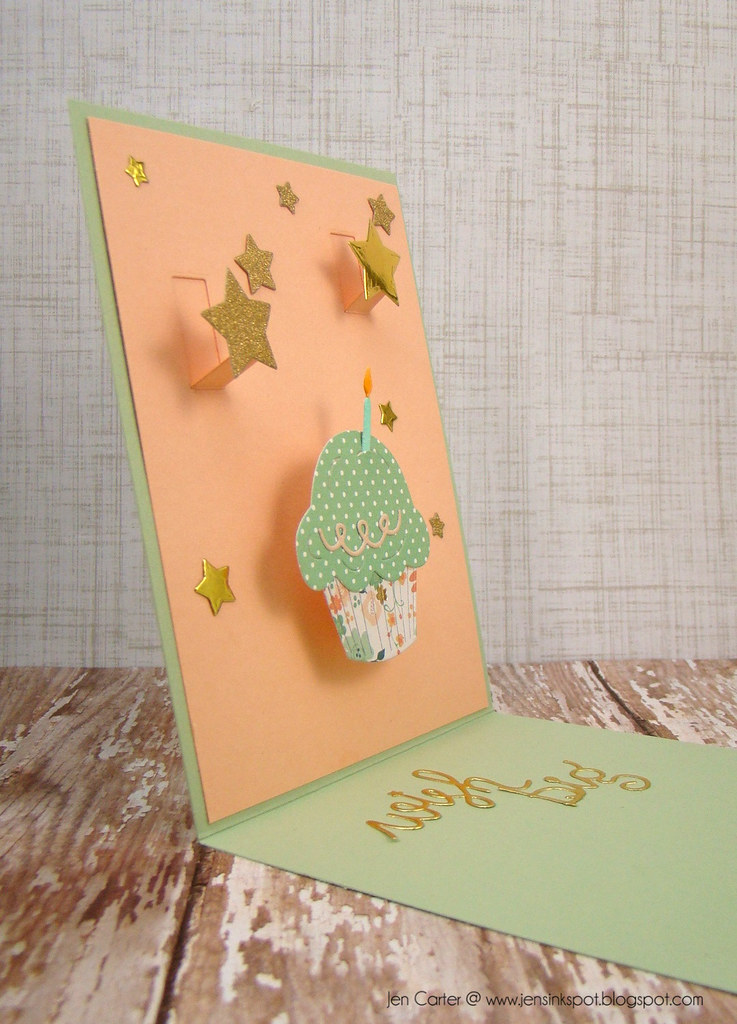
Jen Carter Cupcake Pop Up Inside 2

Here is a side view where you can get a better idea on how the items are popped up.

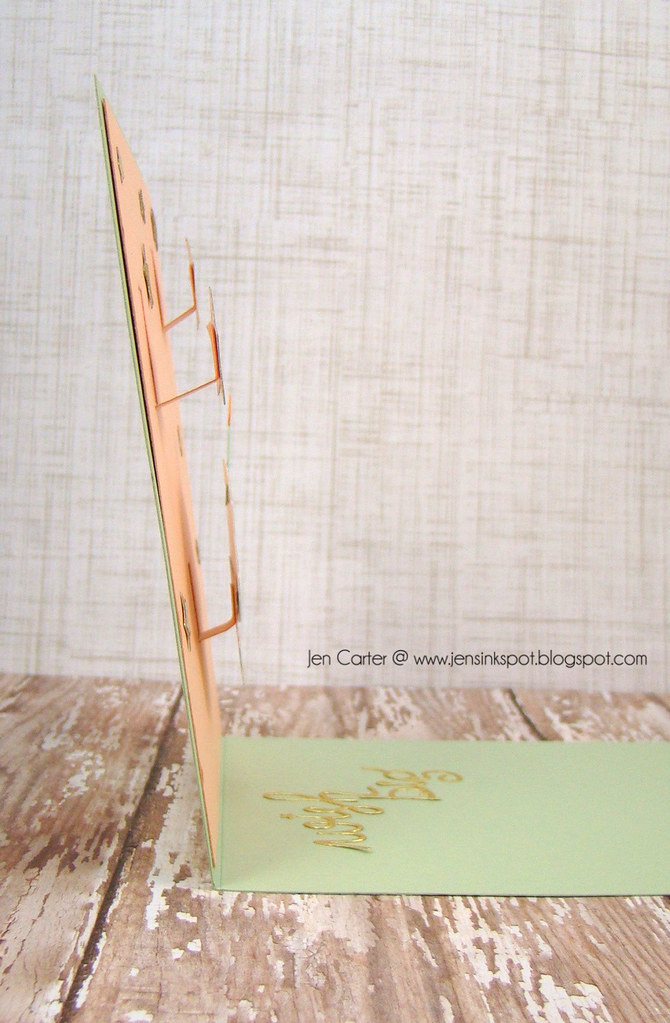
Jen Carter Cupcake Pop Up Inside Side

And you may be wondering why I'm showing this picture! The reason is so that you can see how thin everything is!  It ALL folds up and lays fairly flat and is easily mailed!  NO BULK and you still get items popped up quite a bit!  I LOVE that.  And, you could do this same thing on the front of a card if you wanted in place of pop dots (just an idea)!  :)

So how did I do it?  The instructions are in the video below.  Now remember I am still learning and I'm not very good at editing yet, but I am learning!  Thanks for hanging in there with me!


Thanks for hanging in there with me!  I know that this was  long post!  I hope you enjoyed the video!


*** Materials for this project available at www.franticstamper.com.
 
FRA-Die-09414
 
FRA-Die-09457
 
FRA-Die-09464
 
FRA-Die-09375
 
FRA-Die-09191


Saturday, March 28, 2015

Pop-up THANKS (Kathy Berger)


Pop-up THANKS
by Kathy Berger


Everyone who knows me knows that I just love cards that do something. This is one of those cards! Its somewhat simple front is the cover for a fun pop-up card that has real "WOW!" factor.


But before we get into how I did that, let's talk about how I made the front...

First I cut a circle out of a white panel of card stock and also out of gray woodgrain card stock. I pieced the woodgrain circle into the panel of white card, replacing the cut out circle. I taped them in place on the back using wide post-it tape.

Next I cut the Solid Spring Sprig out of the white panel, placing it so it was cut from both the gray and the white. I also cut the sprig out of dark gray card stock. I pieced the gray sprig into the hole left by cutting the white panel.

I glued the panel to a piece of dark gray card stock, just a tad bigger than the white, and debossed it with a leafy embossing folder, then ran it through the machine one time without a folder to flatten it back out, making the debossing a more subtle background effect.


I then mounted that piece to a light gray panel, wrapped that with a bit of gray and white bakers twine, and then mounted it to my card. A few iridescent sequins finished the front.


And now for how I did the inside of the card! It was so easy, you aren't going to believe it!

I cut a panel that would measure 1/4" smaller all around than the main card (3.75" x 10.5").

I scored the card at the center line (5.25"). I placed the bottom of Thanks Card Band die against the score line and marked the top of the die with a pencil. Then I moved the die so that the top of the die aligned with the score line, and scored at the die's bottom edge, and then taped the die in place.

Next I aligned the main die from the Pop-up Card Bases die set with the pencil line so that the short end was toward the THANKS band die, and so the die was centered on the card. I taped it into place.


I ran the whole thing through my die cutting machine. I folded on the score lines and, voila!, my pop-up mechanism was done! I glued it down to my card, making sure not to get glue on any of the actual pop-up parts, but adhering the areas near them well.

All that was left to do was decorate!


I ran the Thanks Card Band through the die cutting machine on a strip of the gray woodgrain card stock that was cut to the exact height as the die. I glued the resulting Thanks over the Thanks on the pop-up mechanism and trimmed at the edges.


I used three different sizes of Coved Labels from the Coved Labels and the Elementals #7- Coved Labels sets to create my label for my sentiment (from Technique Tuesday). I glued the layers into place on the card.


I cut the Solid Spring Sprig out of the lighter gray card stock, and the Open Spring Sprig from the dark gray. I glued them on top of the THANKS box with their stems across the crease.

And now for the POP of color to add to the physical pop!

I cut the Sunburst Card Panel from both orange and sun-yellow card stocks. I used a circle die (the next size down from the one I used for the circle on the card front) to cut the sun out of the two panels. I layered the two suns on top of each other, just barely offset, and then affixed them to the pop-up mechanism. The sun really added just the POP of color I wanted, and went perfectly with my sentiment, don't you think?


Here is one last look at the inside of my card. I hope you have enjoyed it as much as I enjoyed making it!


Smiles,


*** Materials for this project available at www.franticstamper.com.
 
FRA-Die-09166
 
FRA-Die-09173
 
FRA-Die-09434
 
FRA-Die-09414
 
FRA-Die-09128
 
FRA-Die-09373
 
FRA-Die-09141