Wednesday, March 23, 2016

Bunny Barrettes (Jen Carter)


Bunny Barrettes
by Jen Carter


Hello everyone!  I wanted to share some projects I made using Spring/Easter dies from Frantic Stamper and some felt.  For today's felt projects I'm going to share three different barrettes I made for my daughter and I'll show you pictures of her modeling them too!

The picture above shows all three barrettes that I'm going to share in more detail below.  You can see that on two of them I stitched the felt pieces together with a sewing machine (you could use needle & thread too) and the other one I used hot glue on.
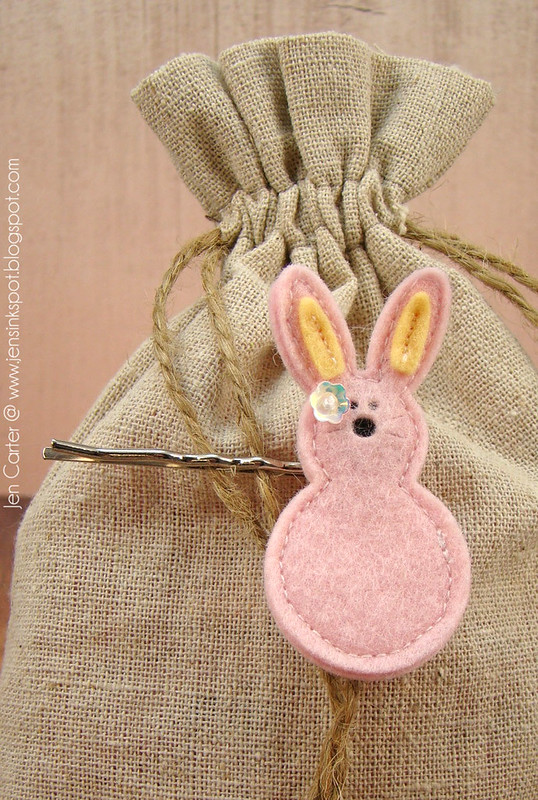

Jen Carter Felt Bunny Hair Barrettes Pink Bobby Pin

For this one I used the Large Marshmallow Bunny die and a large bobby pin that has a circle on the back to attach your project onto. To attach the felt bunny I hot glued it to the circle but you could also hide the circle inside the bobby pin and sew.

I used a small piece of black felt between the pink layers so that it would show the eyes and nose.  I also used the sewing machine to add the yellow ears.  To attach the flower sequin I used a French Knot.
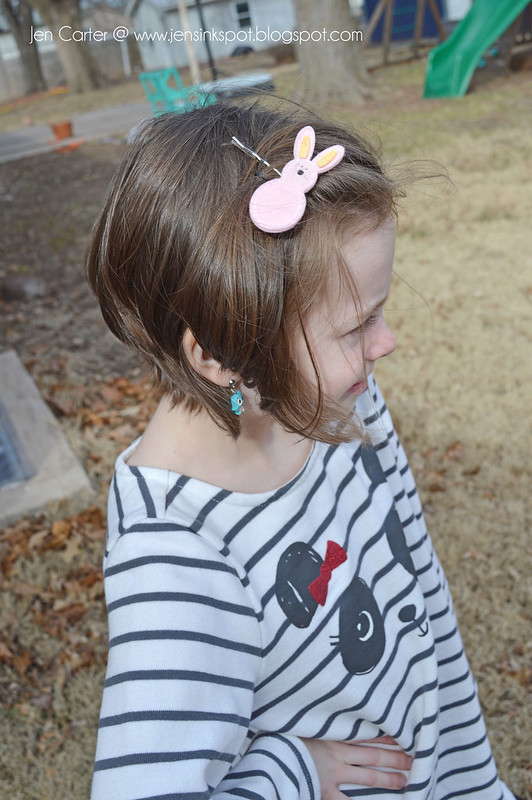
Jen Carter Sadie Pink Bunny

This is my sweet daughter modeling it (on a very windy day).
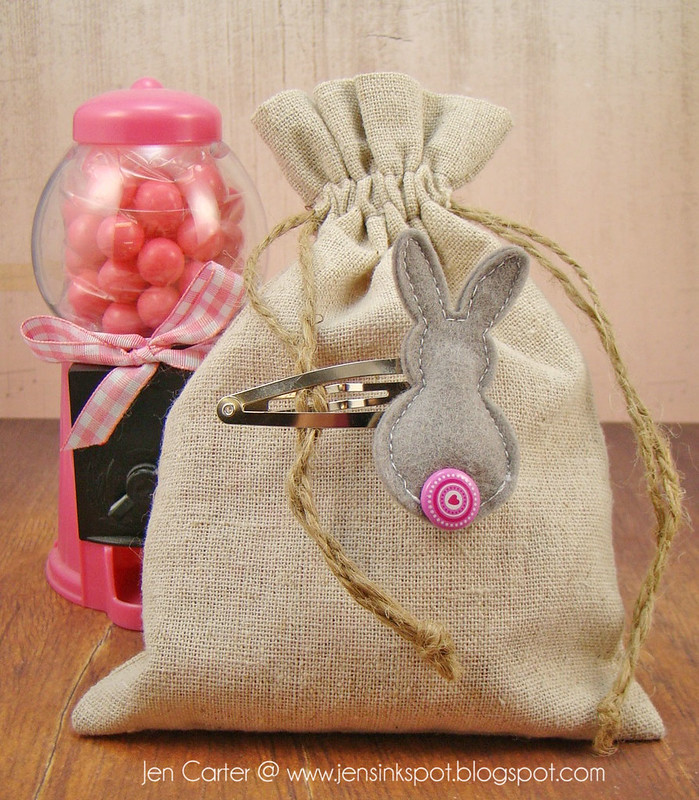
Jen Carter Felt Bunny Hair Barrettes Bunny Back Bunny 2

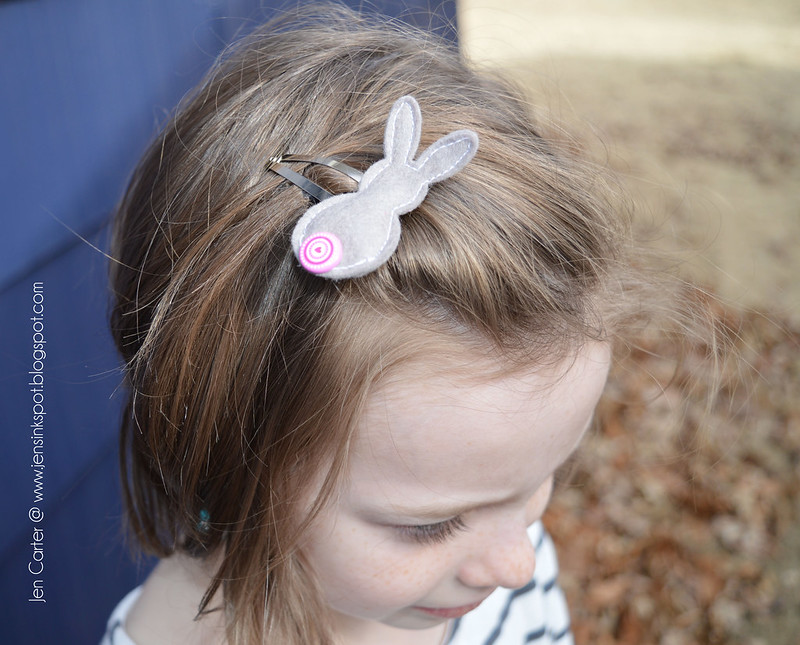
Next up is the same die Large Marshmallow Bunny but I used it as the back of the bunny.  I cut a hole with my crop-a-dile to attach the brad (which turned as I was sewing and I didn't realize it, it was straight when I started). I sewed past where the brad went and then inserted it and continued sewing.  To attach the barrette I used thread and a needle to stitch it on to the backside.

Jen Carter Sadie Bunny Button

And again my daughter modeling.

Jen Carter Felt Bunny Hair Barrettes Bunny Back Large Gray

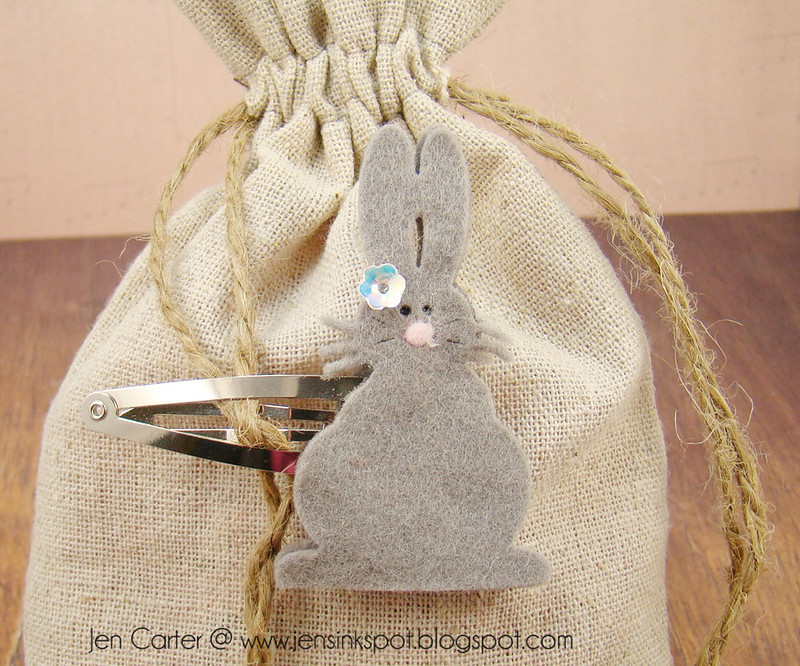
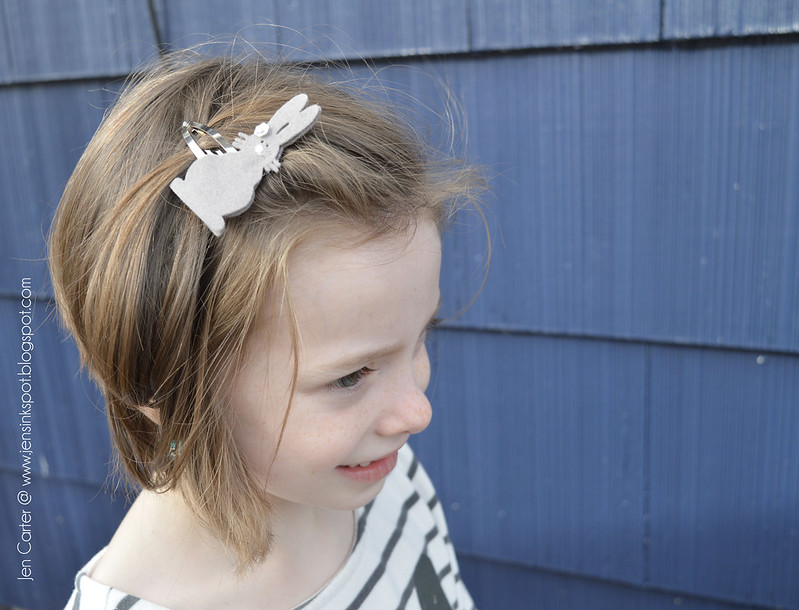
And last I used the Bunny Back die and instead of sewing it I used hot glue to put her together. I cut off the whiskers on the back layer of the bunny so that they lined up properly.  I used the face from the Large Marshmallow Bunny die and it fit perfectly.  I also hot glued the flower sequin to her head.
Jen Carter Sadie Bunny Large

And again the cutest little girl.  I may be slightly biased! :)

Thanks for joining me today.  I hope you feel inspired! 


*** Materials for this project available at www.franticstamper.com.
 
FRA-Die-09817
 
FRA-Die-09819


Tuesday, March 22, 2016

Peeking Bunnies (Karen Oliver)


Peeking Bunnies
by Karen Oliver


This card features the Peeking Bunny Square Die set of three adorable little bunnies. They separate so you can use all three or each individually.  I double cut them to add the gingham accents and used a fine marker to add the whiskers.  I then cut a coloured square to put behind each bunny for some dimension and colour.  The border is cut with one of my favourite dies, the Stitched Scene Builder.  Final touches: Celebrate stamp from the Celebration clear stamp set and some sequins.

This is such a sweet die set you just have to love it.


*** Materials for this project available at www.franticstamper.com.
 
FRA-Die-09818
 
FRA-Die-09403
 
FRA-CL-039

Monday, March 21, 2016

Hop Into Easter (Karen Letchworth)


Hop Into Easter
by Karen Letchworth


The Easter Release of Precision Dies at Frantic Stamper brought all of us SO many great options in the way of new die-cuts to help us to prepare for Easter.  I was able to use three of these fabulous new dies on this little project I created for Frantic Stamper.


First, I used the new Basket Weave Panel to make a cut from wool felt that I cut down, folded over, and turned into an "Easter Basker" of sorts.  I tucked some green tulle (grass) and painted/glittered chipboard garden pieces into the Basket Weave Panel basket.  Then, on top of the basket I added one (of three) Bunny Backs (two in white, and one in pink with alternating tails).  The die-cut set includes the bunny and his cute fluffy little tail.  I attached this entire scene, which I backed with green cardstock cut/fringed to look like grass.  I attached the entire design to a large glassine bag that I folded half-way back up and machine stitched to create a pocket.  Into the pocket, I tucked a large photo/journalling mat that I cut from pink cardstok; and to which I attached the sentiment EASTER.  This EASTER sentiment was cut using the new Block Easter Sentiment.

I added some sweet lace and darling sequin accents to my project as well.


All the dies from the February releases are just as adorable and will help you create something really special for Easter.  From little party favors, gift items, cards, scrapbook pages and more - you are sure to LOVE the way these sweet die-cuts will help your projects to really STAND OUT and be remembered.  They're just so sweet, and they all work so well together.


Thanks for stopping by today.  I hope this project will really inspire you to pick up some dies from the Frantic Stamper Precision Dies February Release and get started on something special to give your loved ones this Easter.  Happy crafting!


*** Materials for this project available at www.franticstamper.com.
 
FRA-Die-09796
 
FRA-Die-09817
 
FRA-Die-09826

Sunday, March 20, 2016

Spring Is In The Air (Karen Oliver)


Spring is in the Air
by Karen Oliver


Today is the first official day of spring. But what you all think of as spring is some way off down here in New Zealand.  Autumn is in the air, the days are shorter and the evenings cooler, the trees aren't yet turning colour but its just around the corner. But I still couldn't resist a card to celebrate the day.

For this card I used the beautiful new stamp set called Spring is Blooming.  It has several spring blooms and I stamped them to fit in behind the circle, a bit like looking through a window into the garden.  The sentiment is from the same set.  I added accents in yellow as yellow is such a spring colour.  I hope you will enjoy the card and the season.


*** Materials for this project available at www.franticstamper.com.
 
FRA-Die-09291
 
FRA-Die-09637
 
FRA-Die-09195
 
FRA-CL-043

Saturday, March 19, 2016

He is Risen (Jeni Allen)


He is Risen
by Jeni Allen


I think this sentiment die, He Is Risen, is so pretty!! I love it and it is perfect for this time of year as Easter sneaks up on us!! I paired the detailed die with just a pretty floral paper and a few sequins...not wanting to take away from the beauty of the die! Simple and clean and it speaks "spring" to me!!


*** Materials for this project available at www.franticstamper.com.
 
FRA-Die-09808

Friday, March 18, 2016

Happy Easter with Peeking Bunny Squares (Alanna Moses)


Happy Easter with Peeking Bunny Squares
by Alanna


I'm in love with this newly released die set called Peeking Bunny Squares. There is so much detail in each of the dies. I decided to keep my bunnies white gave them lots of dimension. I did this by adhering Stick it to a piece of fun foam. I then ran the dies through my machine. I then took a piece of white card stock, also with Stick it and then die cut the bunnies again. This gave me adhesive on either side that was needed.

You can't tell in the photo but each of the bunnies were also given a liberal coating of clear Wink of Stella.


*** Materials for this project available at www.franticstamper.com.
 
FRA-Die-09818


Peeking Bunny Squares -- FRA-DIE-09818

Thursday, March 17, 2016

Hexagon Hello (Kendra Sand)


Hexagon Hello
by Kendra Sand


I am in love with how this card turned out!!  So fun and bright!!

I started by taking my main base layer of my card and randomly die cutting the smallest stitched hexagon from the Stitched Hexagons die set three times. I then also used that same die to die cut three different pieces of patterned paper. I picked bright colors as I wanted to make this card as fun and possible as I could!!

I then used the smallest hexagon die from the Hexagons In-Betweens die set to randomly die cut four hexagons from the card layer. And then again used the small hexagon to die cut them from pattern paper.


I then placed the hexagon patterned pieces into the die cut areas on the main layer.  Four of them were adhered to the actual card base and the other three I used a pop-dot so they would be the same height as the layer. I finished the card off by adding some bright colored enamel dots!!!


*** Materials for this project available at www.franticstamper.com.
 
FRA-Die-09830
 
FRA-Die-09829

Wednesday, March 16, 2016

Pop-Ups #2 (Jen Carter)


Pop-Ups #2 
by Jen Carter


Hello everyone!  Frantic Stamper just had a couple of new releases and I wanted to share a video I put together focusing on one of the new die sets called Pop-Ups #2, which is part of the Elementals series (#13). This new die set is a follow up to the original Pop-Up Card Bases die set.


I hope the video helped show how to use this very versatile die set!  As you saw, I also shared some dies that will be released soon so you know what you have to look forward to!

Here's one of the cards that I shared in the video that used products already available to order, from the Garden release!

Jen Carter Spring Pop Up Front


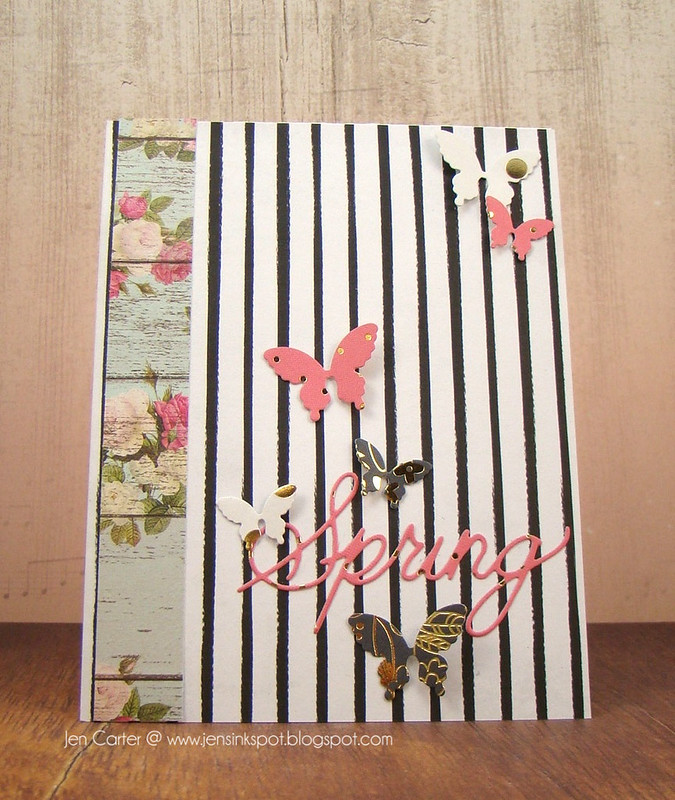
Here's the front. I used the new Spring word die and then used the oldie, but goodie Petite Butterflies die set


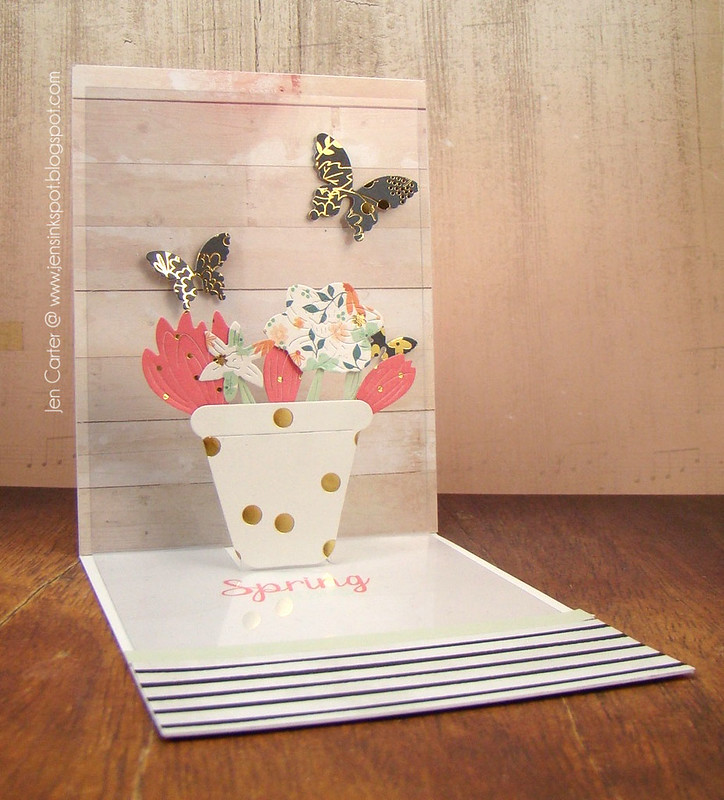
The magic for this card happens when you open it up.

Jen Carter Spring Pop Up Inside

I tried something different with this pop-up card.  I used acetate for my base.  It is a nice thick acetate, sold as clear cardstock, and supports the elements very well.  I used patterned paper for the background and then the acetate fit right over the top of it.  The flower pot is a new die set called Gardening Pots and inside it are flowers that I die cut using the Mix 'n Match Daffodils set & the Mix 'n Match Crocus set.

Jen Carter Spring Pop Up Inside Sentiment

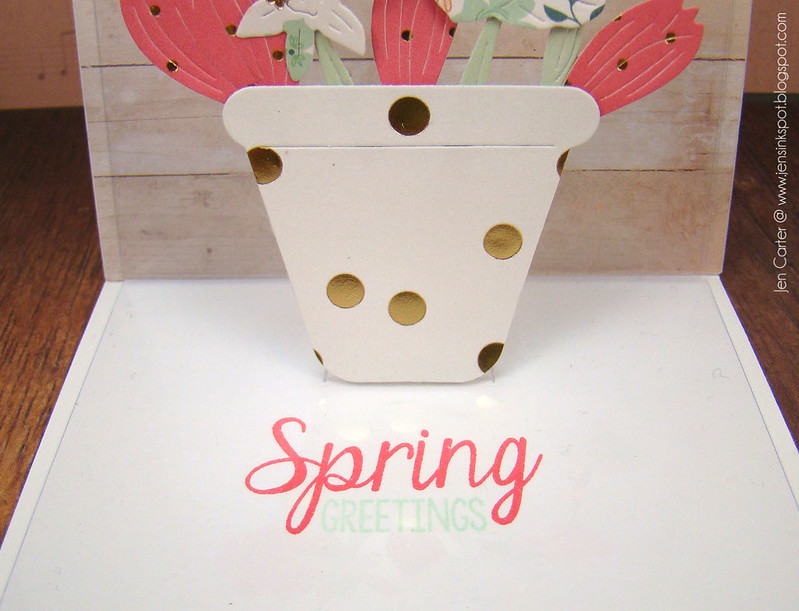
I stamped my sentiment on the white cardstock base and then the acetate went right on top of it.  The sentiment is from the new stamp set called Spring is Blooming.  

To adher the acetate to my card base I placed patterned paper at the bottom of the card (below the sentiment) and adhered it there.  I adhered the top panel by strategically placing adhesive under the butterflies.  It was just enough to hold it in place (and I adhered my butterflies with foam tape).

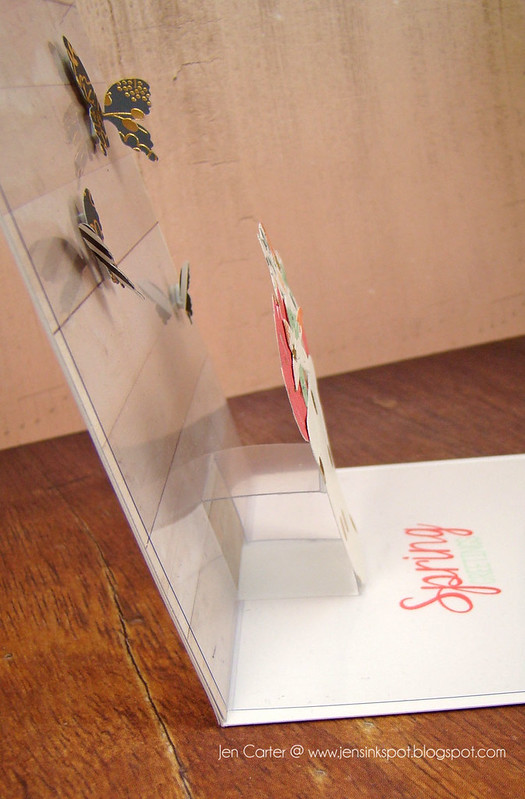
Jen Carter Spring Pop Up Inside Side View

Here you can see how the pop-up works and how it looks with the acetate.  I really like the effect it gives.

Thank you for joining us today!  I hope your day is wonderful!


*** Materials for this project available at www.franticstamper.com.
 
FRA-Die-09797
 
FRA-Die-09803
 
FRA-Die-09195
 
FRA-Die-09822
 
FRA-Die-09824
 
FRA-Die-09823
 
FRA-CL-043

Wednesday, March 09, 2016

In My Spring Garden Die Release


We are very excited to share our "In My Spring Garden" release with you! Our design team has really stepped up to provide you with some gorgeous samples using the new dies, and Kathy has put together a slideshow to share them with you.

We hope you will enjoy the new release!


Be sure to visit www.franticstamper.com to see these dies (and all the other wonderful products we carry).