Tuesday, May 31, 2011

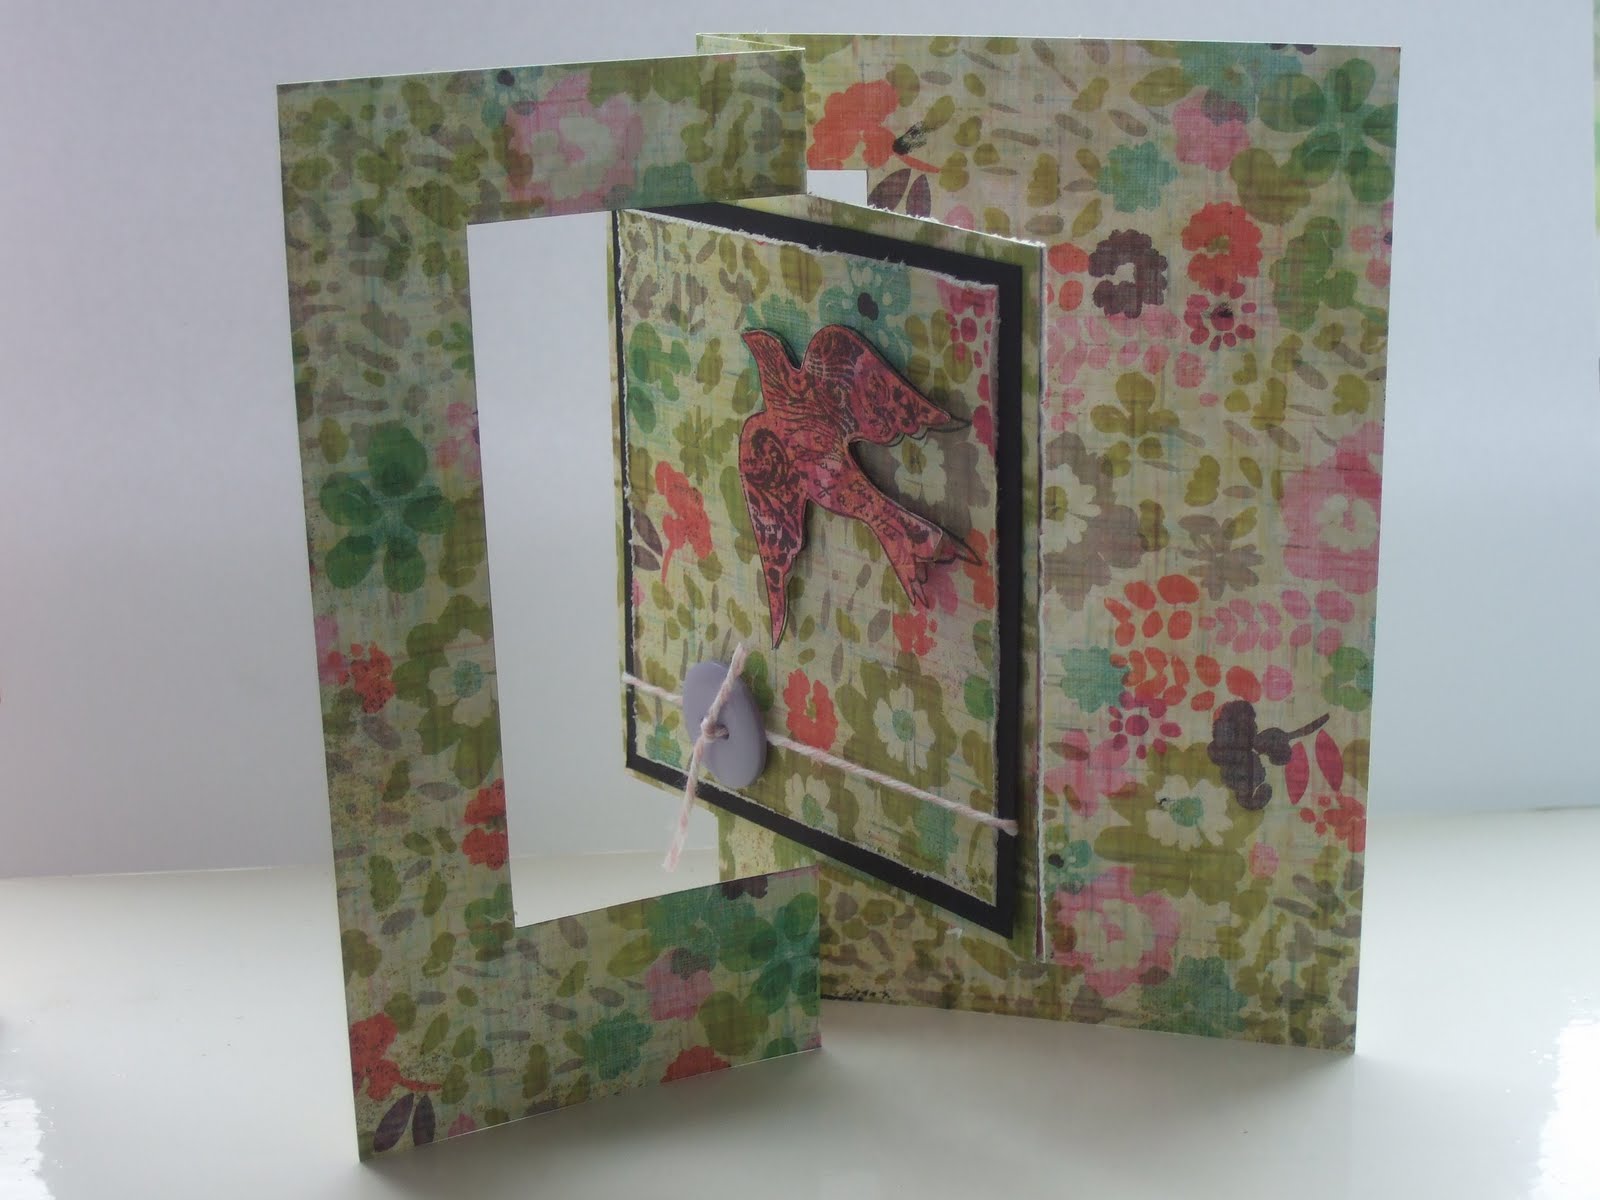
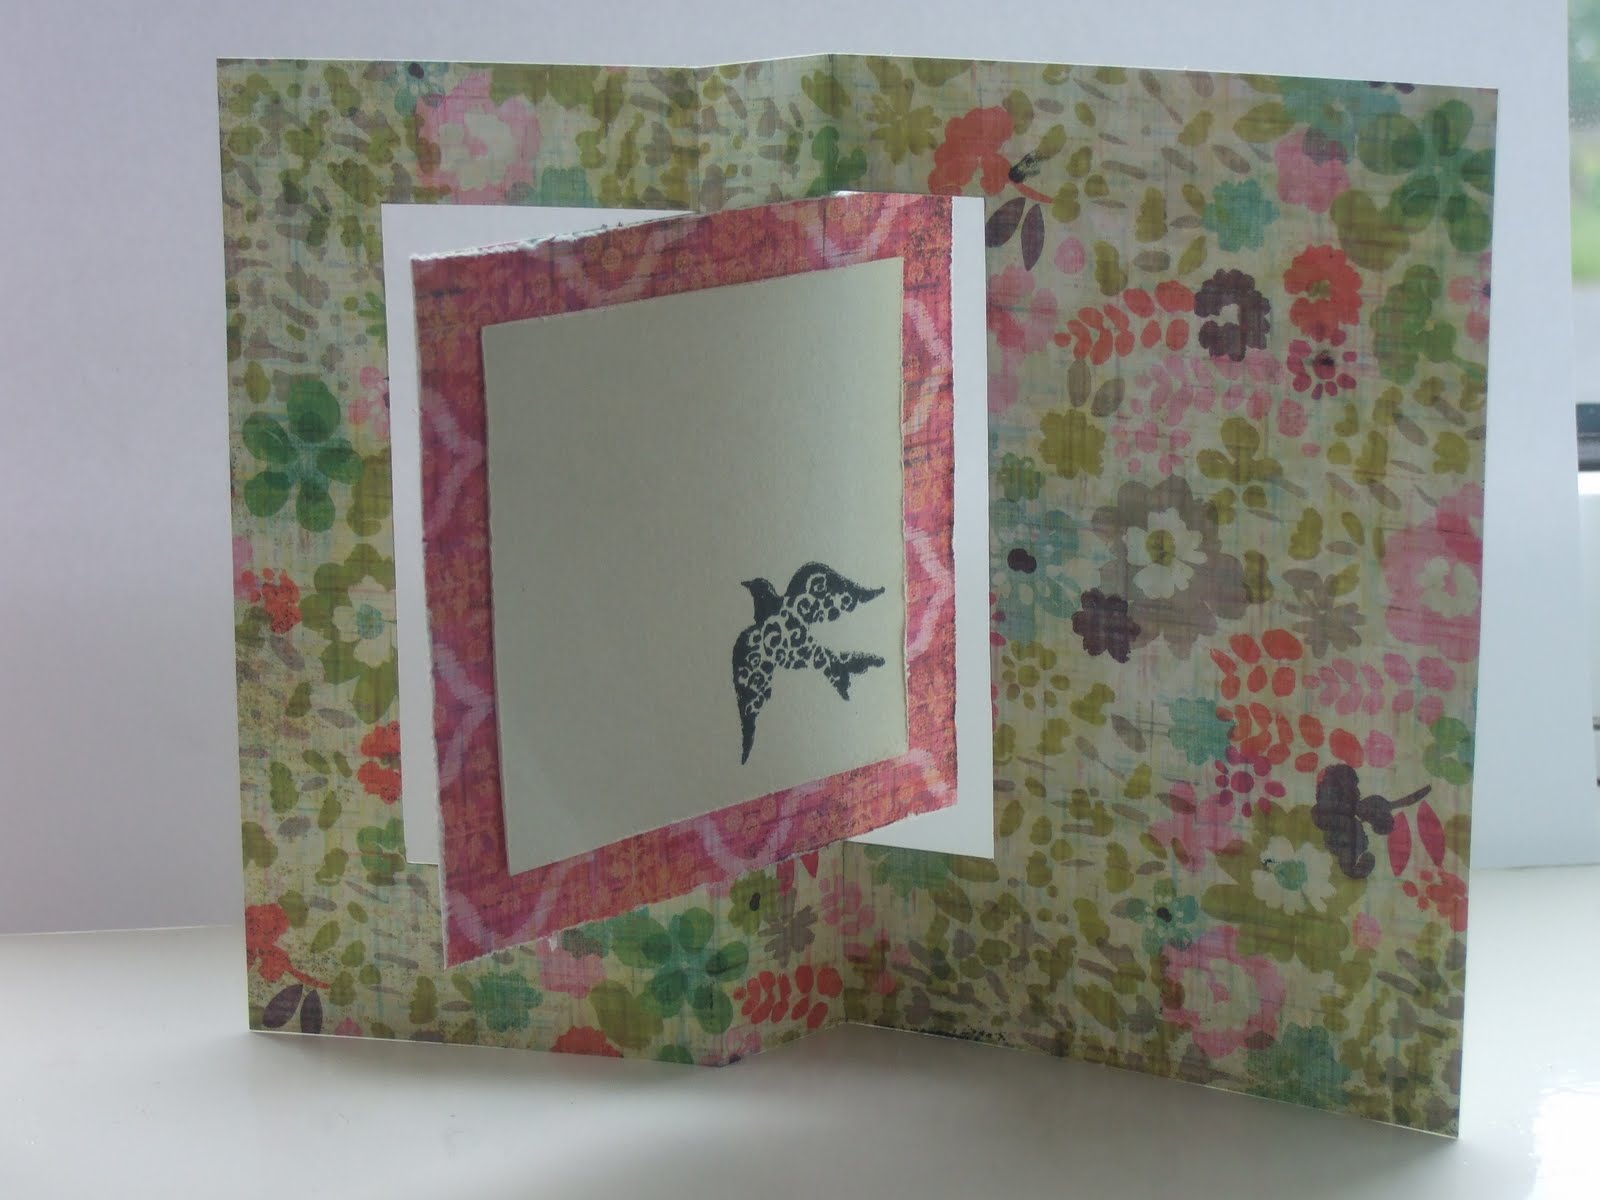
Tip Template Tuesday: Swing or FlipFlop Card


The design team is interested in providing you the widest variety of crafting inspiration, instruction, and ingenuity we possibly can. We have been enjoying giving you our tips each week, but thought it might be kind of fun to change it up from time to time with a template instead. So today, we bring you the first in our Template Tuesday series. Don't panic! We still will be dropping those tips on Tuesdays... but occasionally will throw in a template, just for a change of pace.

Today we would like to share a template and brief instructions for a Swing (or FlipFlop) card. This version of the card when completed will form a standard 4 1/4" x 5 1/2" card when closed. Unlike the one shared by Joanne on last Thursday, though, this one will have a part of the swinging panel hidden by the front post when the card is closed.


Starting with a 6 1/4" x 5 1/2" piece of cardstock, and holding the card-stock in the landscape orientation, score the card at 2 5/8” and 3 5/8” from the left edge. With a pencil or disappearing ink pen, draw a line 1 1/8” from the edge around the entire piece of card-stock. Cut on the drawn line, between the intersections of the lines, up to the score lines (see template). Mountain fold first score line, but only between the cut lines and the card edges. Similarly, valley fold second score line. Attach cut 3 1/8" x 4" rectangles to front and back of center section of card to cover scored areas and reinforce swinging panel. Decorate as desired.

Sunday, May 29, 2011

Sketch Sunday: ATC #3


Today I have another ATC sketch for you. This sketch is for a miniature landscape, made with a torn layer, a stamped image, and a punched partial circle. Make a cold wintery scene with a snowman, or a hot desert scene with a cactus, or something in between, with flowers or a tree. This is YOUR ATC, do it YOUR way!

I hope you will enjoy this sketch idea and give it a try!


If you do choose to try it the design team would love to see your creation! Upload a photo somewhere (Flickr, Picasa, Photobucket, etc.) and then share a link with us in the comments. To share all you need to do is add the following codes to your comment, and then replace the word "link" with the actual link to your photo:

      <a href="link">My ATC</a>

Your comment will then contain the words "My ATC" which will link to your photo. The design team really looks forward to seeing your work!

Until the next time,
Kathy

Saturday, May 28, 2011

Something Special Saturday: Color Challenge #1


Color Challenge #1

I like to surf the web in somewhat unusual places to find inspiration for my creative side. I often surf gift catalog sites and magazine sales sites for layout inspiration or color inspiration. Among my favorite haunts are seed and bulb catalog sites; there is almost always some color or texture that grabs me. Today I would love to share a photo from Landscape Flower Bulbs, Inc. whose color caught my eye.


The design team challenges you to use the colors in this photo to create something... a card, a layout, a piece of jewelry, some wall decor,... whatever you want to make.

If you accept the challenge, the design team would LOVE to see what you make! Upload a photo somewhere (Flickr, Picasa, Photobucket, etc.) and then share a link with us in the comments. To share all you need to do is add the following codes to your comment, and then replace the word "link" with the actual link to your photo:

      <a href="link">My Color Challenge</a>

Your comment will then contain the words "My Color Challenge" which will link to your photo. The design team really looks forward to seeing your work!


On another note, I'd love to share a link to a wonderful card by design team member Joanne Wardle. This is a very clean and simple card using a hot air balloon stamp from FranticStamper's own line of stamps. I think you'll love the card. If you do go visit, please be sure to leave Joanne a note to let her know how much you love her work.

Until the next time, for the entire team,

Smiles,
Kathy

Friday, May 27, 2011

Set of Three Spring Cards (Design Team Project)

by Sharon Jeffs

Set of Three Spring Cards


I love spring. Although it’s very cold where I live right now, it’s nice to know that on the other side of our planet someone is enjoying the spring that I am missing.

I love the sudden emergence of life when spring comes around. The birds begin to sing from the trees and the ground blooms with flowers. To celebrate this I decided to create a spring inspired set of cards.

I actually prefer creating sets of three cards at a time. It means that I use all of the supplies I had reserved for a card so that I don’t have as much leftover scraps. It also means that I have three cards to giveaway rather than one. Whenever I begin, I like to tie in the theme across each card by using either the same colour palette and/or similar techniques.

For my first card I began by inking a white base card with coordinating inks. I used patterned papers from the Pink Paisley ‘Butterfly Garden’ collection. Once it was cut out I stamped three bird images along one side in a light coloured ink. I used an Inkadinkadoo ‘Inchies set’ that featured bird images. cut up all my pieces and inked all the edges for a grungy effect then layered some blossoms across the card (I kind of thought this was prettier and more ‘spring’ than just a bit of ribbon) then added one of the pretty bird stickers from the K & Company ‘Blessings of joy’ range. I love these stickers because they have some dimension to them as well as having a very vintage feel to the images.

<

With my second card I also began by inking a white base card. I used more patterned papers to create a background on my card and even a wide mat for my stamped section that I then curled the edges of. In the stamped section, I only stamped the top and bottom image so that I could add the ‘hope’ sticker to the centre of this strip. To finish off I then coloured my stamped birds and added a bird’s nest sticker.


For my final card I once again inked the edges after covering the entire surface with a piece of patterned paper. To tie my last card in with the other two, I decided to create a curled edge mat for another piece of patterned paper and I cut a few blossoms in half to adhere to a few parts of the curled edges. I finished off by randomly stamping some of the bird images in the centre paper then adding another bird sticker to finish my card off.


These cards only took me about an hour to put together. The stickers made my cards so much quicker to create. I love the idea of creating a set of cards to giveaway rather than one so that I won’t feel so guilty when I can’t part with a card.

Thursday, May 26, 2011

Technique Thursday: Make a swing card without a template


by Joanne Wardle

How to make a swing card without a template.

I have seen many designs for swing cards that just don’t work properly. To me when a swing card is closed you should be able to see all of the front of the swing piece and none of it should be hidden under the left hand “bar”


To achieve this you need to follow very specific, but simple, measurements. There are a few basic rules.
  • The swing shape needs to be vertically symmetrical.
  • You need to be able to measure its widest point, and divide this measurement by 4.
    • The key to this is find this measurement, make a note of it, and from this point just consider it a “chunk” or “measure” as all further measurements will just be a multiple of this.
    • In the sample I have made I have used a 4 inch square, as this is the simplest shape to explain it, but you could just as easily use a heart or circle, and any size can be divided by four.
  • The height of the shape and the final card are unimportant.
  • The width of the final open card will be twice the width of the shape.


Okay, so here’s what you do.
  • Take a template of your central shape and find the quarter measurement (call this 1 measure) and then mark up as shown.


  • Take your card, which is twice the width of your central shape, and split into 8 measures. Draw in the swing post between measures 3 and 4 as shown.


  • Line up your template so that the lines you have drawn match. And draw around the template


  • Now cut and score as shown (red lines are cut, blue lines are score)


  • Fold the blue lines as showm

Basically that’s it! But here’s a few more pictures to explain it, if it’s not yet clear.


All of the products used to make the final card, are available from the frantic stamper.

I’d love to see any cards you make using this method. Hope you enjoy it!
Joanne

Wednesday, May 25, 2011

Warehouse Wednesday: Copic Offerings

Expanding our Copic Offerings


Today, I'm excited to announce that we will soon be carrying a much wider selection of Copic proudcts.

Right now, we only stock the CIAO series (round barrel, 144 colors) which is a great starting point for most crafters. More and more, we have been receiving requests to carry the SKETCH series (larger oval barrel, over 340 colors).

As you can imagine, this is a huge investment! But we've done it. We should be receiving a gigantic shipment in about 10 days with ALL the Sketch colors!! This will mean a redesign of the Copic section on our website so we can direct you to the proper product. We will also have great tools for you such as instruction videos, color charts and storage options.

The other exciting news is that we have negotiated better pricing with Copic so that we can be competitive with other online retail sources. Our new Copic prices will be 25% off retail EVERY DAY on most Copic products (individual pens, refills, and pen sets). I'm so happy to be able to bring such a great discount to our customers. This new pricing will be effective as soon as we receive our shipment (around June 5th).

So be on the lookout for a full selection of over 340 colors of Copic Sketch markers (and all the matching refills) coming very shortly to our website!

Hugs,
-Fran
www.franticstamper.com

541-826-2500

Tuesday, May 24, 2011

Tip Tuesday: Cleaning Stamps


Today the team would like to share some tips for cleaning stamps. Some folks don't bother cleaning their rubber, but residual ink can cause problems if ink is transferred to ink pads of a different color, or if the wrong color is printed when you stamp on your project. So... most stampers we know do clean their stamps. Here are some tips for keeping inky stamps from spoiling your new ink pad or your beautiful project.

Tip #1
Clear stamps clean well in a small bowl of slightly soapy water. Don't use the sink, though, because small stamps can easily wash down the drain.

Tip #2
After using stamps with Stazon and cleaning with Stazon cleaner, I like to sit my stamps on an old (but well re-inked) embossing ink pad for a while. It conditions the rubber.

Tip #3
Find a square plastic lunch box to store your stamping scrub in. This will give you something to store the moisture it require to clean your stamps while giving you the opportunity to carry it with you to crafting events.

Tip #4
Baby Wipes make great stamp cleaners. Make sure to use Alcohol Free wipes (most are). Great for traveling too, baby wipes come in a handy dispenser package. Great for cleaning ink off hands as well.

Tip #5
A soft toothbrush (I prefer a child size) is great for really getting into the crevices of a stamp to clean it.

Tip #6
I have found that cleaning stamps immediately after use is the best thing if you want clean stamps. Even StazOn comes off easily.

Tip #7
When using dye inks, just run water over cling-mounted stamps to clean them! (Note: don't do this with your wood-mounted stamps, though, since the water can damage the wooden block over time.)

Tip #8
If you don't have a stamping scrub pad, a paint pad refill will work just fine. You can find the refills in most hardware stores. Cut off any clips on the back and cut to size to store in any sealed storage container. An advantage to a pad like this is that because it isn't affixed inside a case, you can use it to scrub those HUGE background stamps.

Tip #9
Use the right kind of cleaner for the kind of ink you are using! If you are using a solvent-based ink like Stazon, you really need a solvent-based cleaner. Memories cleaner really works well on that type of ink. Most other inks will clean up just fine with a water=based cleaner. FranticStamper carries them all!

Sunday, May 22, 2011

Sketch Sunday: Card #5


Today's sketch is for a card. I have filled in some sample colors and patterns for you, but these were just examples. Think of different patterns and palettes when you look at the sketch and see what you can come up with using just the basic sketch with your own color scheme, patterns, and textures.

I thought about making this card with back-to-school colors and motifs, and then imagined it with a summer picnic motif with red gingham and watermelon. And then thought about a cool blue with silver and white, with a snowy motif. What can you envision?

Have fun imagining and being creative!

And as always, if you decide to use this week's sketch, the design team would love it if you would share! Upload a photo somewhere (Flickr, Picasa, Photobucket, etc.) and then share a link with us in the comments. To share all you need to do is add the following codes to your comment, and then replace the word "link" with the actual link to your photo:

      <a href="link">My Card</a>

Your comment will then contain the words "My Card" which will link to your photo. The design team really looks forward to seeing your work!

Smiles,
Kathy

Friday, May 20, 2011

7 Gypsies Card (Design Team Project)

By Lis Whiting


Hi everyone!  Today I want to share with you a card I made with some of the new 7 Gypsies items!  I wanted to do a theme card. Its almost summer and time to think about traveling.  So, I imagined a trip aboard a steamship…  

I wanted to use some half-rosettes in my card. I chose three papers from Gypsy Market (Isn’t that a great name?). The papers are full of rusts and muted colors which ties in perfectly with a mysterious cruise…  

I cut a little more than half of a rosette using the regular sized Tim Holtz die.  I added some 7 Gypsies paper tape to each of the die cuts before I folded my rosettes.  I was able to create a two-layered effect.  After I folded them, I glued them with hot glue and added a 7 Gypsies brad to each.  I cut off the fastener parts on the back and used a pop dot to attach each brad.  

I really like the black and white striped paper so I made a banner (Tim Holtz) using it.  The letters are from the Tim Holtz Typeset alphabet. I mounted the banner to the card with mounting tape.  

I had a lot of fun choosing some pretty tags for my card.  7 Gypsies has quite a few.  I found one with a steamship and another that looks like it could be from a ship schedule.  I decorated with a gear (its got bling in the middle!). (Gotta have some steampunk!)

I hope that you enjoyed my card today.

Thursday, May 19, 2011

Technique Thursday: Embossing Folders


by Kathy Berger

Embossing Folders

First, I would like to apologize a little for the length of this post. I am sure I am going to overwhelm some of our readers, but I really wanted to be as thorough as I could about using embossing folders; perhaps I should have done this across several posts, but I really wanted to provide you with a single reference. I hope you will forgive my transgression and read through the post, or at least bookmark it for future reference.

This post is not necessarily intended as an exhaustive guide for using those folders, but I hope it will be thorough enough to help you to get more out of the folders you might already have, and perhaps encourage you to buy more (check out the huge selection of folders available at FranticStamper!

Using an embossing folder is as simple as inserting the material to be embossed into the folder, building up the appropriate sandwich for the machine being used, and rolling the folder through the machine (by cranking, pumping, or turning on a switch, depending on the machine.)

Here is a summary of the standard sandwiches for using the embossing folders with a variety of die cutting machines. Machines do have some variation in the tightness of their sandwiches. You may need to add shims or vary your sandwich for your particular machine. One rule to remember is never to force a sandwich into your machine... you might break your plates and potentially could damage your machine. Always be sure to follow your manufacturer's guidelines!

Machines and sandwiches:

MachineSandwich
  Cuttlebug     White A Plate
  B Clear Cutting Plate
  Cuttlebug Embossing Folder
  B Clear Cutting Plate
  Wizard     Blue Mat
  Cuttlebug Embossing Folder
  Tan Embossing Pad
  White Mat
  Original Sizzix     Standard Cutting Plate
  Cuttlebug Embossing Folder
  Sizzlet Machine Concerter in place on machine
  Big Shot     Multi-Purpose Platform, open at Tab 1
  Clear Cutting Pad
  Cuttlebug Embossing Folder
  Clear Cutting Pad
  QuickCutz Epic     Gray Cutting/Embossing Platform
  Cuttlebug Embossing Folder
  Clear Cutting Mat
  Vagabond     Solo Platform
  Shim
  Standard Cutting Mat
  Cuttlebug Embossing Folder
  Standard Cutting Mat
  Craftwell eBosser     Plate D
  Plate C
  Cuttlebug Embossing Folder
  Plate A


Throughout this tutorial, if you wish to see a photo closer up, you can click on the photo to open it at a larger size then use your browser's back button to return to the tutorial page, or right-click (ctrl-click on a Mac) to choose to open the photo in a different tab or window.

Next, here is a little warning about your choice of materials for embossing...if your material has a right side and a wrong side it is important to always be sure to insert it into the folder correctly! In general, the right side should be against the side which has the pattern indented rather than against the side whose pattern is raised; the embossing (raised pattern) will end up on the right side and the debossing (indented pattern) on the wrong side.

EMBOSSDEBOSS

Embossing Different Materials

  • Vellum

    Vellum is beautiful when embossed, but it is a little bit fragile and sometimes tears or breaks when embossing. I find that if I sandwich the velum between two pieces of text-weight paper before inserting into the folder I have better results.


  • Transparencies

    Getting a photo of an embossed transparency is definitely difficult, but the embossing is child's play; simply insert the transparency into a folder and emboss as you would card-stock! The results are fabulous even when the photo isn't!


  • Metal

    Only thin metals (foils and foil card stock are wonderful!) should be embossed; thicker metals can damage not only your folder, but also your machine! The metal I used is aluminum from a soft drink can.

    Note: thin metals can be die cut with steel rule dies like the original Sizzix dies before embossing. These flowers were cut with a small (green) Sizzix Originals die.


    Also try embossing flashing tape (not to be confused with duct tape!); it is very metalic looking, embosses easily, and is self-adhering!


    By the way, once embossed metals can be colored with alcohol inks for a wonderful effect!

  • Chipboard

    Chipboard can be difficult to emboss because it is stiff and it is thick. Only thin chipboard (the weight of a cereal box) should be used in the folders.


    Thin coasters can be embossed in the same way as chipboard.


  • Velvet paper

    Velvet or suede papers can be embossed with a beautiful yet subtle result. These specialty papers are less stiff than standard cardstock but still hold the embossing beautifully.


  • Craft foam

    While it is possible to emboss craft foam it is difficult to get a good, deep emboss. It helps some if you HEAT the embossing foam prior to embossing, but to do so you need to work quickly. Use a heat tool to heat the foam and as soon as the foam starts to curl, place the foam into the folder and run immediately through the embossing machine. This is one case where having an extra set of hands would be a BIG help (I didn't have extra hands so this is not as deeply embossed as I would like.)


Embossing, Plus Color

  • It is easy to emboss anything that has already been colored. Add texture to your patterned papers or your stamped and colored images by embossing them! But here are some other ways to combine color and texture by using embossing folders.

  • DTP

    Using a light touch, simply rub an ink pad across the embossed image. Color will transfer to the raised parts of the image.


  • Chalk

    Apply chalk to the embossed areas of the card; smudge and rub in lightly. For this technique I use Stabilo CarbOthello Pastel Pencils I had from an old art class, but any quality art chalk, like the Pebbles and Craft chalks at FranticStamper, will work well. Use a white polymer eraser to remove stray chalk or to lighten areas if desired.


  • Gel Pen Highlights

    Use a gel pen to trace around all or parts of the embossed image to add highlights (especially effective on colored papers!)


  • Using Waxed Paper for a Resist

    Emboss a piece of waxed paper as you would any other piece of paper. Place the embossed piece onto a piece of card stock. Cover with a sheet of typing bond, and iron on high temperature (NO STEAM!) to transfer the wax to the glossy card stock. Sponge or brayer ink onto the card, and then buff off the excess ink with a rag or piece of paper towel. The pattern from the embossing folder will have transferred to the glossy card, and will act as a resist to the ink.


  • Sanding white core paper

    Emboss white core or double sided papers as usual. (Using Core'Dinations cardstock for this technique is fabulous! A wide selection of Core'Dinations is available at FranticStamper .) Use a sanding block to lightly sand away the top of the embossed areas of the paper. Sand away a little, or a lot, depending on the look you are after.


  • Ink the folder

    Rub dye based, pigment, or chalk ink directly onto the inside of the embossing folder from the ink pad (do not use permanent or solvent based inks as they will not transfer well and will not come off the folder.) Rub onto the flatter side of the folder, the side with the indentations of the pattern. When embossed the ink will become the background for the embossed images.


Partial Embossing

  • Back out

    Roll the sandwich only part way through the machine and then back the folder out.

    Note: all of the manual machines have a method for reversing direction of the sandwich's progress through the machine. On the Cuttlebug, for example, simply turn the crank in the reverse direction.)


  • Small folders

    Use a piece of Spellbinder's tan embossing mat (this stuff cuts easily!) or a chipboard shim (you might need a couple of layers) just a little smaller than the folder to replace one of the plates in your sandwich (on a Cuttlebug the sandwich would be A plate, folder with cardstock inserted, embossing mat or shim, and C plate... experiment with your machine's sandwich). The embossing will only happen where the mat or shim makes contact with the embossing folder, preventing the edges of the folder from being embossed.


    Note: This selective embossing technique can be used to emboss a shape or a window. Simply cut a shape out of chipboard and use with a full-sized embossing folder to emboss only the shape. Here are a rectangular frame and a circular shape embossed with the Swiss Dots folder.

Long Embossing

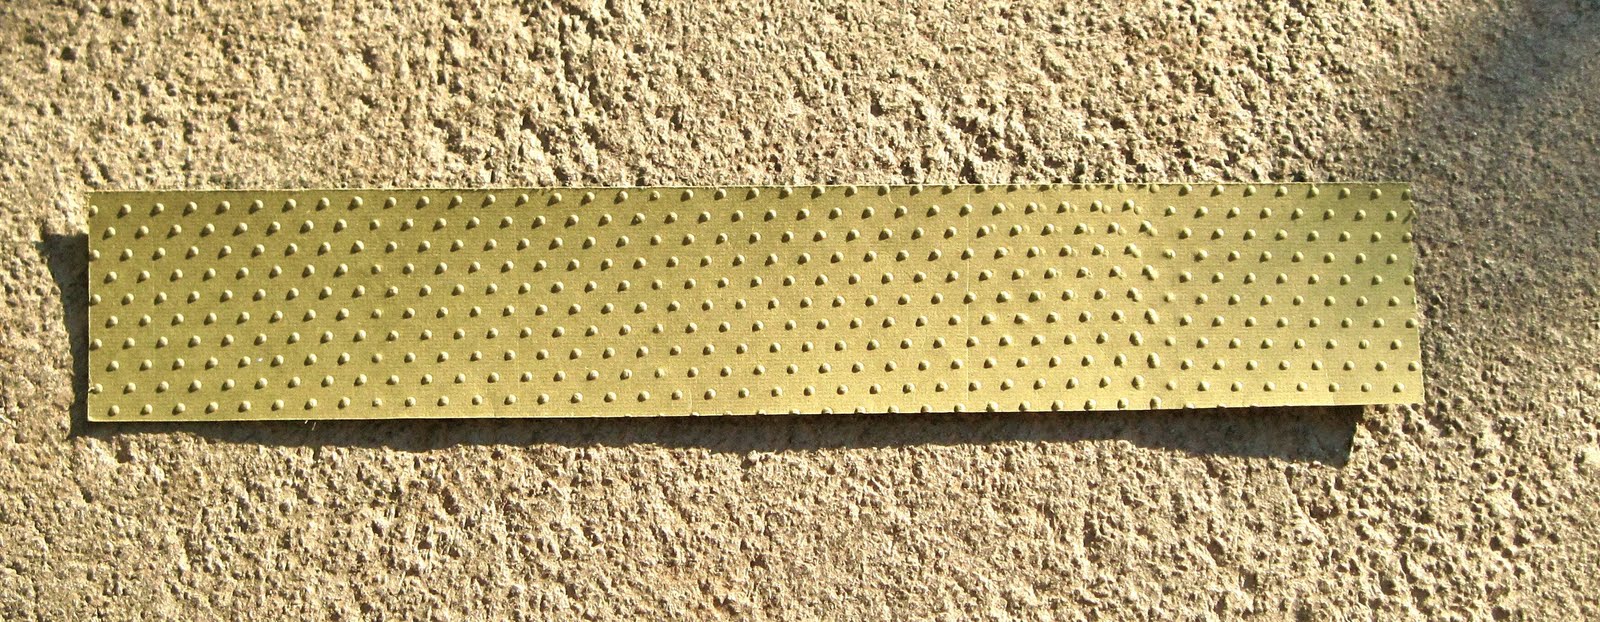
To emboss a long strip of paper that is no more than 5" wide you can use one of the A2-sized folders that has a repeating pattern (Swiss Dots, for example). The preferred method uses a piece of the Spellbinder's tan embossing mat, just a little smaller than the A2 Folder, and a C plate.

Place the paper in the folder so that the top edge is inside the patterned area. Place the folder SIDEWAYS onto the A plate on the base of the embossing machine so that the bottom edge of the paper extends beyond the end of the plates. Put the embossing mat on top of the folder, then put the C plate on top of it all to complete the sandwich. Roll through the machine.

Remove the paper from the folder then reposition the paper so that you will emboss an un-embossed area; carefully align the end of the embossed area onto the pattern of the folder. You will be able to feel it almost "lock" into place.

Rebuild the sandwich, pass through the machine and then repeat until the entire strip is embossed.

Alternately, you can use the standard sandwich (A plate, B Plate, folder, B plate) with the same repetitive process. The difference is that the B-plate will cause the edges of the folder to flatten out a small amount of the pattern that previously has been embossed. First emboss all the way across the strip, ignoring this flattening effect. When the whole strip has been embossed, simply align the paper onto the raised side of the pattern of the embossing folder and rub your fingers around the area that had been flattened, applying slight pressure. You will cause the previously embossed area to push into the pattern, and the embossing will re-imerge. Repeat this on any flattened areas. The strip (2 1/4" x 12") in the photo was embossed with this method.


Double embossing

This technique involves using two different embossing folders and inking, and can use either of a couple of the coloring methods discussed above. The ink will highlight the first folder's pattern, while the texture will show the second.
  • Ink positive

    Emboss your first folder and use the DTP method to add color to the raised image. Next, emboss with the second folder.


  • Ink negative Use the Ink the folder method with the first folder to add color to the background of the raised image. Then emboss using the second folder. The texture of the second folder will be the only texture left on the cardstock, but the negative of the pattern of the first folder will be printed on the cardstock.


I hope you have enjoyed at least some of this lengthy post and perhaps have found it useful. I promise to try to make my next technique post a little less involved!

(Be sure to check out this article by Sharon Jeffs for more examples of these techniques, plus a few more techniques!)

Smiles,
Kathy