Friday, April 17, 2015

Frantic Stamper Newsletter - Friday inspiration using dies +new products!


Summer sale

Friday Inspiration
Using Frantic Stamper Precision Dies

It's Friday!!

I would like to share some beautiful cards made by our design team featuring our recent releases of Frantic Stamper Precision Dies.


We can't wait to see your creations with these new dies and stamps!
Be sure to look at our facebook page for more card samples from our Design Team.


*********NEW PRODUCT ARRIVALS*******

Speaking of dies.....  have you seen the latest additions to our store?   Our new products page always shows you all the fantastic new items in stock.  This week, we received new dies from Tattered Lace, Taylored Expressions, Memory Box and Poppystamps:
   

It's not just dies though... . we also have new solid color Pion cardstock, new collections from Echo Park and Heartfelt Creations, new Relics & Artifacts plaster casts from Prima, and more.

Coming up this weekend will be new dies from Joy Crafts and Marianne Designs, plastic stencils from a new vendor:  Stencils 1, and more!

We'd love to see your creations made with our dies too!


Hugs,
-Fran


Frantic Stamper 1-541-826-2500
644 W. Dutton Road, Eagle Point, OR. 97524


Like us on Facebook


Tuesday, April 14, 2015

Thinking of You (Rachelle Green)


Thinking of You
by Rachelle Green


I am having a ton of fun using the Frantic Stamper panel dies. If you are ever in a hurry but still want a fabulous card, start out with one of the Frantic Stamper panel dies. I started this card with a 4 1/4" x 5 1/2" card base. Next I chose the Bamboo Card Panel die. Using a 1 1/2" circle punch I used glitter paper to simulate a "sun." I stamped the sentiment onto a die from my most favorite die set ever...Elementals #1.


The digital is image colored with Copic Markers is from Saturated Canary.


*** Materials for this project available at www.franticstamper.com.
 
FRA-Die-09330
 
FRA-Die-09306


Monday, April 13, 2015

Lilac Flowers (Pam Sims, Special Contributor)


Lilac Flowers
by Pam Sims, Special Contributor

Pam has again created an amazing piece of art with Frantic Stamper dies. She used Frantic Stamper Mix 'n Match Lilac flowers and leaves, Frantic Stamper Elegant Vine , as well as Frantic Stamper Elementals #7-Coved Labels to create this stunning card.

To see another view of this lovely card, visit Pam's blog post. Be sure to leave her a comment!


*** Materials for this project available at www.franticstamper.com.
 
FRA-Die-09426
 
FRA-Die-09450
 
FRA-Die-09373

Sunday, April 05, 2015

And the winner is....


And the winner is....


Kristie Goulet

She was chosen randomly from all the entries in our contest. Using Random.org we randomly selected which pool was to be used for our selection from all the possible entries, using the numbers corresponding to the ways to enter.

1) Comment on this blog post
2) Become a follower of the Frantic Stamper Facebook page
3) Like the Giveaway announcement post
4) Share the Giveaway post on your FB page
5) Comment on the Giveaway post with your favorite die from the Frantic Stamper Precision Die line
6) tag your friends (no limit)
7) Subscribe to the Frantic Stamper Newsletter (if you already subscribe, let us know that too!)

The random number selected was 5, so we chose from the comments on the giveaway post.

The random number selected for the comments was 48. That led us to Kristie.

I have contacted Kristie to tell her of her win. Please join me in congratulating her on her victory!


Happy Easter (Rozy Smith)


"Happy Easter"
by Rozy Smith


Start with a white card base. Using silver foil die-cut the largest Elementals #5 Arches & Frames mat and attach to card base.

Cut the Easter Scene Card Panel from light blue glitter paper, attach to Arches & Frames mat.

Cut several of the Petite Leaves with green glitter foil and randomly attach, use some pop-dots for dimension.

Cut Happy Easter from white cardstock, distress with light pink chalk marker and attach to card.

Embellish with flowers and butterflies. Very simple card, easy to make and beautiful to present.


*** Materials for this project available at www.franticstamper.com.
 
FRA-Die-09376
 
FRA-Die-09343
 
FRA-Die-09393
 
FRA-Die-09194


Saturday, April 04, 2015

Easter Pop-Up Card (Ann Greenspan)


Easter Pop-Up Card
by Ann Greenspan


Frantic Stamper has a set of 7 dies called Pop-Up Card Bases that allow you to make a pop-up card without having to manually cut the pop-up supports.

When I make a pop-up card, I like to work on the inside layer first then once that is done, adhere the inside to the actual card base.  The first thing I did was to adhere a blue and green panel for the inside of the card so it had a nice background.  Then I put the largest of the pop-up dies on the center where the normal fold line would be but didn't fold the card until after cutting this first die.


Use your fingers to reinforce the score lines that the die made for you.


I always try to remember to hold the object that will be attached to the pop-up area onto the card to be sure that when the card closes it won't stick outside the card.  You also want to be sure that the size of the pop-up die is the correct one for the embellishment that will be popped up.  I accidentally forgot to do this and when I placed a cloud  on the pop-up, you could see the white card base that would go behind the panel, so I ended up not using that pop-up space for that cloud.


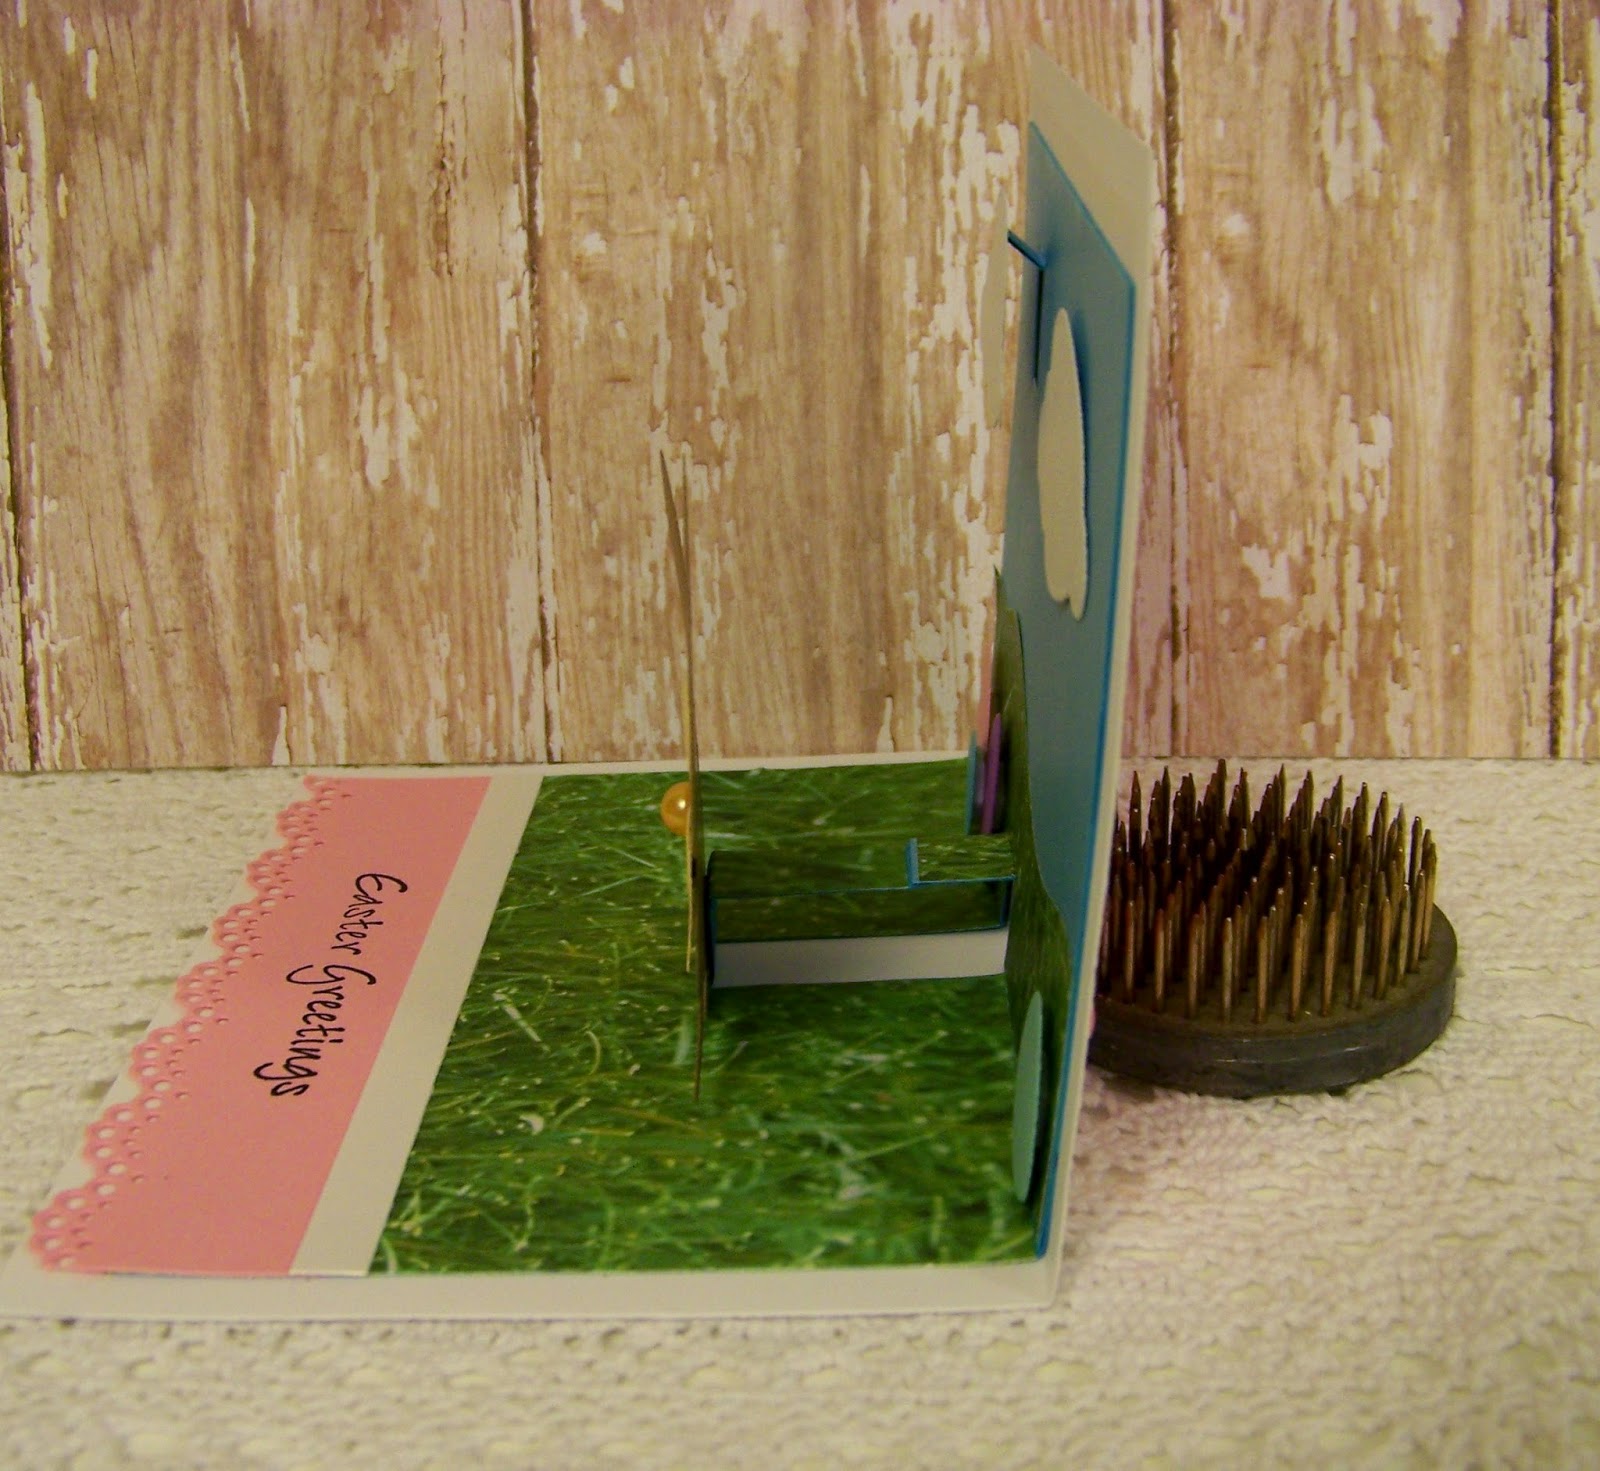
Once the pop-ups are adhered to the card, you can decorate the inside and front.  Below is a side view of what the card looks like with the two pop-ups.


Now you can decorate the front of the card however you wish.  I chose to put a bunny and butterflies on mine:


*** Materials for this project available at www.franticstamper.com.
 
FRA-Die-09414
 
FRA-Die-09129
 
FRA-Die-09390
 
FRA-Die-09388

Friday, April 03, 2015

Faux Silver Inlay (Anne Harada, Former Guest Designer)


Faux Silver Inlay Chili Peppers
by Anne Harada, Former Guest Designer


Silver Inlay is a popular Southwest art technique used most often in jewelry making.  It's a favorite of mine and I own several pieces of silver, onyx, coral and turquoise jewelry made using that style.  Google "Inlay Jewelry" and you're pretty much only going to see samples made from artists in the Southwest region.

I wanted to try to capture that look in my card today, so I came up with this technique that I am calling "Faux Silver Inlay"   Since obviously I'm not going to use real silver (LOL!), I went with aluminum.  Basically I just went to the dollar store and picked up an aluminum roasting pan that is quite large and will yield many many die cuts for my cards!

I started with a 4-1/4" square of some very cool, wood grain style paper from Lori Whitlock's "All About a Boy" collection that came from Frantic Stamper.  I used the Frantic Stamper Chili Pepper die to die cut the chili peppers shape out of the center of it.  This created a "chili pepper hole" in the middle.  I layered the panel over a 4-1/2" square, deep-red cardstock panel.  (Insider Tip - save the resulting die cut chili peppers from the wood grain paper for another project!)

Next, from a square of aluminum from my roasting pan, I die cut the chili peppers out of the aluminum.  (It cuts effortlessly and beautifully by the way!)  I glued the aluminum chili pepper shape inside the "hole" of the wood grain paper panel filling in my "chili pepper hole".  You can see below how the red cardstock peeks through some of the details of the chili peppers.


To get the "inlay" look, I ran the whole panel through my die cutting machine, without any die, using the same sandwich as if I were die cutting.  This flattens the aluminum image so it is flush with the rest of the paper panel, resulting in the "Faux Silver Inlay" look!  (Insider tip - your top sandwich plate needs to be flat; and, if it has lots of embedded cuts, place a layer of plastic packaging between the top of the card and the top sandwich plate so the cuts don't impress onto your aluminum.)  Ta Da!! That's it! 

I hope you will give this a try, especially with any of the SW Series dies that Frantic Stamper now carries!!  I created several more cards using this technique that I'll be sharing later.

Have a great day!
Anne


*** Materials for this project available at www.franticstamper.com.
 
FRA-Die-09407

Thursday, April 02, 2015

Pop-Up Bases Video #2 (Jen Carter)


Jen Carter Cupcake Pop Up 1
Pop-Up Bases Video #2
by Jen Carter


Hello everyone!

I have another card & video to share today.  I told you a few weeks ago when I shared a video on how to use the Frantic Stamper Pop Up Bases dies that I would make another one to show how to use a few more dies in the die set.

So, first here is my card and then the video will follow.

Jen Carter Cupcake Pop Up 1

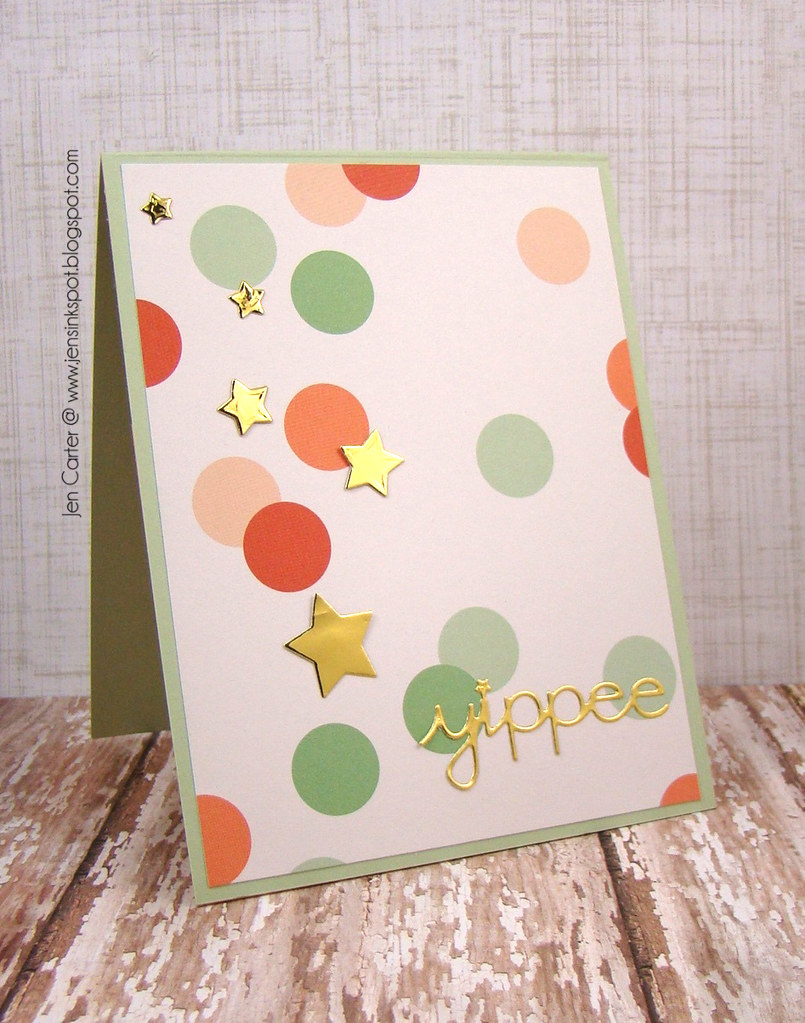
Here's the front of my card.  I kept it pretty simple because I want the impact to be on the inside. I used a dotted patterned paper and then added in gold stars & a gold die cut sentiment from Frantic Stamper.

Jen Carter Cupcake Pop Up Inside 1

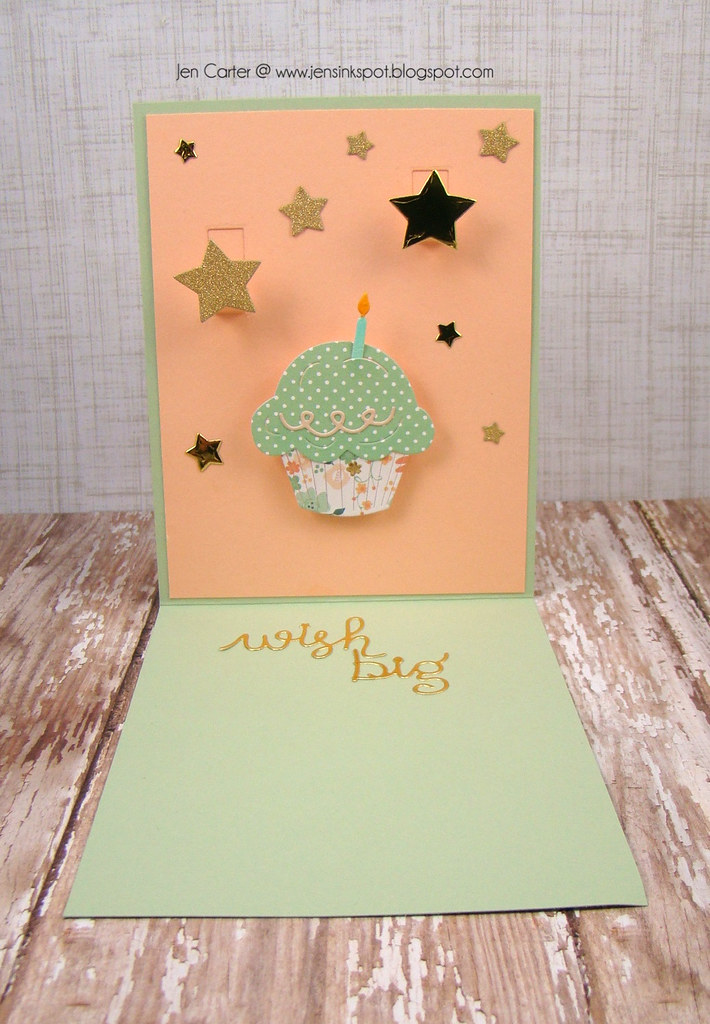
This is the inside. I used the 3 little rectangle dies from the Pop-Up Bases die set to pop up the cupcake and the two largest stars.  The cupcake dies are a new die set from Frantic Stamper called Delicious Cupcake.

Jen Carter Cupcake Pop Up Inside 2

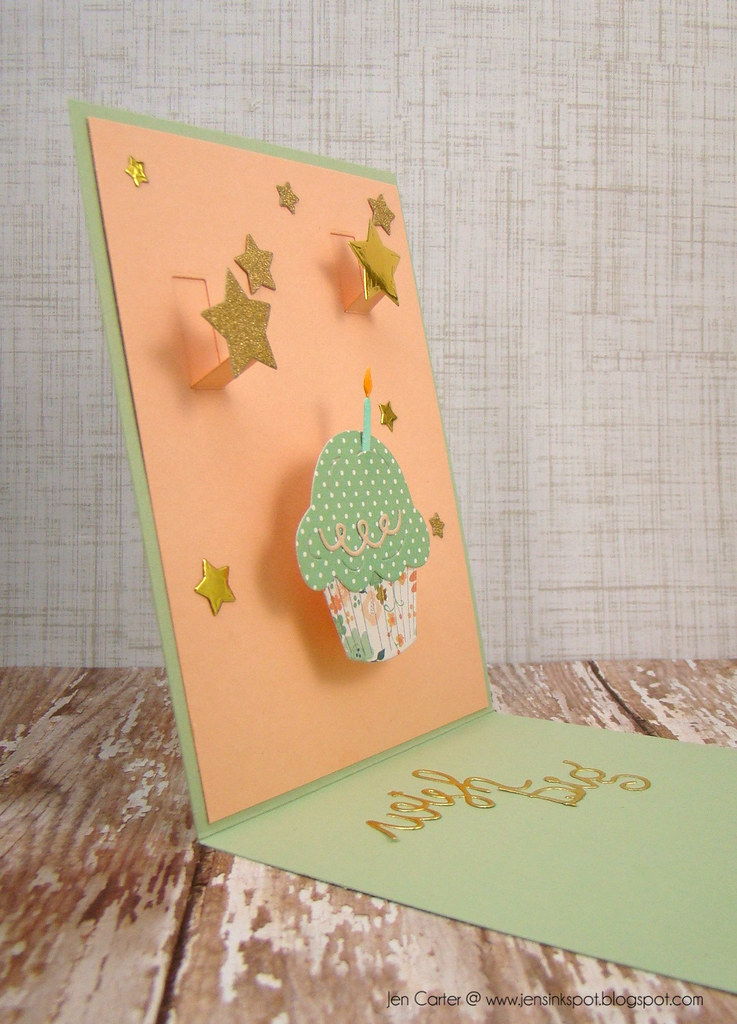
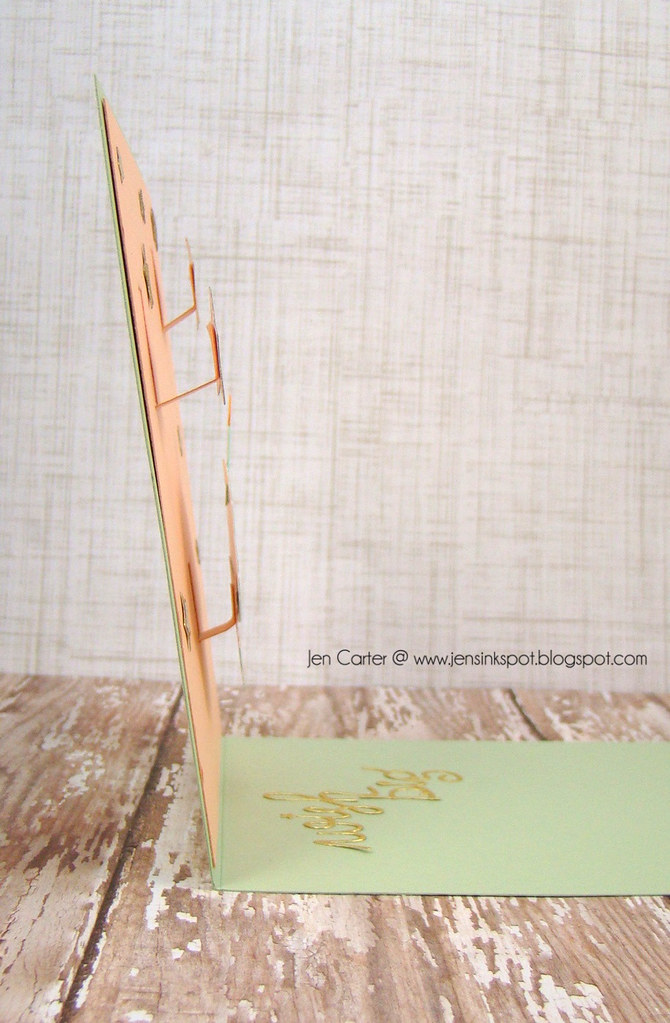
Here is a side view where you can get a better idea on how the items are popped up.

Jen Carter Cupcake Pop Up Inside Side

And you may be wondering why I'm showing this picture! The reason is so that you can see how thin everything is!  It ALL folds up and lays fairly flat and is easily mailed!  NO BULK and you still get items popped up quite a bit!  I LOVE that.  And, you could do this same thing on the front of a card if you wanted in place of pop dots (just an idea)!  :)

So how did I do it?  The instructions are in the video below.  Now remember I am still learning and I'm not very good at editing yet, but I am learning!  Thanks for hanging in there with me!


Thanks for hanging in there with me!  I know that this was  long post!  I hope you enjoyed the video!


*** Materials for this project available at www.franticstamper.com.
 
FRA-Die-09414
 
FRA-Die-09457
 
FRA-Die-09464
 
FRA-Die-09375
 
FRA-Die-09191


Wednesday, April 01, 2015

Design Team Announcements (Anne Harada, Lynn Mangan)


It is with a sadness that we bid our farewell to Anne Harada, one of our former DT members and recent Guest Designers. We really loved her contributions to the team, especially her wonderful work with our Southwest dies, and we hope that she will join us again sometime in the near future. In the meantime, we wish her well as she goes forward. Please join all of us in thanking Anne for all she did for the team. We truly hope you enjoyed your time with us!

Though sad to be saying "au revoir" to Anne, we are happy to be saying "bonjour" to our newest Guest Designer. Meet Lynn Mangan. We are excited to have Lynn join us for the next three months or so...

Here is a brief introduction to Lynn, in her own words.


Hi there Frantic Stampers friends! I am thrilled to be a guest designer for the next few months! My name is Lynn Mangan and I love to craft. Sounds like a confessional! Seriously though, making cards is one of the few things in life that truly brings me relaxation. I’m thrilled to be here to show off the fabulous products at Frantic Stampers.

A little about me. I’m married to my high school sweetheart, Patrick. We’ve been married for almost 23 years and have four boys: Ryan (17); Jonathon (14); Collin (11) and Marcel (9). They keep us very busy with their activities (show choir, musicals, drums, baseball and many more activities). It certainly makes life a ton of fun to watch them grow up with their unique interests…and we tend to be running around a lot! Our oldest will be a high school senior next year so the college visits have started.

I also work full time as executive in a software company and am very blessed to have my husband home as a stay at home dad. We’re also very lucky to have our family close by. We’re both from Cincinnati and love that our children get to grow up with their grandparents and most of their cousins.

That’s a little about me! I look forward to learning about you too!


Please join us in welcoming Lynn to the team.