Thursday, March 26, 2020

Outerspace Hello


Outerspace Hello
by Kathy Berger


I wanted to make a special card for a friend who supported me with cards and cheery notes to help me get through some pretty rough times. I wanted to make sure it was a kinetic card of some sort because she had recently mentioned that she was thrilled to get the swinging monkey card I had made for her for Monkey Day, the first kinetic card I had sent to her in years of card exchanges. I knew I wanted to make sure I send her more cards that have some kind of fun paper engineering to them.

I had just received the new Lawn Fawn Magic Iris die (and both of its companion die sets, too) from the Frantic Stamper store and wanted to give it a try. I decided I would make a cute outerspace card with little aliens saying hello.

I used water-reactive inks to blend my outerspace backdrop and some water splatter to lift some of the color in order to add some interest. I used some slightly thinned white acrylic paint to splatter some bright spots to further add interest.

Once the backdrop was dry I diecut it with the Magic Iris Add-On. I made sure to reserve the circle piece that was cut from the center of the backdrop. I next diecut the Magic Iris parts as needed for assembling the mechanism (3 each of the sausage and the rings, 1 each of the rest) from white cardstock, and colored them with the same inks and process as I had with the backdrop, but using only the same color as the center circle of the backdrop that was cut out with the Add-On.

I assembled the Magic Iris parts, and then affixed them to a card base as shown in this tutorial:


And then the real fun began! I stamped, colored, and diecut the four little monsters, the banner, and the signs from the Monster Mash Up stamp set using the matching dies. I next stamped, colored, and diecut the moon from the The Final Frontier stamp set. I diecut the planet (and colored it), stars, and spiral from the Outer Space die set. And lastly, I diecut and colored the Flying Saucer.

I glued the circle that I had reserved from the Add-on into place inside the hole in the Magic Iris, and then glued the planet in the center of that. I added a computer-generated "Welcome to my world" sentiment strip to the center. I adhered the moon to the bottom of the Add-on panel, and then glued three of the little monsters (who make perfect aliens, don't you agree?) to the moon's surface. I hand-wrote "hello" and "hi" on the signs and put them in the monster's hands. I glued the fourth monster to the back side of the flying saucer so it looks like he is inside, and then adhered the saucer to the card. Lastly I added some stars and the spiral to the card.

I hope my friend liked the card, and that you do, too. I had so much fun making it!
*** Materials for this project available at www.franticstamper.com.
 
FRA-CL-018
FRA-Die-09585
 
FRA-Die-09792
 
FRA-Die-09793
 
FRA-CL-042

Tuesday, March 17, 2020

St Patrick's Day Card


Happy St. Patrickks Day
by Kathy Berger

This card was fun to create. The leprechaun's beard and clothes are flocked with nail flock to add fun texture. I ran a piece of cardstock through my xyron, then diecut it. I then applied the nail flocking powder to the die cuts, burnishing it and tapping off the excess. The sequins in the pot of gold also add texture, and some bling. I simply glued them in place with some strong liquid glue. The shamrock is diecut and glittered with a clear wink of stella brush pen, and then covered with Glossy Accents. The sentiment is computer-generated.

I hope you enjoy the card!


*** Materials for this project available at www.franticstamper.com.
 
FRA-Die-10762
 
FRA-Die-10760
 
FRA-Die-10764

Monday, March 09, 2020

This Little Piggy


This Little Piggy
by Kathy Berger


A pig as a pet? Why not! The family who lived in my home before we bought it had a potbelly pog as a pet because their child was allergic to cats and dogs, and there is a girl whom my daughter follows on Facebook and Instagram who has a cute pig as a pet. So, again, why not!

This card is a CASE of a card made by another Frantic Stamper Design Team. Her card was in landscape orientation, so I changed it up by turning it to portrait.

I started by diecutting the largest frame with the Elementals #16 - Stitched Rectangle Frames. I set the frame itself aside, and created a cloudy sky for the backdrop on the center piece left behind when cutting the frame. I diecut two stitched grassy hills and then cut them to size with the frame die. I glued one of the grass hills to the backdrop. I adhered the sun in the upper right corner of the backdrop, and trimmed off the excess. Next, I glued the backdrop centered on my card front.

I diecut the pig out of two shades of pink. I used the darker pink for the pig's ears and nostrils. I backed the eye area of the pig with white, and added two small black dots to the eyes with a black marker.

I added the pig's pen to the card, then the pig, and then a second grassy hill. Using foam tape, I added the frame, centering it over the backdrop. For fun and as a departure from the inspiration card, I added tiny purple flower sequins to the grass, and a sheer purple bow to the frame.
*** Materials for this project available at www.franticstamper.com.
 
FRA-Die-10788
 
FRA-Die-09986
 
FRA-Die-10091
 
FRA-Die-10471
 
FRA-Die-09

Birthday Kitty


Birthday Kitty
by Kathy Berger


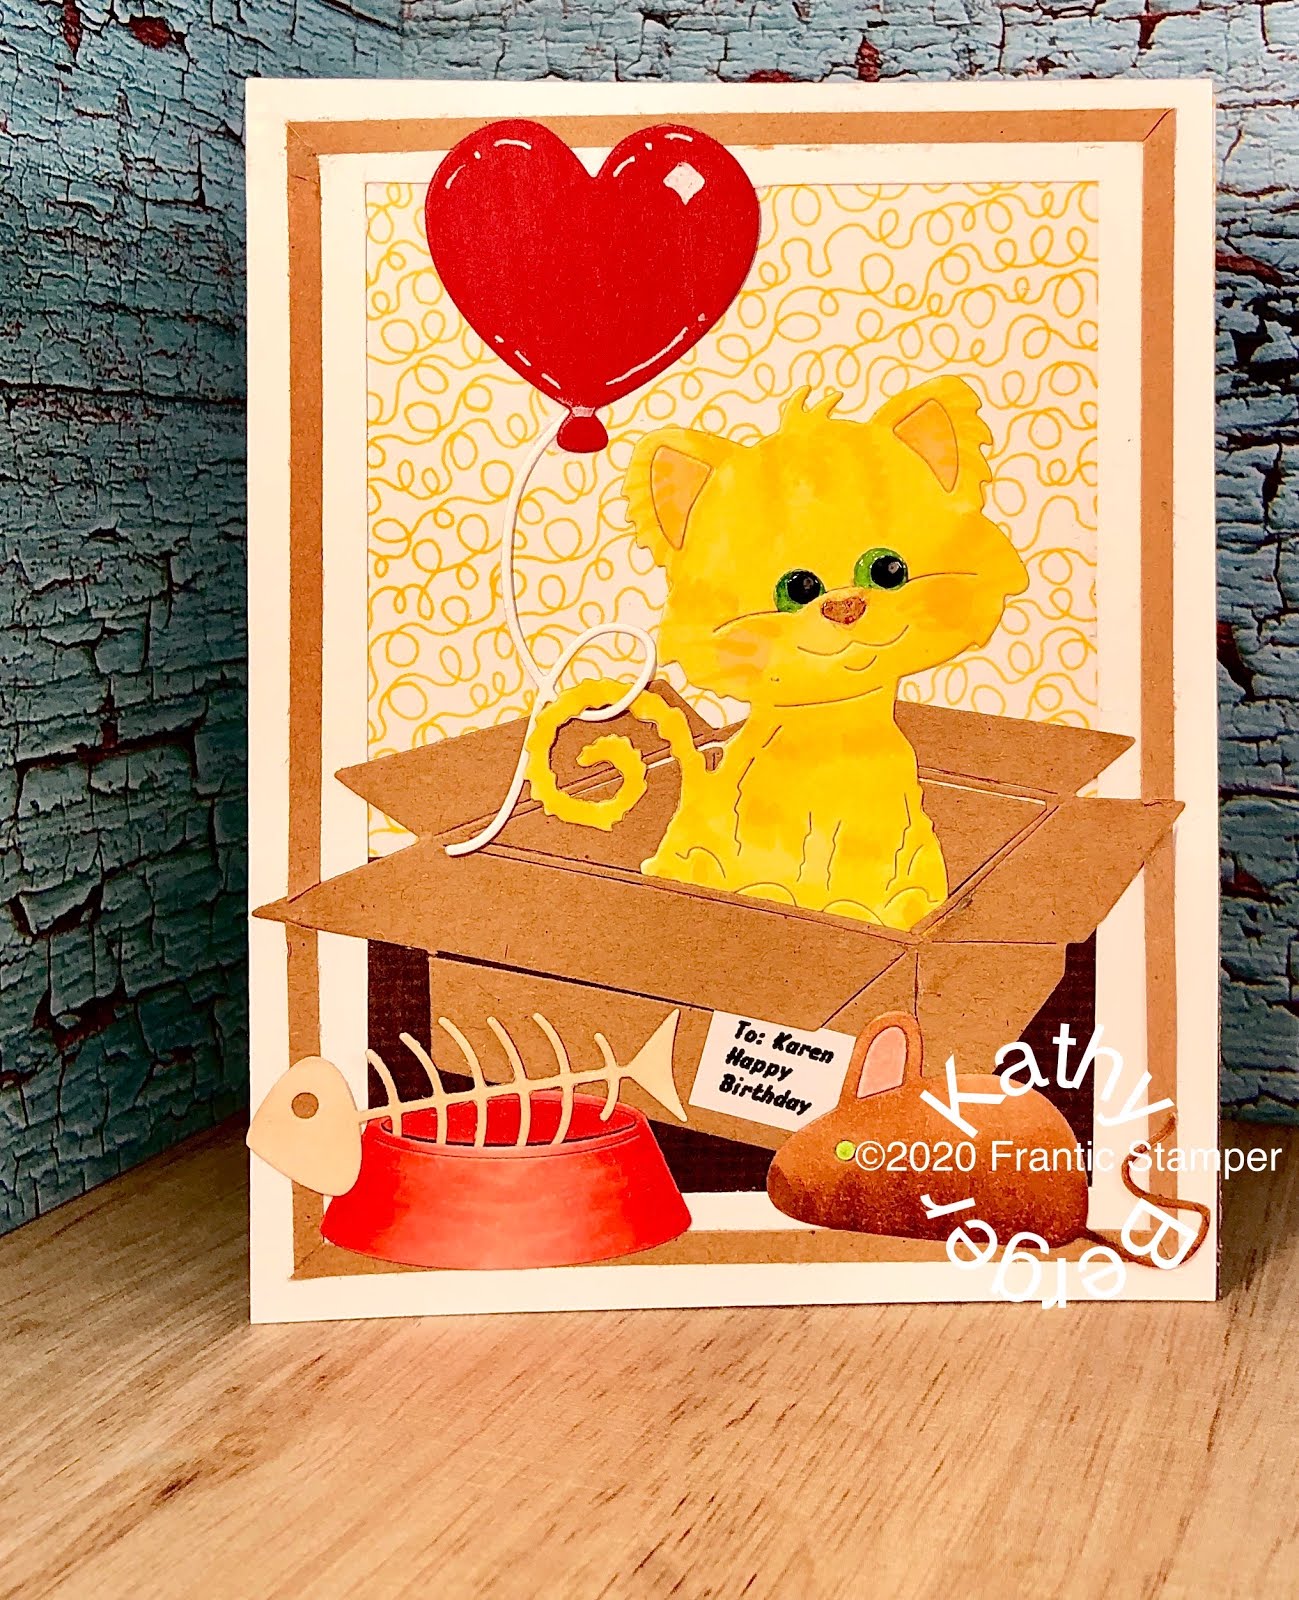
Making this kitty card was really fun. First, I diecut the kitty and My Cat's Stuff from white cardstock and colored them with Copic markers. I set them aside. I diecut the box out of kraft cardstock and set it aside as well.

I made the backdrop for the card by cutting a piece of yellow patterned cardstock and a piece of dark brown cardstock to form a wall and floor, and glued them to the card. I then cut 1/4" strips of card stock and used them to create a frame around the card. I mitered the corners as I adhered them to the card. I put the cat inside the box, adhered them together, and then glued them to the card. I added the cat's bowl, fishbones, and toy to the bottom of the card.

I created the tiny gift label for the box with my Brother P-touch label maker and then adhered it in place. I die cut the heart balloon and string and added them to the card. Notice I let the kitty's tail hold the balloon by passing it through the loop in the balloon string. My final touch was to put a bit of glossy accents on the cat's eyes.

I sent this card to a really dear friend who has Alzheimer's. She likes cute things, and cats are her favorite animal. I hope she enjoyed it!


*** Materials for this project available at www.franticstamper.com.
 
FRA-Die-10794
 
FRA-Die-10796
 
FRA-Die-09322

Tuesday, March 03, 2020

Suspended Pups


Suspended Pups
by Kathy Berger


I love the front and back cats and dogs from the March 2020 release! These dies were designed for the matching animals to be pasted together to make a single piece that can be viewed from the front or back. One of the most fun ways I could think of to use these animals was in a suspension card.

First I cut the front and back dog dies from white card stock and colored each piece with Copic markers. I then cut 3 6" pieces of thin nylon cord and sandwiched one between each oair of dogs, glued together with a strong liquid glue.


I used the Tri-panel Card Base die from the January 2020 release to cut holes in my card front, and in a separate panel. I glued those together, adhering the nylon cord between them so the dogs were suspended in the windows. I stamped "WOOF" onto a scrap of white cardstock and added it to a scrap of polka dotted paper, and affixed it to the upper center of the card front.

On the inside of the card I die cut the Stitched Paw Prints panel. I colored the areas outside of the paw prints light blue to form the sky. I then added some grassy hills that I die cut with the Stitched Grassy Hills Edgers from some green polka dot paper, coloring in random dots to make flowers. Lastly, I adhered a 4 1/4" x 5 1/2" piece of white card stock to the back of the card to give the card a more finished look.


Isn't this card fun? I can't wait to make more like it!


*** Materials for this project available at www.franticstamper.com.
 
FRA-Die-09000
 
FRA-Die-09
 
FRA-Die-09
 
FRA-Die-09
 
FRA-Die-09

Monday, March 02, 2020

February Card Selection

My how the year is flying by! It is already March even though we had a little extra February. I hope you made the most of Leap Day!

The design team would like to share some of their cards using the February Frantic Stamper release. Yoi can see these and many more posted on the Frantic Stamper Facebook group and on team members blogs; links to the team members blogs can be found in the list of team members to the right of this oost.


Watch this space for more cards and a whole lot more! -Kathy